Getting Started
This Getting Started Guide helps new users to install, start and work with INCEpTION. It gives a quick overview (estimated time for reading only: approx. 20-30 minutes) on the key functionalities in order to get familiar with the tool. It excludes special cases and details due to simplicity and focuses on the first steps. See our documentation for further reading on any topic. You are already in the User Guide document. The main documentation of this User Guide starts right after the Getting Started section: Core Functionalities.
For quick overviews, also see our tutorial videos e.g. covering an Introduction, an Overview, Recommender Basics and Entity Linking. Getting Started will refer to them wherever it might be helpful.
| Boxes: In Getting Started, these boxes provide additional information. They may be skipped for fast reading if background knowledge exists. Also, they may be consulted later on for a quick look-up on basic concepts. |
After the Introduction, Getting Started leads you to using INCEpTION in three steps:
-
We will see how to install it in Installing and starting INCEpTION.
-
In Project Settings and Structure of an Annotation Project, for a basic orientation and understanding the structure of a project will be explained.
-
You will be guided to make your first annotations in First Annotations with INCEpTION.
Introduction
What can INCEpTION be used for?
For a first impression on what INCEpTION is, you may want to watch our introduction video.
INCEpTION is a text-annotation environment useful for various kinds of annotation tasks on written text. Annotations are usually used for linguistic and/or machine learning concerns. INCEpTION is a web application in which several users can work on the same annotation project and it can contain several annotation projects at a time. It provides a recommender system to help you create annotations faster and easier. Beyond annotating, you can also create a corpus by searching an external document repository and adding documents. Moreover, you can use knowledge bases, e.g. for tasks like entity linking.
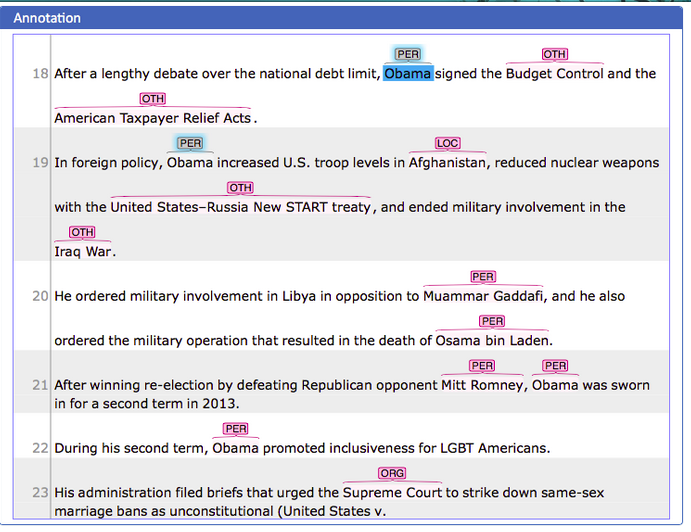
The following picture gives you a first impression on how annotated texts look like. In this example, text spans have been annotated as whether they refer to a person (PER), location (LOC), organization (ORG) or any other (OTH).
INCEpTION’s key features are: First, before you annotate, you need a corpus to be annotated (Corpus Creation).
You might have one already and import it or create it in INCEpTION.
Second, you might want to annotate the corpus (Annotation) and/or merge the annotations which different annotators made (Curation).
Third, you might want to integrate external knowledge used for annotating (Knowledge Bases).
You can do all three steps with
INCEpTION or only one or two.
In addition, INCEpTION is extendable and adaptable to individual requirements.
Often, it provides predefined elements, like knowledge bases, layers and tagsets to give you a starting point but you can also modify them or create your own from scratch.
You may for example integrate a knowledge base of your choice; create and modify custom knowledge bases; create and modify custom layers and tagsets to annotate your individual task; build custom so-called recommenders which automatically suggest annotations to you so you will work quicker and easier; and much more.
Getting Started focuses on annotating. For details on any other topic like Corpus Creation or the like, see the main documentation part of this User Guide: Core Functionalities.
Do you have questions or feedback?
INCEpTION is still in development, so you are welcome to give us feedback and tell us your wishes and requirements.
-
For many questions, you find answers in the main documentation: Core Functionalities.
-
Consider our Google group inception users and mailing list: inception-users@googlegroups.com
-
You can also open an issue on Github.
See our documentation for further reading
Our main documentation consists of three distinct documents:
-
User Guide: If you only use INCEpTION and do not develop it, the User Guide beginning right after Getting Started is the one of your choice. If it does not answer your questions, don’t hesitate to contact us (see Do you have questions or feedback?).
| User Guide-Shortcuts: Whenever you find a blue question mark sign in the INCEpTION application, you may click on it to be linked to the respective section of the User Guide. |
-
Admin Guide: For information on how to set up INCEpTION for a group of users on a server and more installation details, see the Admin Guide.
-
Developer Guide: INCEpTION is open source. So if you would like to develop for it, the Developer Guide might be interesting for you.
All materials, including this guide, are available via the INCEpTION homepage.
Installing and starting INCEpTION
| Hey system operators and admins! If you install INCEpTION not for yourself, but rather install it for somebody else or for a group of users on a server, if want to perform a Docker-based deployment or need information on similarly advanced topics (logging, monitoring, backup, etc.) , please skip this section and go directly to the Admin Guide. |
Installing Java
In order to run INCEpTION, you need to have Java installed in version 11 or higher. If you do not have Java installed yet, please install the latest Java version e.g. from AdoptOpenJDK.
Download and start INCEpTION
In this section, we will download, open and log in to INCEpTION. After, we will download and import an Example Project:
Step 1 - Download: Download the .jar-file from our website by clicking on INCEpTION x.xx.x (executable JAR) (instead of “x.xx.x”, there will be the number of the last release). Wait a minute until it has been fully downloaded. That is, until the name of the downloaded folder ends on “.jar“, not on “.jar.part“ anymore.
| Working with the latest version: We recommend to always work with the latest version since we constantly add new features, improve usability and fix bugs. After downloading the latest version, your previous work will not be lost: within a new version you will generally find all your projects, documents, users etc. like before without doing anything. However, please consult the release notes on this beforehand. To be notified when a new version has been released, please check the website, subscribe to Github notifications or the Google group (see Do you have questions or feedback?). |
Step 2 - Open: There are two ways to open the application: Either by double-clicking on it or via the terminal.
Step 2a - Open via double-click: Now, simply double-click on the downloaded .jar-file. After a moment, a splash screen will display. It shows that the application is loading.

| In case INCEpTION does not start: If double-clicking the JAR file does not start INCEpTION, you might need to make the file executable first. Right-click on the JAR file and navigate through the settings and permissions. There, you can mark it as executable. |
Once the initialization is complete, a dialog appears. Here, you can open the application in your default browser or shut it down again:

Step 2b - Open via terminal: If you prefer the command line, you may enter this command instead of double-clicking. Make sure that instead of “x.xx.x”, you enter the version you downloaded:
$ java -jar inception-app-standalone-x.xx.x.jarIn this case, no splash screen will appear. Just go to http://localhost:8080 in your browser.
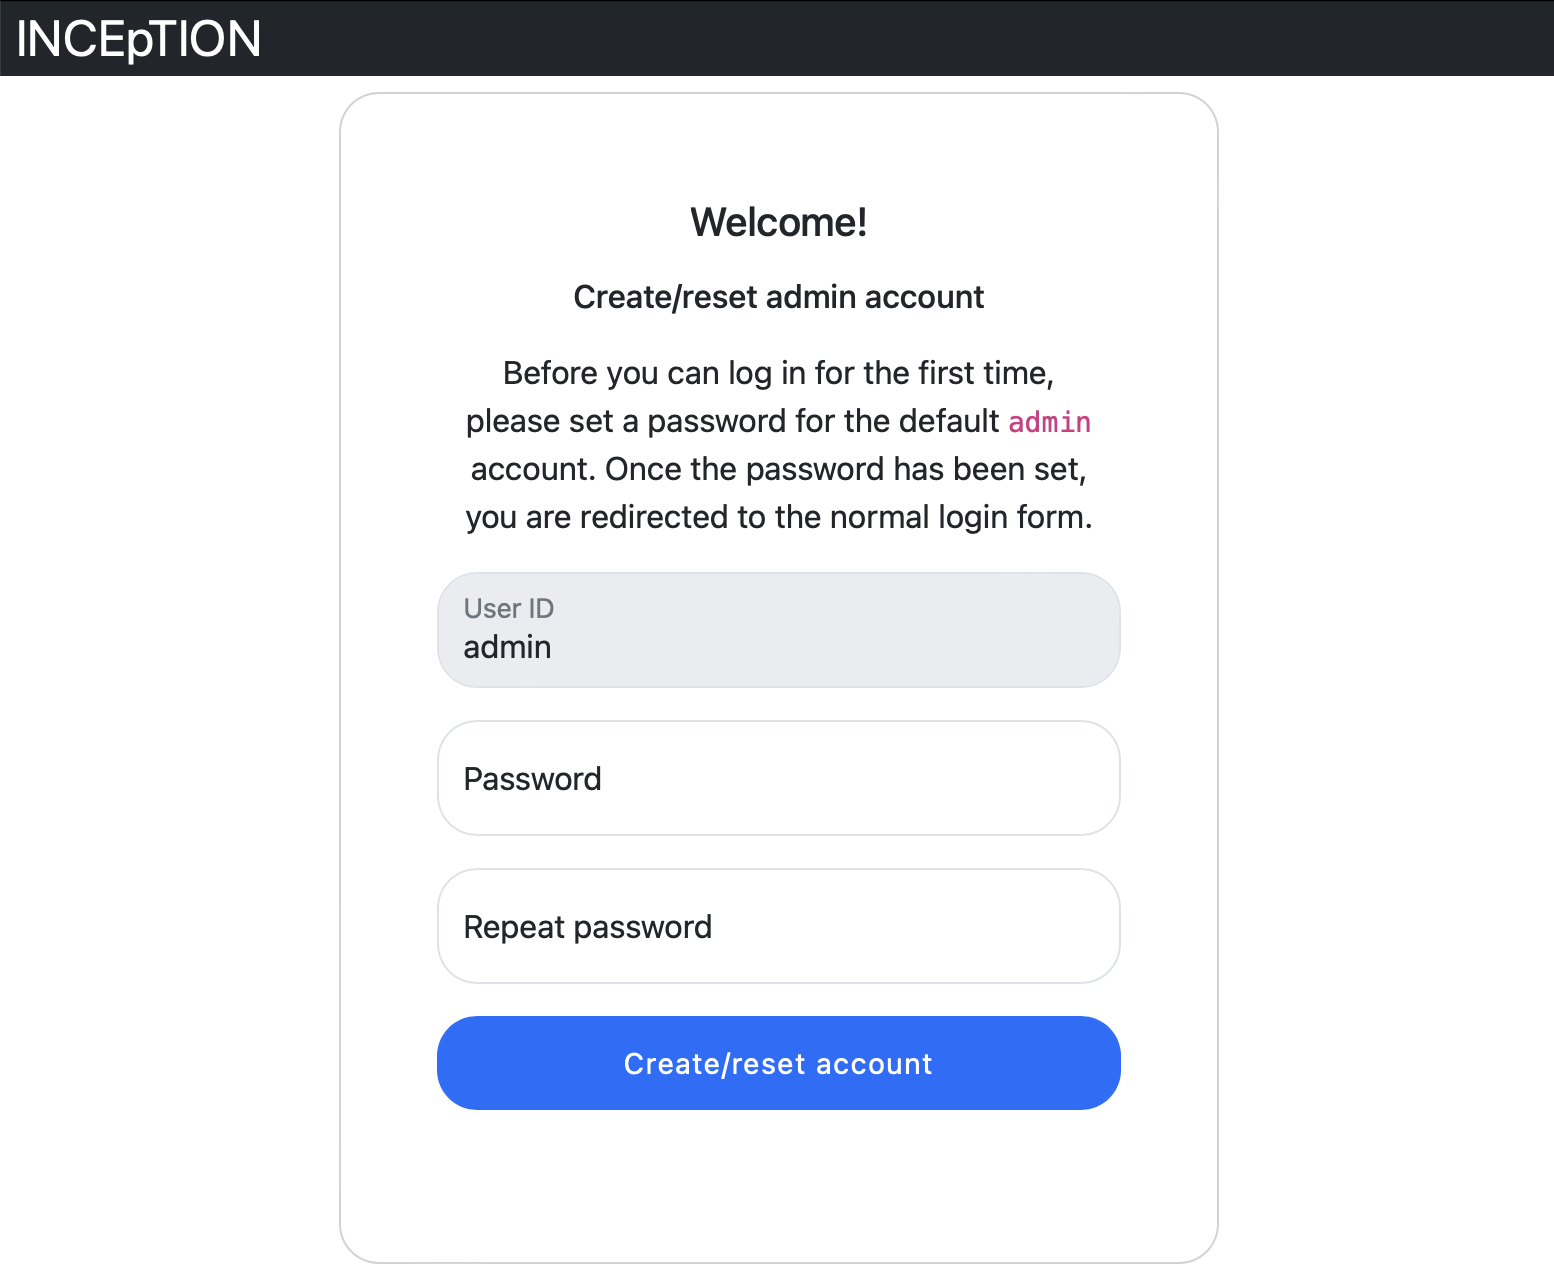
Step 3 - Log in: The first time you start the application, you will be asked to set a password for the default admin user. You need to enter this password into two separate fields. Only if the same password has been entered into both fields, it will be accepted and saved. After the password has been set, you will be redirected to the regular login screen where you can log in using the username admin and the password you have just set.
You have finished the installation.
| INCEpTION is designed for the browsers Chrome, Safari and Firefox. It does work in other browsers as well but for these three, we can support you best. For more installation details, see the Admin Guide. |
Download and import an Example Project
In order to understand what you read in this guide, it makes sense to have an annotation project to look at and click through. We created several example projects for you to play with. You find them in the section Example Projects on our website.

Step 1 - Download: For this guide, we use the Interactive Concept Linking project. Please download it from the Example Projects section on our website and save it without extracting it first. It consists of two documents about pets. The first one contains some annotations as an example, the second one is meant to be your playground. It has originally been created for concept linking annotation but in every project, you can create any kind of annotations. We will use it for Named Entity Recognition.
|
Named Entity Recognition: This is a certain kind of annotation.
In Getting Started, we use it to tell whether the annotated text part refers to a person (in INCEpTION, the built-in tag for person is PER), organization (ORG), location (LOC) or any other (OTH). The respective layer to annotate person/organization/location/other is the Named Entity layer. If you are not sure what layers are, check the box on Layers and Features in the section Project Settings. Also see Concept Linking in the User Guide. |
-
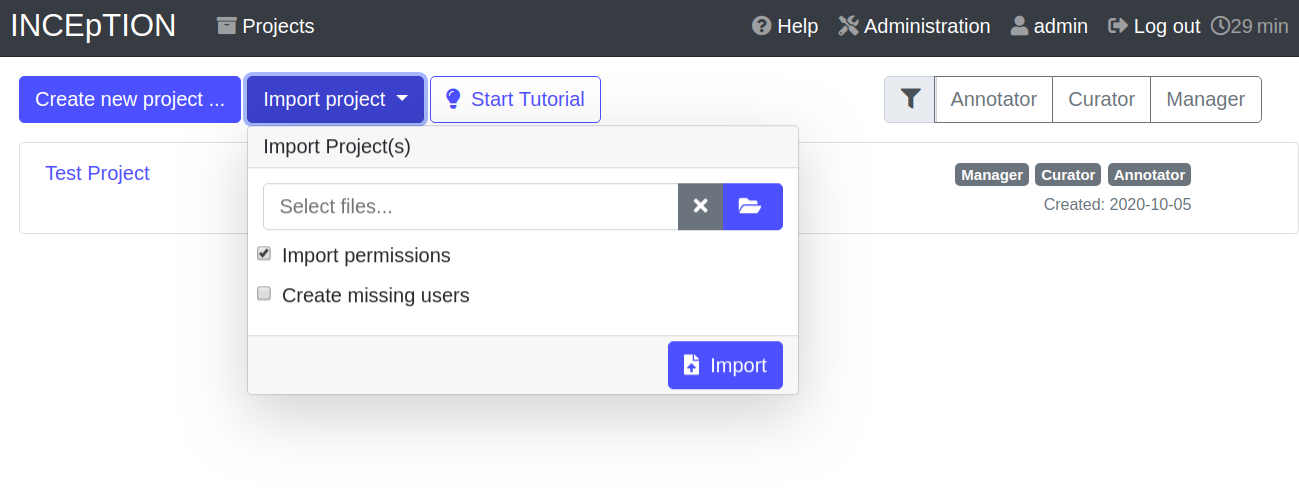
Step 2 - Import: After logging in to INCEpTION, click on the Import project button on the top left (next to Create new project) and browse for the example project you have downloaded in Step 1. Finally, click Import. The project has now been added and you can use it to follow the explanations of the next section.
Project Settings
In this section we will see what elements each project has and where you can adjust these elements by examining the Project Settings. Note that you may have different projects in INCEpTION at the same time.
If you prefer to make some annotations first, you may go on with First Annotations with INCEpTION and return later.
Each project consists at least of the following elements. There are more optional elements such as tagsets, document repositories etc. but to get started, we will focus on the most important ones:
-
one or (usually) more Documents to annotate
-
one or (usually) more Users to work on the project
-
one or (usually) more Layers to annotate with
-
Optional: one or more Knowledge Base/s
-
Optional: Recommenders to automatically suggest annotations
-
Optional: Guidelines for you and your team
For a quick overview on the settings, you might want to watch our tutorial video Overview. As for all topics of Getting Started, you will find more details on each of them in the main documentation on INCEpTION’s Core Functionalities.
The Settings provide a tab for each of these elements. There are more tabs but we focus on the most important ones to get started. You reach the settings after logging in when you click on the name of a project and then on Settings on the left. If you have not imported the example project yet, we propose to follow the instruction in Download and import an Example Project first.

Documents
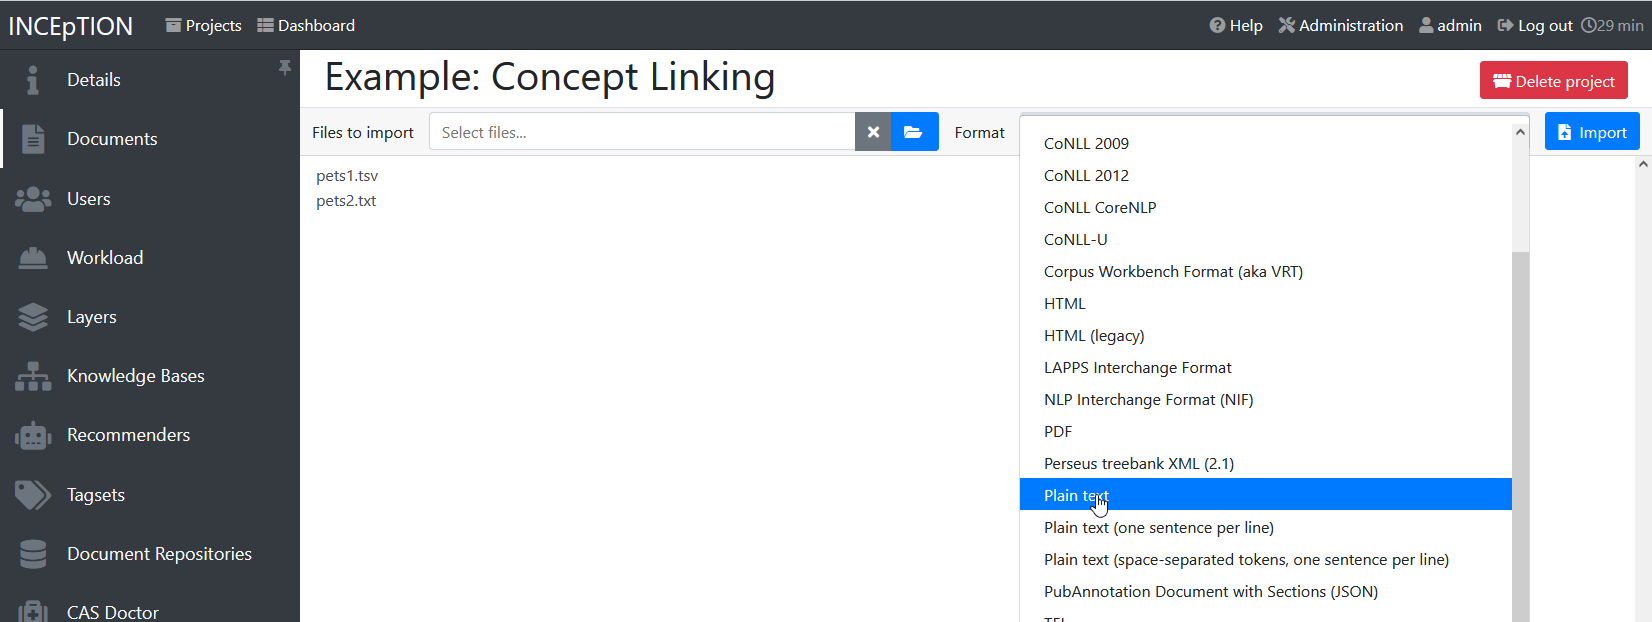
Here, you may upload your files to be annotated. Make sure that the format selected in the dropdown on the right is the same as the one of the file to be uploaded.
| Formats: For details on the different formats INCEpTION provides for importing and exporting single documents as well as whole projects, you may check the main documentation, Appendix A: Formats. |
|
INCEpTION Instance vs.
Project: In some cases, we have to distinguish between the INCEpTION instance we are working in and the project(s) it contains. For example, a user may be added to the INCEpTION instance but not to a certain project. Or she may have different rights in several projects. |
Users
Here, you may add users to your project and change their rights within that project. You can only add users to a project from the dropdown at the left if they exist already in the INCEpTION instance.
-
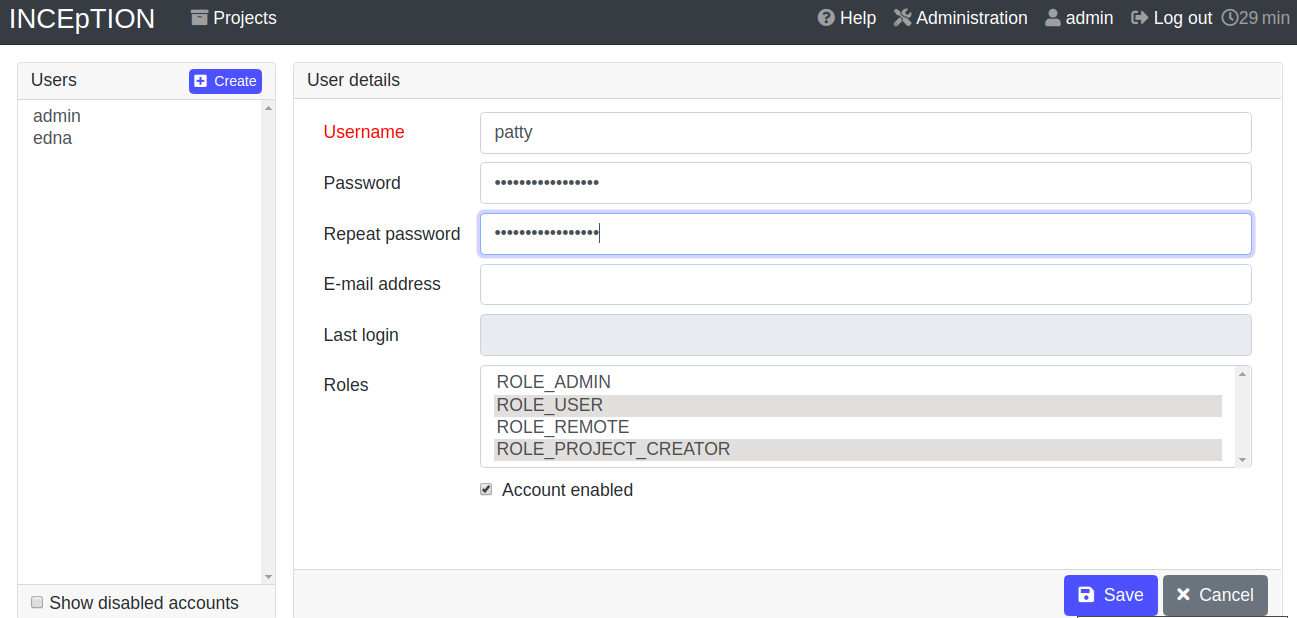
Add new users: In order to find users for a project in the dropdown, you need to add them to your INCEpTION instance first. Click on the administration button in the very top right corner and select section Users on the left. For user roles (for an instance of INCEpTION) see the User Management in the main documentation.
-
Giving rights to users: After selecting a user from the dropdown in the project settings section Users, you can check and uncheck the user’s rights on the right side. User rights count for that project only and are different from user roles which count for the whole INCEpTION instance. Any combination of rights is possible and the user will always have the sum of all rights given.

User Right Description Access to Dashboard Sections Annotator
- annotate only
- Annotation
- Knowledge BaseCurator
- curate only
- Curation
- Workload
- Agreement
- EvaluationManager
- annotate
- curate
- create projects
- add new documents
- add guidelines
- manage users
- open annotated documents of other users (read only)- All pages
Layers
In this section, you may create custom layers and modify them later. Built-in layers should not be changed. In case you do not want to work on built-in layers only but wish to create custom layers designed for your individual task, we recommend reading the documentation for details on Layers.

|
Layers and Features: There are different “aspects” or “categories” you might want to annotate.
For example, you might want to annotate all the places and persons in a text and link them to a knowledge base entry (see the box about Knowledge Bases) to tell which concrete place or person they are.
This type of annotation is called Named Entity.
In another case, you might want to annotate which words are verbs, nouns, adjectives, prepositions and so on (called Parts of Speech).
What we called “aspects”, “categories” or “ways to annotate” here, is referred to as layers in INCEpTION as in many other annotation tools, too. INCEpTION supports span layers in order to annotate a span from one character (“letter”) in the text to another, relation layers in order to annotate the relation between two span annotations and chain layers which are normally used to annotate coreferences, that is, to show that different words or phrases refer to the same person or object (but not which one). A span layer annotation always anchors on one span only. A relation layer annotation always anchors on the two span annotations of the relation. Chains anchor on all spans which are part of the chain. For span layers, the default granularity is to annotate one or more tokens (“words”) but you can adjust to character level or sentence level in the layer details (see Layers in the main documentation; especially Properties). Each layer provides appropriate fields, so-called features, to enter a label for the annotation of the selected text part. For example, on the Named Entity layer in INCEpTION, you find two feature-fields: value and identifier. In value, you can enter what kind of entity it is (“LOC” for a location, “PER” for a person, “ORG” for an organization and “OTH” for other). In identifier you can enter which concrete entity (which must be in the knowledge base) it is. For the example “Paris”, this may be the French capital; the person Paris Hilton; a company named “Paris” or something else. INCEpTION provides built-in layers with built-in features to give you a starting point. Built-in layers cannot be deleted as custom layers can. However, new features can be added. See the main documentation for details on Layers, features, the different types of layers and features, how to create custom layers and how to adjust them for your individual task. |
Tagsets
Behind this tab, you can modify and create the tagsets for your layers. Tagsets are always bound to a layer, or more precisely to a certain feature of a layer.
| Tagsets: In order for all annotations to have consistent labels, it is preferable to use defined tags which can be given to the annotations. If users do not enter free text for a label but stick to predefined tags, they avoid different names for the same thing and varying spelling. A set of such defined tags is called a tagset i.e. a collection of labels which can be used for annotation. INCEpTION comes with predefined tagsets out of the box and they serve as a suggestion and starting point only. You can modify them or create your own ones. |
|
Feature Types: The tags of your tagset must always fit the type of the feature for which it will be used.
The feature type defines what type of information the feature can be, for example “Primitive: Integer” for whole numbers, “Primitive: Float” for decimals; “Primitive: Boolean” for a true/false label only; the most common one “Primitive: String” for text labels or “KB: Concept/Instance/Property” if the feature shall link to a knowledge base.
There are more types for features but these are the most important ones for you to know. Changing the type does only work for custom features, not for built-in features. In order to do so, scroll in the Feature Details panel (in the Layers tab) until you see the field Type and select the type of your choice. If a tagset shall be linked to a feature, they must have the same type. For more details, see the Features in the main documentation. |
-
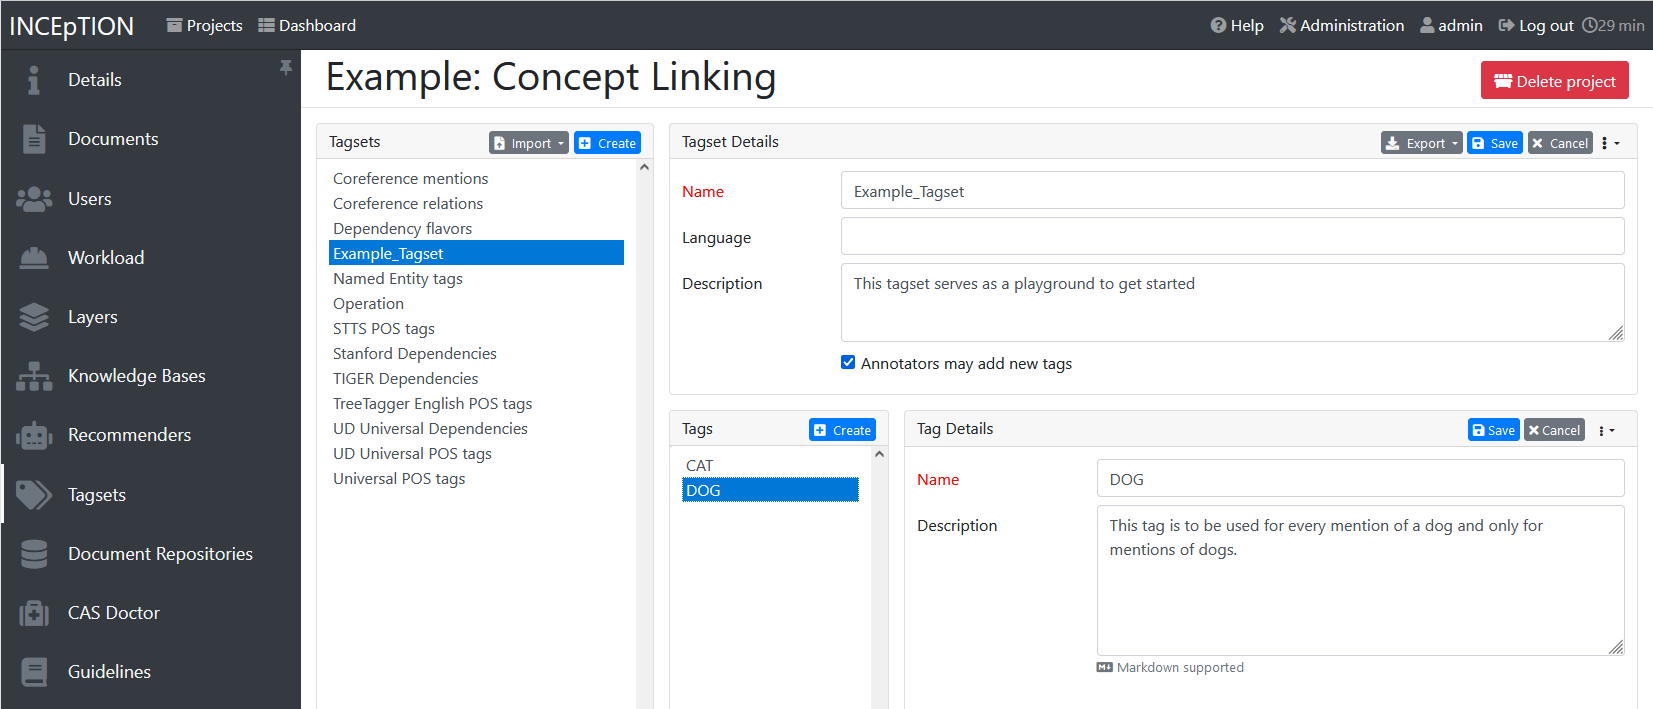
In order to create a new tagset, click on the blue create button on top. Enter a name for it and - not technically necessary but highly recommended to avoid misunderstandings - a speaking description for the tagset. As an example, let’s choose “Example_Tagset” for the name and “This tagset serves as a playground to get started.” for the description. Check or uncheck Annotators may add new tags as you prefer. Now, click on the blue save-button.
-
In order to fill your tagset with tags, first choose the set from the list on the left. Then, click on the blue create-button in the Tags panel at the bottom. A new panel called Tag Details opens right beside it. Enter a name and description for a tag. Let’s have “CAT” for the name and “This tag is to be used for every mention of a cat and only for mentions of cats.” for the description. Click the save-button and the tag has now been added to your set. As another example, create a new tag for the name “DOG” and description “This tag is to be used for every mention of a dog and only for mentions of dogs.”.
-
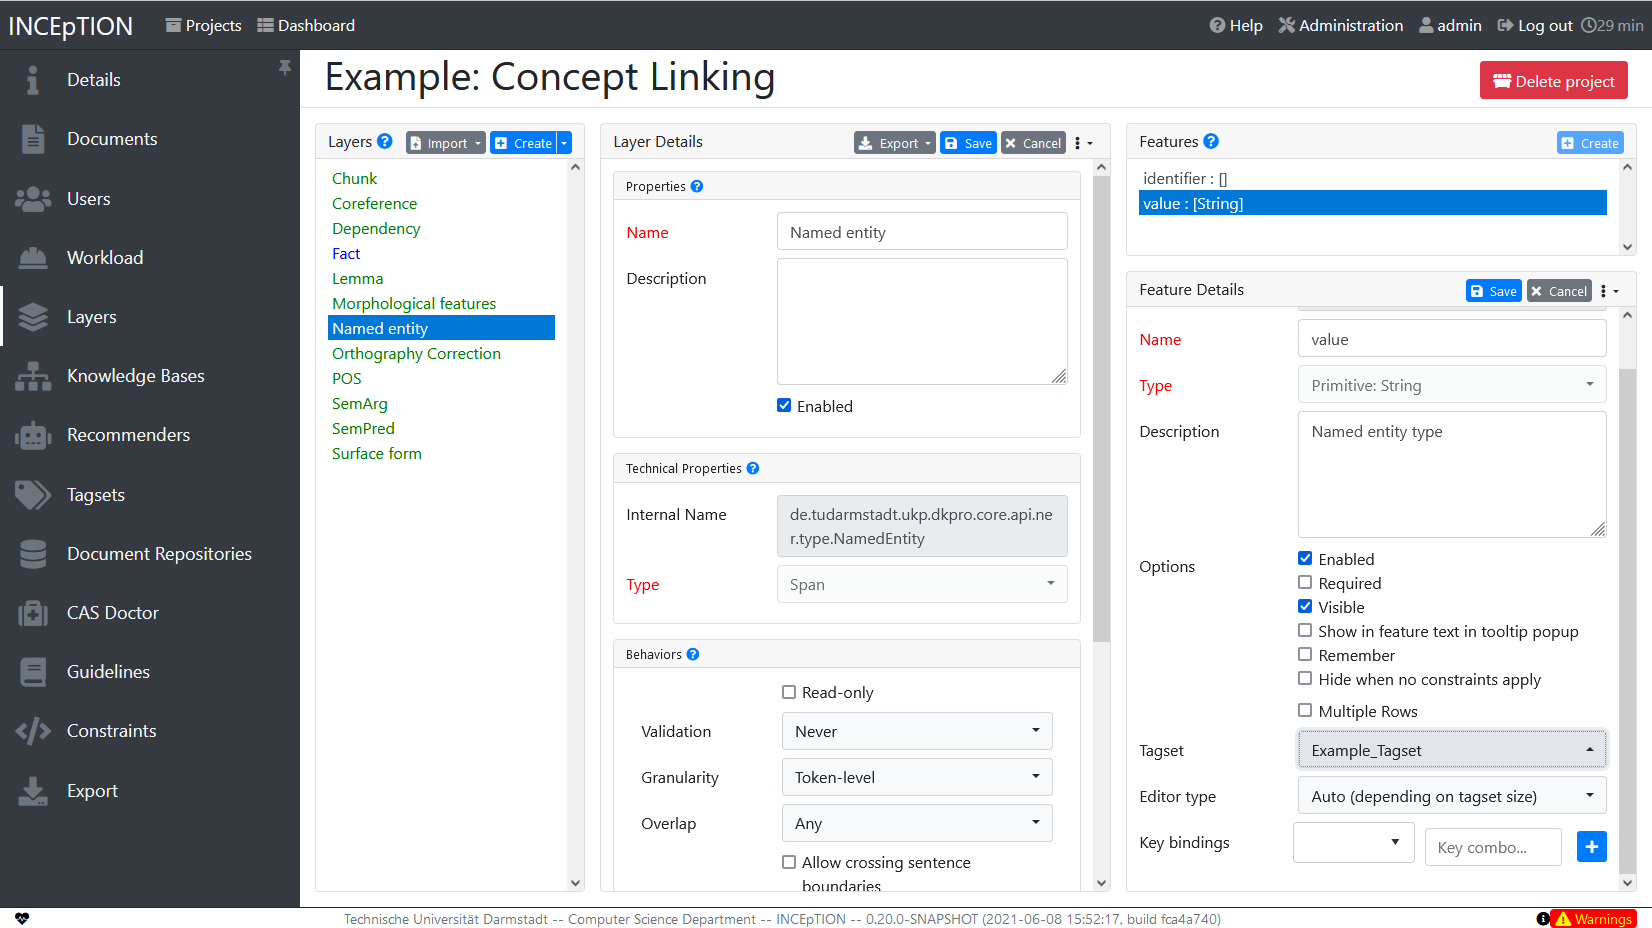
In order to use the tagset, it is necessary to link it to a layer and feature. Herefore, click on the Layers tab and select the layer from the list at the left. As an example, let’s select the layer Named entity. Two new panels open now: Layer Details and Features. We focus on the second one. Choose the feature your tagset is made for. In this example, we choose the feature value. When you click on it, the panel Feature details opens. In this panel, scroll down to Tagset and choose your tagset (to stick with our example: Example_Tagset) from the dropdown and click Save. The tagset which was selected before is not linked to the layer any more but the new one is.
-
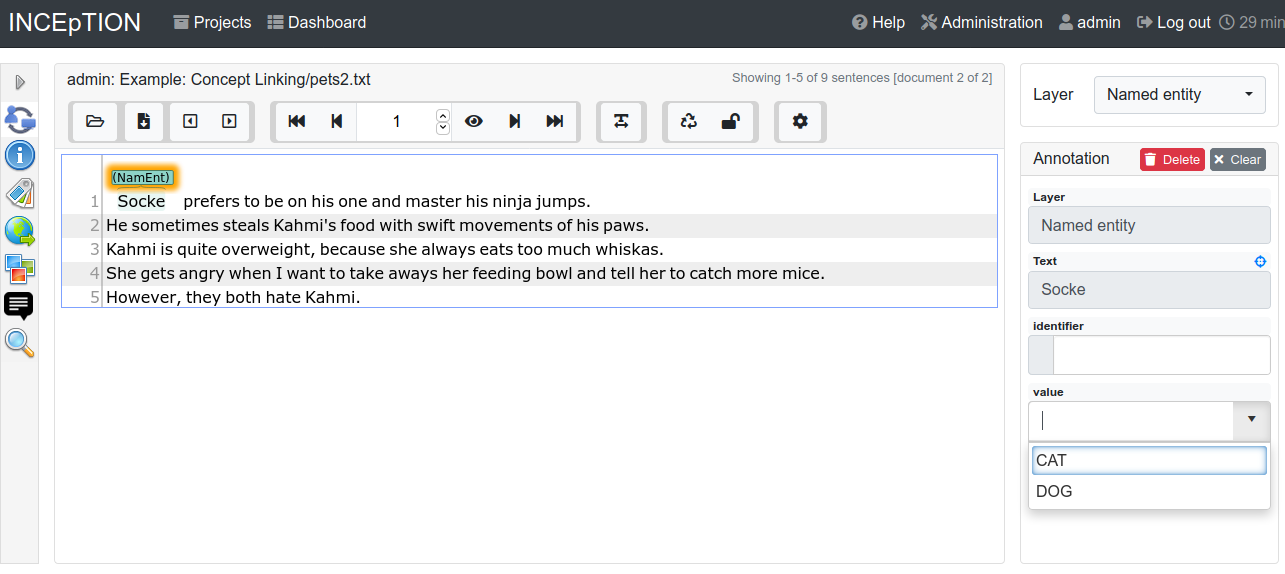
From now on, you can select your tags for annotating. Navigate to the annotation page (click INCEpTION on the top left → Annotation and choose the document pets2.txt). On the layer dropdown on the right, choose the layer Named entity. When you double-click on any part in the text, for example “Socke” in line one, and click on the dropdown value on the right, you find the tags “DOG” and “CAT” to choose from. (For details on how to annotate, see First Annotations with INCEpTION).
-
You might want to link Named Entity tags again to the Named entity Layer and value feature in order to use them like they were before our little experiment.
-
For more details on Tagsets, see the main documentation, Tagsets.
-
Note: Tagsets can be changed and deleted. But the annotations they have been used for will remain with the same tag though. Other than the built-in layers, built-in tagsets can also be deleted.
| Saving: Some steps, like annotations, are saved automatically in INCEpTION. Others need to be saved manually. Whenever there is a blue Save button, it is necessary to click it to save the work. |
Knowledge Bases
In this section, you can change the settings for the knowledge bases used in your project, you can import local and remote knowledge bases into your project and you can create a custom knowledge base. The latter will be empty at first. It will not be filled here in the settings but at the knowledge base page ( → Dashboard, → Knowledge base; also see the part Knowledge Base in Structure of an Annotation Project). In order to import or create a knowledge base, just click the Create button and INCEpTION will lead you.
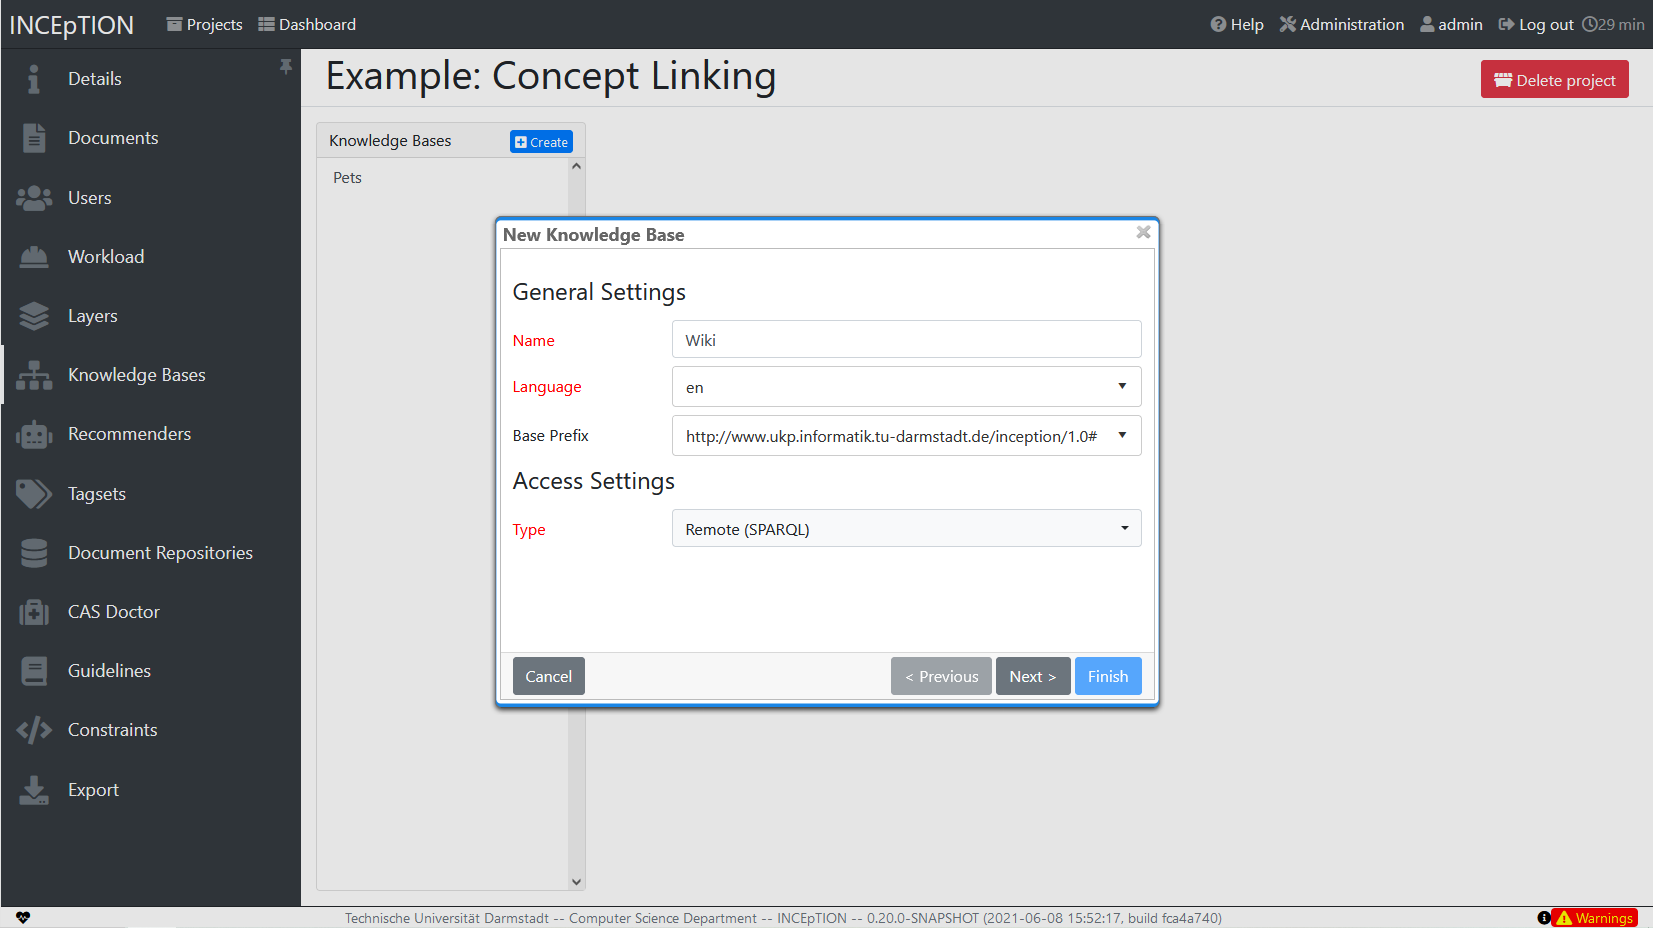
|
Knowledge Bases are data bases for knowledge.
Let’s assume, the mention “Paris” is to be annotated.
There are many different Parises - persons, the capital city of France and more - so the annotation is to tell clearly what entity with the name “Paris” is meant here.
Herefore, the knowledge base needs to have an entry of the correct entity.
In the annotation, we then want to make a reference to that very entry. There are knowledge bases on the web (“remote”) which can be used with INCEpTION like e.g. WikiData. You can also create your own, new knowledge bases and use them in INCEpTION. They will be saved on your device (“local”). |
-
Note that you can have several knowledge bases in your INCEpTION instance but you can choose for every project which one(s) to use. Using many little knowledge bases in one project will slow down the performance more than few big ones.
-
Via the Dashboard (click the Dashboard-button at the top centre), you get to the knowledge base page. This is a page different from the one in the project settings where you can modify and work on your knowledge bases.
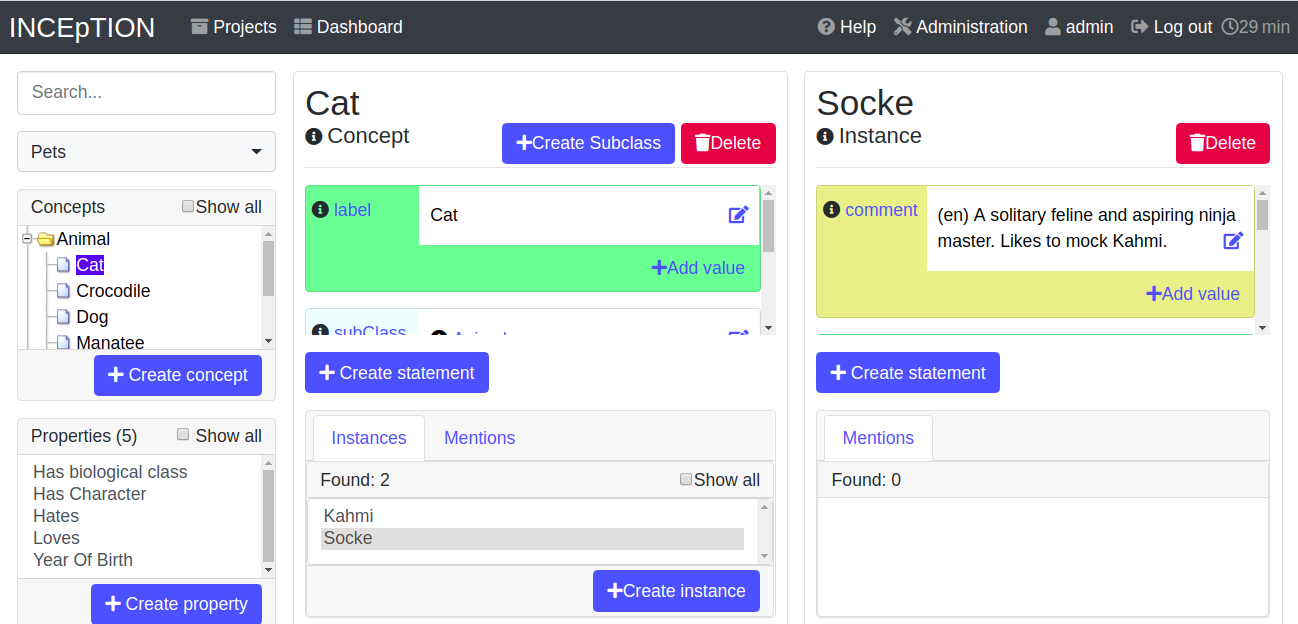
-
For details on knowledge bases, see our main documentation on Knowledge Bases, or our tutorial video “Overview“ mentioning knowledge bases.
-
If you like to explore a knowledge base check the example project we have downloaded and imported before. It contains a small knowledge base, too.
Recommenders
In this section, you can create and modify your recommenders. They learn from what the user annotates and give suggestions. For details on how to use recommenders, see our main documentation on Recommenders in the Annotation section. For details on how to create and adjust them, see Recommenders in the Projects section. Or check the tutorial video “Recommender Basics”.
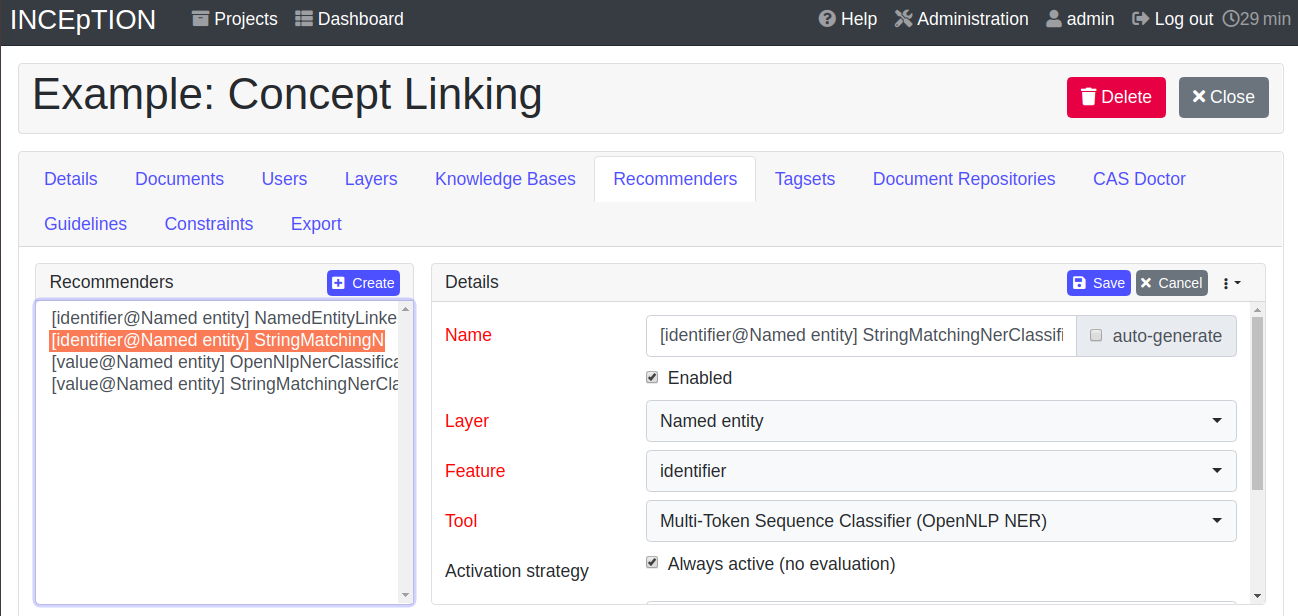
Guidelines
In this section, you may import files with annotation guidelines. There is no automatic correction or warning from INCEpTION if guidelines are violated but it is a short way for every user in the project to read and check the team guidelines while working. On the annotation page (→ Dashboard → Annotation → open any document), annotators can quickly look them up by clicking on the guidelines button on the top which looks like a book (this button only appears if at least one guideline was imported).
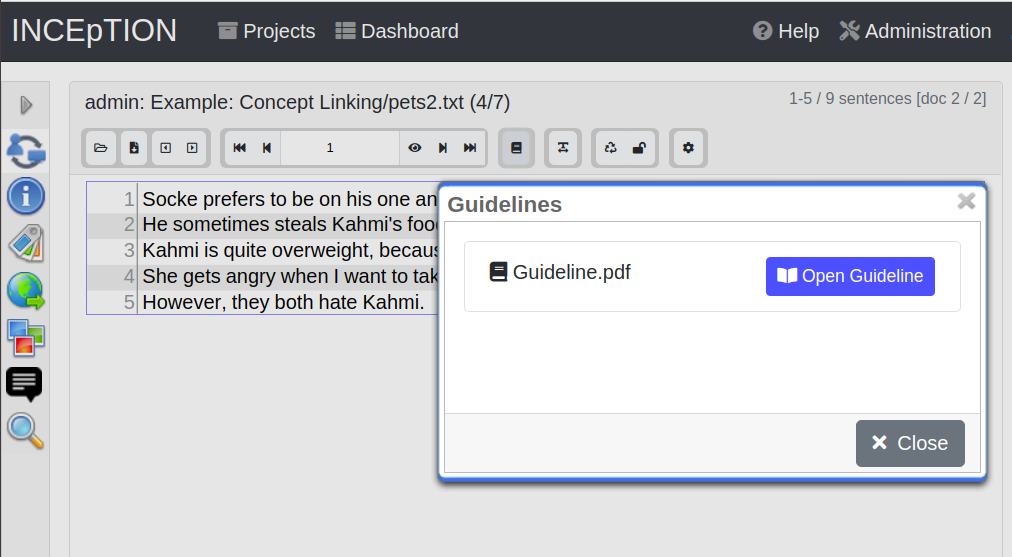
Export
In this section, you can export your project partially or wholly. Projects which have been exported can be imported again in INCEpTION the way we did with our example project in section Download and import an Example Project: at the start page with the Import button. We recommend exporting projects on a regular basis in order to have a backup. For the different formats, their strengths and weaknesses, check the main documentation, Appendix A: Formats. We recommend using WebAnno TSV x.x (where “x.x.” is the highest number available, e.g. 3.2) whenever possible. Since it has been created specially for this application, it will provide all features required. However, many other formats are provided.
Structure of an Annotation Project
Here, we will find out what you can do in each project having a look at the Structure of an Annotation Project. Therefore, we examine the dashboard.
If you are in a project already, click on the dashboard button on the top to get there. If you just logged in, choose a project by clicking on its name. As you are a Project Manager (see User Rights), you see all of the following sub pages. For details on each section, check the section on Core Functionalities.
Annotation
If you went to First Annotations with INCEpTION before, you have been here already. Here, the annotators can go to annotate the texts.
Curation
Everyone with curation rights (see User Rights) within a project can curate it. All other users do not have access to nor see this page. Only documents marked as finished by at least one annotator can be curated. For details on how to curate, see the main documentation → Curation or just try it out:
| Curation: If several annotators work on a project, their annotations usually do not match perfectly. During the process called "Curation", you decide which annotations to keep in the final result. |
-
Create some annotations in any document
-
Mark the document as finished: Just click on the lock on top.
-
Add another user, just for testing this (see Users in the section Project Settings).
-
Log out and log in again as the test user.
-
In the very same document, make some annotations which are the same and some which are different than before. Mark the document as finished.
-
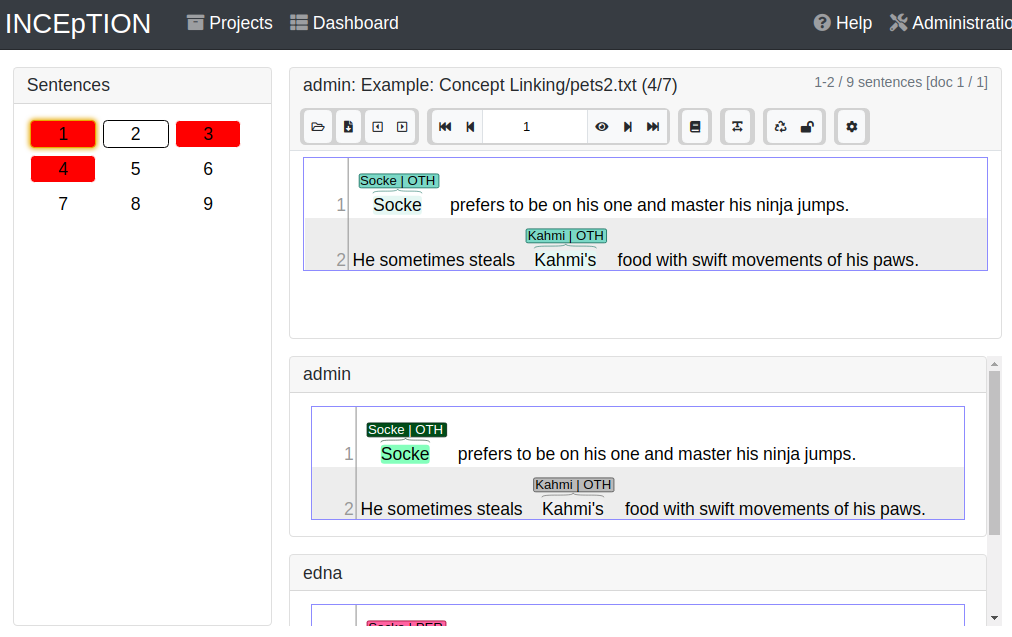
Log in as any user with curation rights (e.g. as the “admin” user we used before), enter the curation page and explore how to curate: You see the automatic merge on top (what both users agreed on has been accepted already) and the annotations of each of the users below. Differences are highlighted. You can accept an annotation by clicking on it.
-
As a curator, you can also create new annotations on this page. It works exactly like on the Annotation page. Note that users who have nothing but curation rights do not see nor have access to the annotation page (see User Rights).
Knowledge Base
Also see the section on knowledge bases in the project settings. On the Knowledge Base page, you can manage and create your knowledge base(s) for the project you are in. You can create new knowledge bases from scratch, modify them and integrate existing knowledge bases into your project which are either local (that is, they are saved on your device) or remote (that is, they are online). Note that this knowledge base page is distinct from the tab of the same name in the project settings (see Knowledge Base in section Project Settings).
Agreement
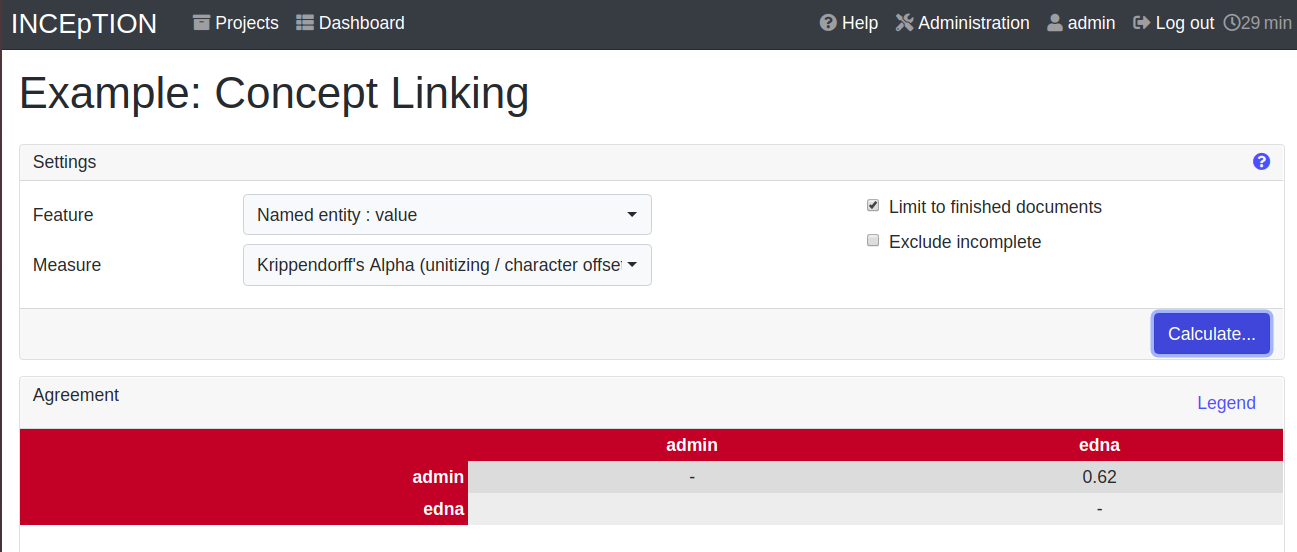
On this page, you can calculate the annotator agreement. Note: Only documents marked as finished by annotators (clicking on the little lock on the annotation page) are taken into account.
| Agreement: The annotations of different annotators usually do not match perfectly. This aspect of difference / similarity is called agreement. For agreement, some common measures are provided. |
Workload
Here you can check the overall progress of your project; see which user is working on or has finished which document; and toggle for each user the status of each document between Done / In Progress or between New / Locked. For details, see Workload Management in the main documentation.

Evaluation
The evaluation page shows a learning curve diagram of each recommender (see Recommender).
Settings
Here, you can organize, manage and adjust all the details of your project. We had a look at those you need to get started for your own projects in the section Project Settings already.
This was the overview on what you can do in each project and what elements each project has. Now you are ready to go for your own annotations.
First Annotations with INCEpTION
In this section, we will make our first annotations. If you have not downloaded and imported an example project yet, we recommend to return to Download and import an Example Project and do so first. In this section, no or little theory and background will be explained. In case you want to have some theory and background knowledge first, we recommend reading the section Structure of an Annotation Project.
Create your first annotations
This will lead you step by step. You also may want to watch our tutorial video „Overview“ on how to create annotations. We will create a Named Entity annotation which tells whether a mention is a person (PER), location (LOC), organization (ORG) or other (OTH):
| Creating your own Projects: In this guide, we will use our example project. If you would like to create your own project later on, click on create, enter a project name and click on save. Use the Projects link at the top of the screen to return to the project overview and select the project you just created to work with it. See Project Settings in order to add documents, users, guidelines and more to your project. |
Step 1 - Opening a Project: After logging in, what you see first is the Project overview. Here, you can see all the projects which you have access to. Right now, this will be only the example project. Choose the example project by clicking on its name and you will be on the Dashboard of this project.

|
Instructions to Example Projects: In case of the example project, on the dashboard you also find instructions how to use it.
This goes for all our example projects.
You may use it instead of or in addition to the next steps of this guide. In case of your own projects, you will find the description you have given it instead. |
Step 2 - Open the Annotation Page: In order to annotate, click on Annotation on the top left. You will be asked to open the document which you want to annotate. For this guide, choose pets1.tsv.
| Annotations in newly imported Projects: In the example project, you will see several annotations already. If you import projects or single documents (see Documents) without any annotations, there will be none. But in the example projects, we have added some annotations already as examples. If you export a project (see Export) and import it again (as we just did with the example project in Download and import an Example Project), there will be the same annotations as before. |
Step 3 - Create an Annotation: After opening the document, select Named entity from the Layer dropdown menu on the right side of the screen to create your first annotation. Then, use the mouse to select a word in the annotation area, e.g. in my home in line one. When you release the mouse button, the annotation will immediately be created and you can edit its details in the right sidebar (see next paragraph). These “details” are the features we mentioned before.
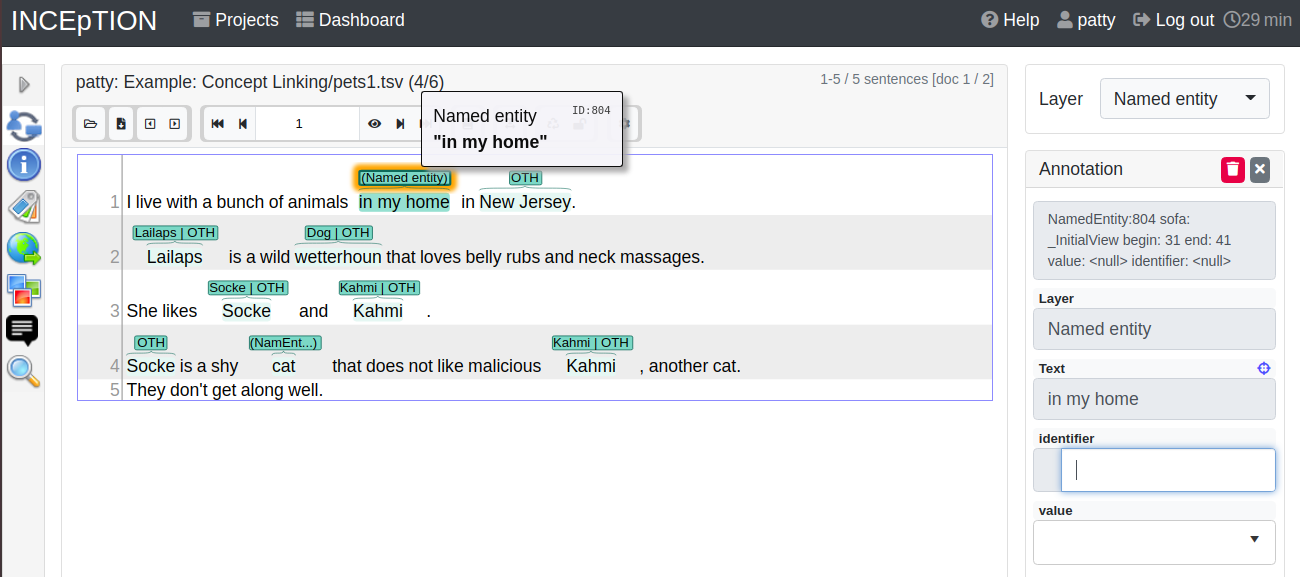
Note: All annotations will be saved automatically without clicking an extra save-button.
Congratulations, you have created your first annotation!
Now, let‘s examine the right panel to edit the details or to be precise: the features. You find the panel named Layer on top and Annotation below.
In the Layer-dropdown, you can choose the layer you want to annotate with as we just did. You always have to choose it before you make a new annotation. After an annotation has been created, its layer cannot be changed any more. In order to change it, you need to delete it, select the right layer and create a new annotation.
If you are not sure what layers are, check the box on Layers and Features in the section Project Settings. In order to learn how to adjust and create them for your purpose, see section Layers in the main documentation.
In the Annotation panel, you see the details of a selected annotation. They are called features.
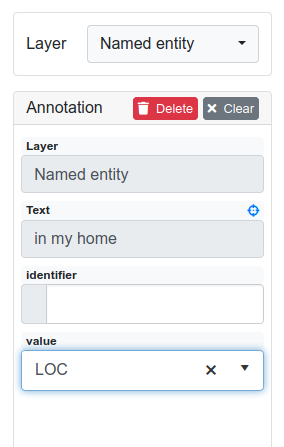
It shows the layer the annotation is made in (field Layer; here: Named entity) and what part of the text has been annotated (field Text; here in my home).
Below, you can see and modify what has been entered for each of the so-called Features.
If you are not sure what features are, check the box on Layers and Features in the section Project Settings (Here: The layer Named entity (see the note box on Named Entity) has the features identifier and value.
The identifier tells, to which entity in the knowledge base the annotated text refers to.
For example, in case the home referred to here is a location the knowledge base knows, you can choose it in the dropdown of this field.
The value tells if it is a Location (LOC) like here, a Person (PER), Organization (ORG) or any other (OTH).).
You may enter free text here or work with tagsets to have a well defined set of labels to enter so all of the users within one project will use the same labels.
You can modify and create tagsets in the project settings.
See section Tagsets in Getting Started or check the main documentation for Tagsets.
You have almost finished the Getting Started. One word can still be said about the Sidebars on the left. These offer access to various additional functionalities such as an annotation overview, search, recommenders, etc. Which functionalities are available to you is determined by the project settings. The sidebars can be opened by clicking on one of the sidebar icons and they can be closed by clicking on the arrow icon at the top.
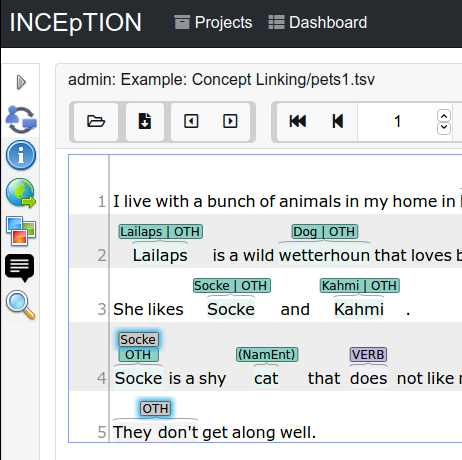
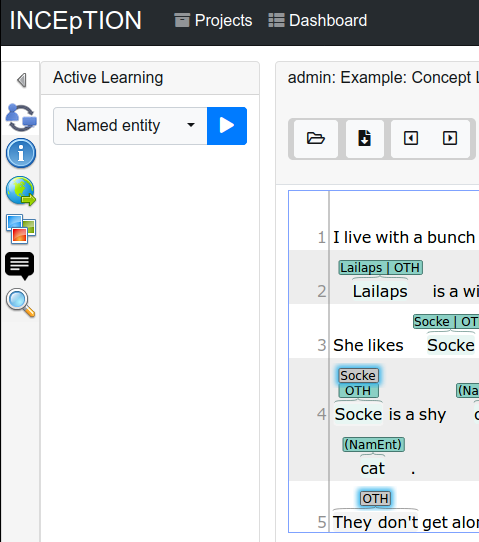
There are several features you might want to check the main documentation for. Especially the Recommender section of the sidebar (the black speech bubble) is worth a look in case you use recommenders (see Recommenders in the section Project Settings). Amongst others, you will find their measures and learning behaviours here. Also note the Search in the sidebar (the magnifier glass): You can create or delete annotations on all or some of the search results.
To get familiar with INCEpTION, you may want to follow the instructions for other example-projects, read more in-depth explanations on its Core Functionalities or explore INCEpTION yourself, learning by doing.
One way or the other: Have fun exploring!
Thank You
We hope the Getting Started helped you with your first steps in INCEpTION and gave you a general idea of how it works. For further reading and more details, we recommend the main documentation, starting right after this paragraph.
Do not hesitate to contact us if you struggle, have any questions or special requirements. We wish you success with your projects and you are welcome to let us know what you are working on.
Core functionalities
Workflow
The following image shows an exemplary workflow of an annotation project with INCEpTION.
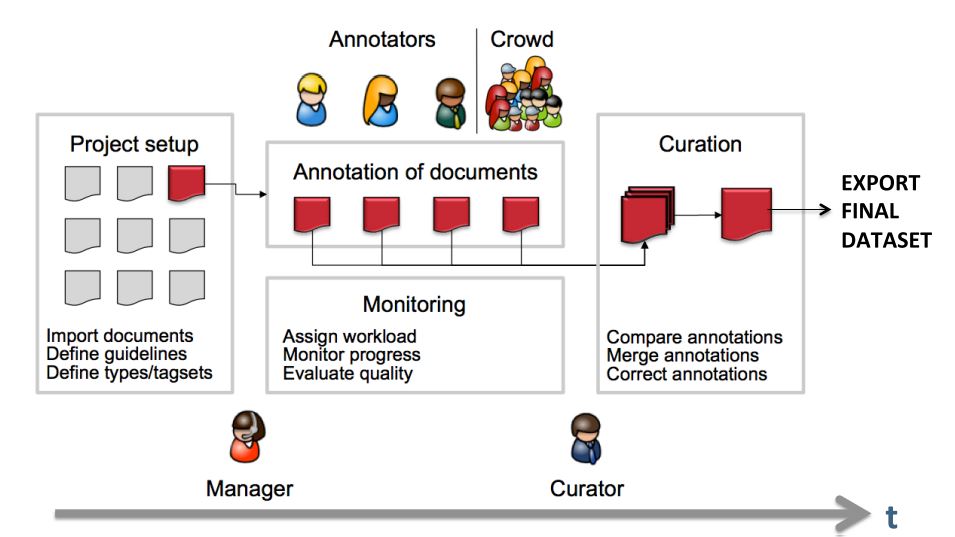
First, the projects need to be set up. In more detail, this means that users are to be added, guidelines need to be provided, documents have to be uploaded, tagsets need to be defined and uploaded, etc. The process of setting up and managing a project are explicitly described in Projects.
After the setup of a project, the users who were assigned with the task of annotation annotate the documents according to the guidelines. The task of annotation is further explained in Annotation. The work of the annotators is managed and controlled by monitoring. Here, the person in charge has to assign the workload. For example, in order to prevent redundant annotation, documents which are already annotated by several other annotators and need not be annotated by another person, can be blocked for others. The person in charge is also able to follow the progress of individual annotators. All these tasks are demonstrated in Workload Management in more detail. The person in charge should not only control the quantity, but also the quality of annotation by looking closer into the annotations of individual annotators. This can be done by logging in with the credentials of the annotators.
After at least two annotators have finished the annotation of the same document by clicking on Done, the curator can start his work. The curator compares the annotations and corrects them if needed. This task is further explained in Curation.
The document merged by the curator can be exported as soon as the curator clicked on Done for the document. The extraction of curated documents is also explained in Projects.
Logging in
Upon opening the application in the browser, the login screen opens. Please enter your credentials to proceed.
| When INCEpTION is started for the first time, a default user called admin with the password admin is automatically created. Be sure to change the password for this user after logging in (see User Management). |
Dashboard
The dashboard allows you to navigate the functionalities of INCEpTION.
Menu bar
At the top of the screen, there is always a menu bar visible which allows a quick navigation within the application. It offers the following items:
-
Projects - always takes you back to the Project overview.
-
Dashboard - is only visible if it is possible to take you to your last visited Project dashboard.
-
Help - opens the integrated help system in a new browser window.
-
Administration - takes you to the administrator dashboard which allows configuring projects or managing users. This item is only available to administrators.
-
Username - shows the name of the user currently logged in. If the administrator has allowed it, this is a link which allows accessing the current user’s profile, e.g. to change the password.
-
Log out - logs out of the application.
-
Timer - shows the remaining time until the current session times out. When this happens, the browser is automatically redirected to the login page.
Project overview
After logging in to INCEpTION, the first thing you see is the project overview. Here, you can see all the projects to which you have access. For every project, the roles you have are shown.
Using the filter toggle buttons, you can select which projects are listed depending on the role that you have in them. By default, all projects are visible.
Users with the role project creator can conveniently create new projects or import project archives on this page.
Users without a manager role can leave a project by clicking on the Leave Project button below the project name.
When uploading projects via this page, user roles for the project are not fully imported! If the importing user has the role project creator, then the manager role is added for the importing user. Otherwise, only the roles of the importing user are retained.
If the current instance has users with the same name as those who originally worked on the import project, the manager can add these users to the project and they can access their annotations. Otherwise, only the imported source documents are accessible.
Users with the role administrator who wish to import projects with all permissions and optionally create missing users have to do this through the Projects which can be access through the Administration link in the menu bar.
Project dashboard
Once you have selected a project from the Project overview, you are taken to this project’s dashboard. Depending on the roles that a user has in the project, different functionalities can be accessed from here such as annotation, curation and project configuration. On the right-hand side of the page, some of the last activities of the user in this project are shown. The user can click on an activity to resume it e.g. if the user annotated a specific document, the annotation page will be opened on this document.
Annotation
| This functionality is only available to annotators and managers. Annotators and managers only see projects in which they hold the respective roles. |
The annotation screen allows to view text documents and to annotate them.
In addition to the default annotation view, PDF documents can be viewed and annotated using the PDF-Editor. Please refer to PDF Annotation Editor for an explanation on navigating and annotating in the PDF-view.
Opening a Document for Annotation
When navigating to the Annotation page, a dialogue opens that allows you to select the document you want to annotate. If you want to access this dialog later, use the Open button in the action bar.
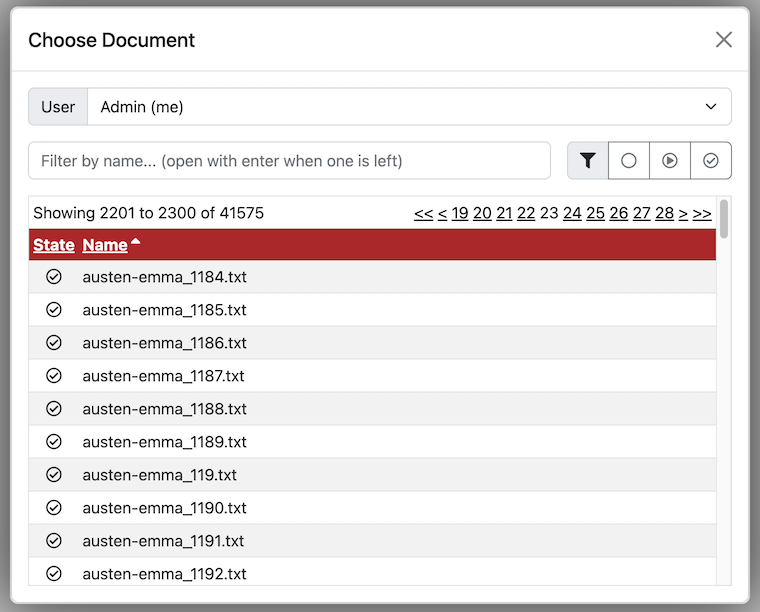
The keyboard focus is automatically placed into the search field when the dialog opens. You can use it to conveniently search for documents by name. The table below is automatically filtered according to your input. If only one document is left, you can press ENTER to open it. Otherwise, you can click on a document in the table to open it. The Filter buttons allow to filter the table by document state.
Users that are managers can additionally open other users' documents to view their annotations but cannot change them. This is down via the User dropdown menu. The user’s own name is listed at the top and marked (me).
Navigation
Sentence numbers on the left side of the annotation page show the exact sentence numbers in the document.

The arrow buttons first page, next page, previous page, last page, and go to page allow you to navigate accordingly.
The Prev. and Next buttons in the Document frame allow you to go to the previous or next document on your project list.
When an annotation is selected, there are additional arrow buttons in the right sidebar which can be used to navigate between annotations on the selected layer within the current document.
You can also use the following keyboard assignments in order to navigate only using your keyboard.
| Key | Action |
|---|---|
Home |
go to the start of the document |
End |
go to the end of the document |
Page-Down |
go to the next page, if not in the last page already |
Page-Up |
go to previous page, if not already in the first page |
Shift+Page-Down |
go to next document in project, if available |
Shift+Page-Up |
go to previous document in project, if available |
Shuft+Cursor-Left |
go to previous annotation on the current layer, if available |
Shift+Cursor-Right |
go to next annotation on the current layer, if available |
Shift+Delete |
delete the currently selected annotation |
Ctrl+End |
toggle document state (finished / in-progress) |
Creating annotations
The Layer box in the right sidebar shows the presently active layer span layer. To create a span annotation, select a span of text or double click on a word.
If a relation layer is defined on top of a span layer, clicking on a corresponding span annotation and dragging the mouse creates a relation annotation.
Once an annotation has been created or if an annotation is selected, the Annotation box shows the features of the annotation.
The definition of layers is covered in Section Layers.
Spans
To create an annotation over a span of text, click with the mouse on the text and drag the mouse to create a selection. When you release the mouse, the selected span is activated and highlighted in orange. The annotation detail editor is updated to display the text you have currently selected and to offer a choice on which layer the annotation is to be created. As soon as a layer has been selected, it is automatically assigned to the selected span. To delete an annotation, select a span and click on Delete. To deactivate a selected span, click on Clear.
Depending on the layer behavior configuration, span annotations can have any length, can overlap, can stack, can nest, and can cross sentence boundaries.
For example, for NE annotation, select the options as shown below (red check mark):
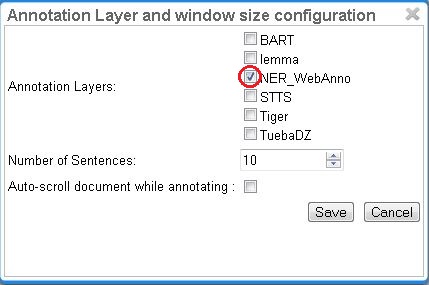
NE annotation can be chosen from a tagset and can span over several tokens within one sentence. Nested NE annotations are also possible (in the example below: "Frankfurter" in "Frankfurter FC").

Lemma annotation, as shown below, is freely selectable over a single token.

POS can be chosen over one token out of a tagset.

To create a zero-length annotation, hold Shift and click on the position where you wish to create the annotation. To avoid accidental creations of zero-length annotations, a simple single-click triggers no action by default. The lock to token behavior cancels the ability to create zero-length annotations.
A zero-width span between two tokens that are directly adjacent, e.g. the full stop at the
end of a sentence and the token before it (end.) is always considered to be at the end of the
first token rather than at the beginning of the next token. So an annotation between d and .
in this example would be rendered at the right side of end rather than at the left side of ..
|
Co-reference annotation can be made over several tokens within one sentence. A single token sequence can have several co-ref spans simultaneously.
Relations
In order to create relation annotation, a corresponding relation layer needs to be defined and attached to the span layer you want to connect the relations to. An example of a relation layer is the built-in Dependency relation layer which connects to the Part of speech span layer, so you can create relations immediately on the Part of speech layer to try it out.
If you want to create relations on other span layers, you need to create a new layer of type Relation in the layer settings. Attach the new relation layer to a span layer. Note that only a single relation layer can connect to any given span layer.
Then you can start connecting the source and target annotations using relations.
There are two ways of creating a relation:
-
for short-distance relations, you can conveniently create relation by left-clicking on a span and while keeping the mouse button pressed moving the cursor over to the target span. A rubber-band arc is shown during this drag-and-drop operation to indicate the location of the relation. To abort the creation of an annotation, hold the CTRL key when you release the mouse button.
-
for long-distance relations, first select the source span annotation. Then locate the target annotation. You can scroll around or even switch to another page of the same document - just make sure that your source span stays selected in the annotation detail editor panel on the right. Once you have located the target span, right-click on it and select Link to…. Mind that long-ranging relations may not be visible as arcs unless both the source and target spans are simultaneously visible (i.e. on the same "page" of the document). So you may have to increase the number of visible rows in the settings dialog to make them visible.
When a relation annotation is selected, the annotation detail panel includes two fields From and To which indicate the origin and target annotations of the relation. These fields include a small cross-hair icon which can be used to jump to the respective annotations.
When a span annotation is selected, and incoming or outgoing relations are also shown in the annotation detail panel. Here, the cross-hair icon can be used to jump to the other endpoint of the relation (i.e. to the other span annotation). There is also an icon indicating whether the relation is incoming to the selected span annotation or whether it is outgoing from the current span. Clicking on this icon will select the relation annotation itself.
Depending on the layer behavior configuration, relation annotations can stack, can cross each other, and can cross sentence boundaries.
To create a relation from a span to itself, press the Shift key before starting to drag the mouse and hold it until you release the mouse button. Or alternatively select the span and then right-click on it and select Link to….
| Currently, there can be at most one relation layer per span layer. Relations between spans of different layers are not supported. |
| Not all arcs displayed in the annotation view are belonging to chain or relation layers. Some are induced by Link Features. |
When moving the mouse over an annotation with outgoing relations, the info pop-up includes the yield of the relations. This is the text transitively covered by the outgoing relations. This is useful e.g. in order to see all text governed the head of a particular dependency relation. The text may be abbreviated.

Chains
A chain layer includes both, span and relation annotations, into a single structural layer. Creating a span annotation in a chain layer basically creates a chain of length one. Creating a relation between two chain elements has different effects depending on whether the linked list behavior is enabled for the chain layer or not. To enable or disable the linked list behaviour, go to Layers in the Projects Settings mode. After choosing Coreference, linked list behaviour is displayed in the checkbox and can either be marked or unmarked.
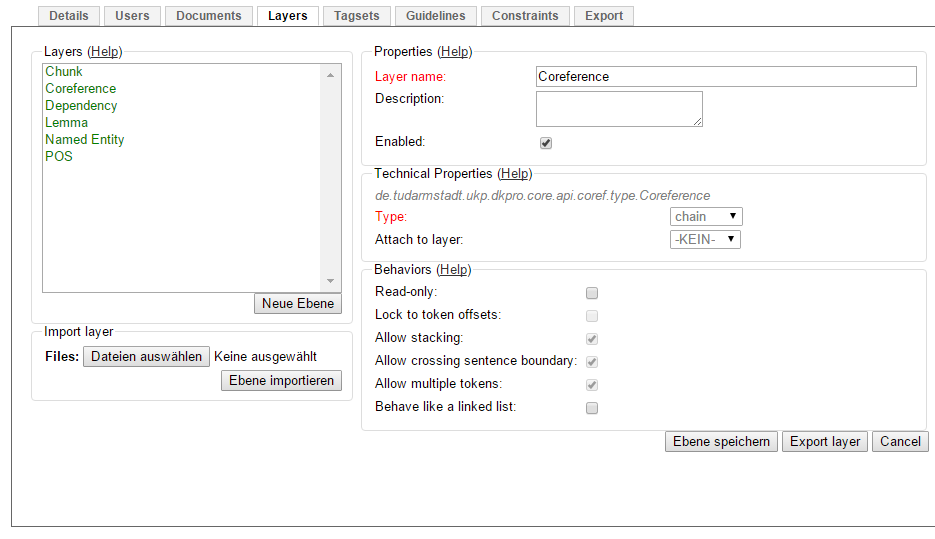

To abort the creation of an annotation, hold CTRL when you release the mouse button.
| Linked List | Condition | Result |
|---|---|---|
disabled |
the two spans are already in the same chain |
nothing happens |
disabled |
the two spans are in different chains |
the two chains are merged |
enabled |
the two spans are already in the same chains |
the chain will be re-linked such that a chain link points from the source to the target span, potentially creating new chains in the process. |
enabled |
the two spans are in different chains |
the chains will be re-linked such that a chain link points from the source to the target span, merging the two chains and potentially creating new chains from the remaining prefix and suffix of the original chains. |
🧪 Document metadata
Experimental feature. To use this functionality, you need to enable it first by adding documentmetadata.enabled=true to the settings.properties file (see the Admin Guide).
|
Curation of document metadata annotations is not possible. Import and export of document metadata annotations is only supported in the UIMA CAS formats, but not in WebAnno TSV.
Before being able to configure document-level annotations, you need to define an annotation layer of type Document metadata on the project Settings, Layers tab. For this:
-
Go to Settings → Layers and click the Create button
-
Enter a name for the annotation layer (e.g.
Author) and set its type to Document metadata -
Click Save
-
On the right side of the page, you can now configure features for this annotation layer by clicking Create
-
Again, choose a name and type for the feature e.g.
nameof type Primitive: String -
Click Save
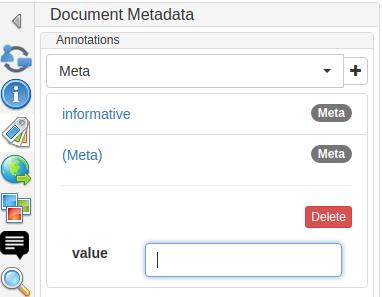
On the annotation page, you can now:
-
Open the Document Metadata sidebar (the tags icon) and
-
Choose the newly created annotation layer in the dropdown.
-
Clicking the plus sign will add a new annotation whose feature you can fill in.
Singletons
If you want to define a document metadata layer for which each document should have exactly one annotation, then you can mark the layer as a singleton. This means that in every document, an annotation of this type is automatically created when the annotator opens the document. It is immediately accessible via the document metadata sidebar - the annotator does not have to create it first. Also, the singleton annotation cannot be deleted.
Primitive Features
Supported primitive features types are string, boolean, integer, and float.
String features without a tagset are displayed using a text field or a text area with multiple rows. If multiple rows are enabled it can either be dynamically sized or a size for collapsing and expanding can be configured. The multiple rows, non-dynamic text area can be expanded if focused and collapses again if focus is lost.
In case the string feature has a tagset, it instead appears as a radio group, a combobox, or an auto-complete field - depending on how many tags are in the tagset or whether a particular editor type has been chosen.
There is also the option to have multi-valued string features. These are displayed as a multi-value select field and can be used with or without an associated tagset. Keyboard shortcuts are not supported.
Boolean features are displayed as a checkbox that can either be marked or unmarked.
Integer and float features are displayed using a number field. However if an integer feature is limited and the difference between the maximum and minimum is lower than 12 it can also be displayed with a radio button group instead.
Link Features
Link features can be used to link one annotation to others. Before a link can be made, a slot must be added. If role labels are enabled enter the role label in the text field and press the add button to create the slot. Next, click on field in the newly created slot to arm it. The field’s color will change to indicate that it is armed. Now you can fill the slot by double-clicking on a span annotation. To remove a slot, arm it and then press the del button.
Once a slot has been filled, there is a cross-hair icon in the slot field header which can be used to navigate to the slot filler.
When a span annotation is selected which acts as a slot filler in any link feature, then the annotation owning the slow is shown in the annotation detail panel. Here, the cross-hair icon can be used to jump to the slot owner.
If role labels are enabled they can be changed by the user at any time. To change a previously selected role label, no prior deletion is needed. Just click on the slot you want to change, it will be highlighted in orange, and chose another role label.
If there is a large number of tags in the tagset associated with the link feature, the the role
combobox is replaced with an auto-complete field. The difference is that in the auto-complete field, there is no button to open the dropdown to select a role. Instead, you can press space or use the cursor-down keys to cause the dropdown menu for the role to open. Also, the dropdown only shows up
to a configurable maximum of matching tags. You can type in something (e.g. action) to filter for
items containing action. The threshold for displaying an auto-complete field and the maximum number
of tags shown in the dropdown can be configured globally. The settings are documented in the
administrators guide.
If role labels are disabled for the link feature layer they cannot be manually set by the user. Instead the UI label of the linked annotation is displayed.
Image Features
Image URL features can be used to link a piece of text to an image. The image must be accessible via an URL. When the use edits an annotation, the URL is displayed it the feature editor. The actual images can be viewed via the image sidebar.
Concept features
Concept features allow linking an annotation to a concept (class, instance, property) from a knowledge base.
There are two types of concept features: single-value and multi-value. A single value feature can only link an annotation to a single concept. The single-value feature is displayed using an auto-complete field. When a concept has been linked, its description is shown below the auto-complete field. A multi-value concept feature allows linking the annotation up to more than one concept. It is shown as a multi-select auto-complete field. When hovering with the mouse over one of the linked concepts, its description is displayed as a tooltip.
Typing into the field triggers a query against the knowledge base and displays candidates in a dropdown list. The query takes into account not only what is typed into the input field, but also the annotated text.
| Just press SPACEBAR instead of writing anything into the field to search the knowledge base for concepts matching the annotated text. |
The query entered into the field only matches against the label of the knowledge base items, not
against their description. However, you can filter the candidates by their description. E.g. if you
wish to find all knowledge base items with Obama in the label and president in the description,
then you can write Obama :: president. A case-insensitive matching is being used.
If the knowledge base is configured for additional matching properties and the value entered into the field matches such an additional property, then the label property will be shown separately in the dropdown. In this case, filtering does not only apply to the description but also to the canonical label.
Depending on the knowledge base and full-text mode being used, there may be fuzzy matching. To
filter the candidate list down to those candidates which contain a particular substring, put
double quotes around the query, e.g. "County Carlow". A case-insensitive matching is being used.
You can enter a full concept IRI to directly link to a particular concept. Note that searching by IRIs by substrings or short forms is not possible. The entire IRI as used by the knowledge base must be entered. This allows linking to concepts which have no label - however, it is quite inconvenient. It is much more convenient if you can ensure that your knowledge base offers labels for all its concepts.
The number of results displayed in the dropdown is limited. If you do not find what you are looking for, try typing in a longer search string. If you know the IRI of the concept you are looking for, try entering the IRI. Some knowledge bases (e.g. Wikidata) are not making a proper distinction between classes and instances. Try configuring the Allowed values in the feature settings to any to compensate.
Instead of searching a concept using the auto-complete field, you can also browse the knowledge base. However, this is only possible if:
-
the concept feature is bound to a specific knowledge base or the project contains only a single knowledge base;
-
the concept feature allowed values setting is not set to properties.
Note that only concept and instances can be linked, not properties - even if the allowed values setting is set to any.
Annotation Sidebar
The annotation sidebar provides an overview over all annotations in the current document. It is located in the left sidebar panel.
The sidebar supports two modes of displaying annotations:
-
Grouped by label (default): Annotations are grouped by label. Every annotation is represented by its text. If the same text is annotated multiple times, there will be multiple items with the same text. To help disambiguating between the same text occurring in different contexts, each item also shows a bit of trailing context in a lighter font. Additionally, there is a small badge in every annotation item which allows selecting the annotation or deleting it. Clicking on the text itself will scroll to the annotation in the editor window, but it will not select the annotation. If an item represents an annotation suggestion from a recommender, the badge instead has buttons for accepting or rejecting the suggestion. Again, clicking on the text will scroll the editor window to the suggestion without accepting or rejecting it. Within each group, annotations are sorted alphabetically by their text. If the option sort by score is enabled, then suggestions are sorted by score.
-
Grouped by position: In this mode, the items are ordered by their position in the text. Relation annotations are grouped under their respective source span annotation. If there are multiple annotations at the same position, then there are multiple badges in the respective item. Each of these badges shows the label of an annotation present at this position and allows selecting or deleting it. Clicking on the text will will scroll to the respective position in the editor window.
Undo/re-do
The undo/re-do buttons in the action bar allow to undo annotation actions or to re-do an an undone action.
This functionality is only available while working on a particular document. When switching to another document, the undo/redo history is reset.
| Key | Action |
|---|---|
Ctrl-Z |
undo last action |
Shift-Ctrl-Z |
re-do last un-done action |
| Not all actions can be undone or redone. E.g. bulk actions are not supported. While the undoing the creation of chain span and chain link annotations is supported, re-doing these actions or undoing their deletions is not supported. |
Settings
Once the document is opened, a default of 5 sentences is loaded on the annotation page. The Settings button will allow you to specify the settings of the annotation layer.
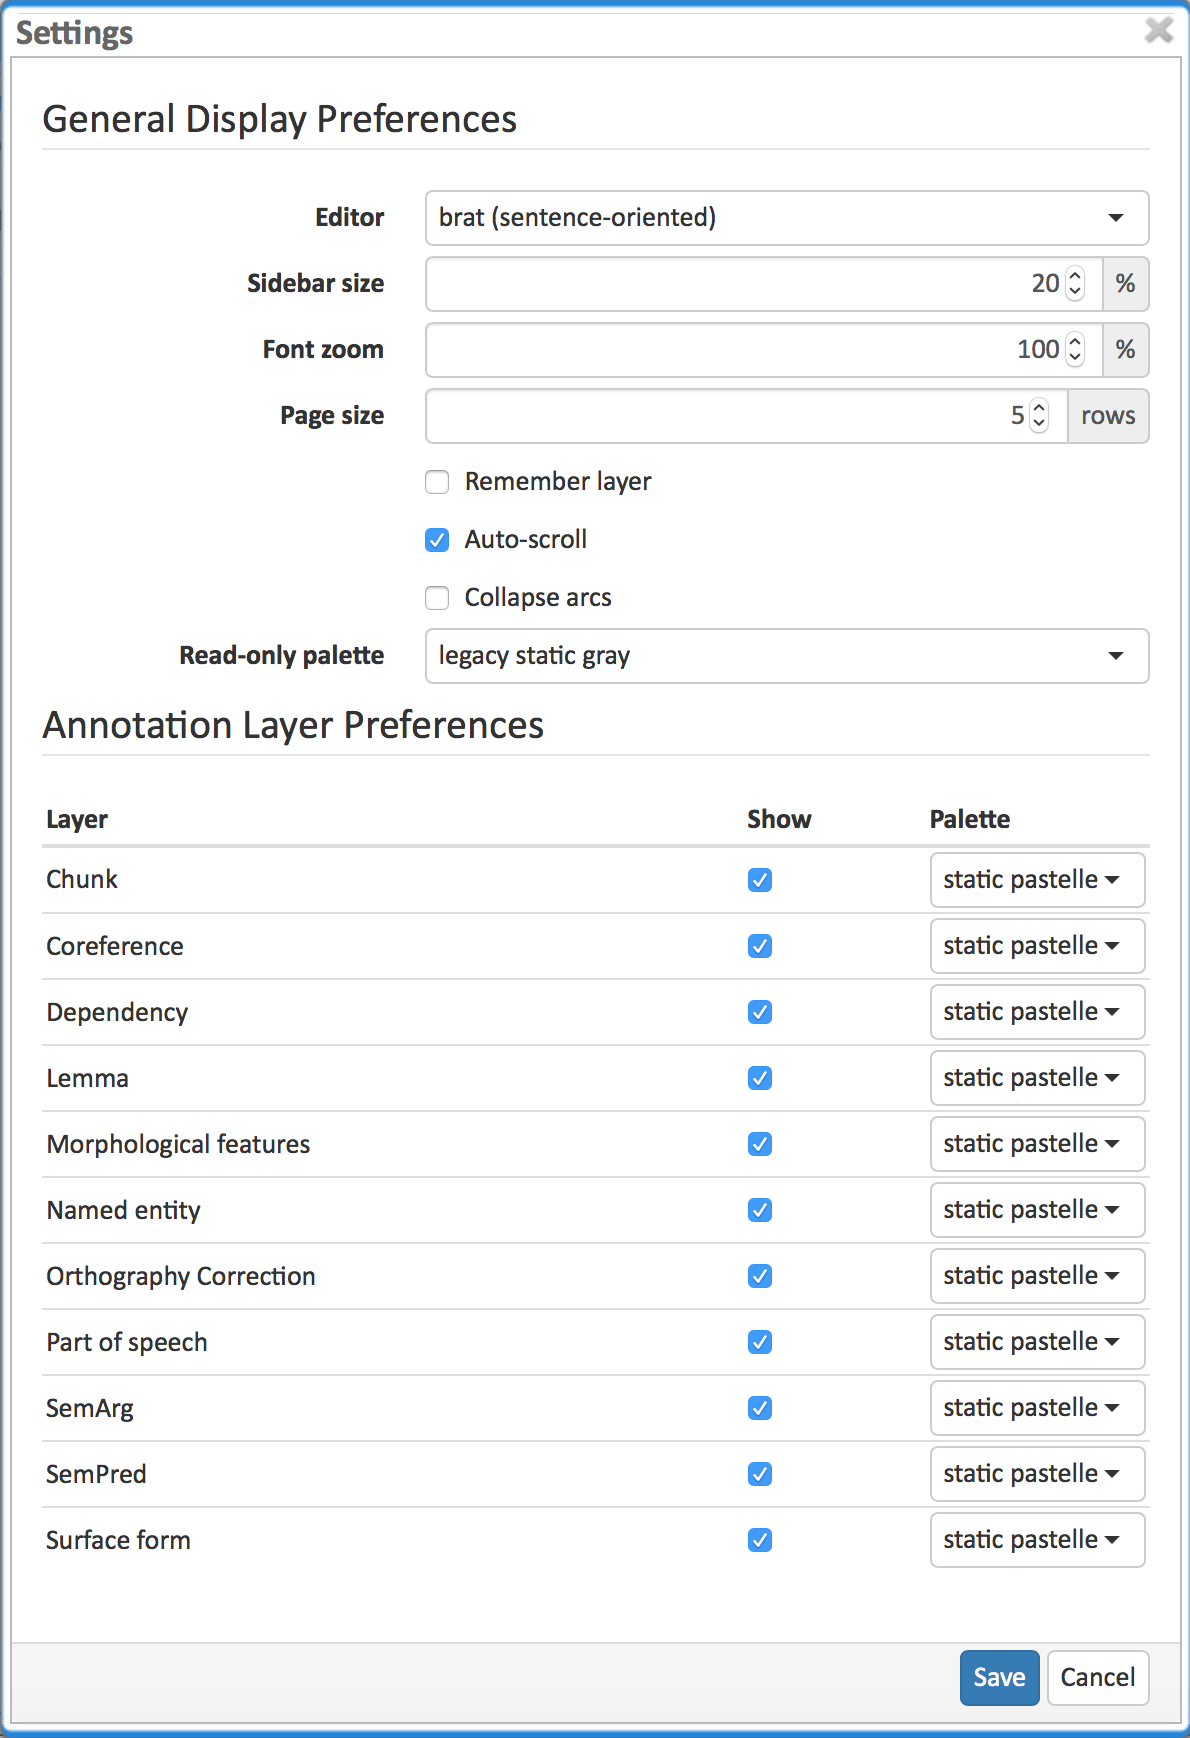
The Editor setting can be used to switch between different modes of presentation. It is currently only available on the annotation page.
The Sidebar size controls the width of the sidebar containing the annotation detail editor and actions box. In particular on small screens, increasing this can be useful. The sidebar can be configured to take between 10% and 50% of the screen.
The Font zoom setting controls the font size in the annotation area. This setting may not apply to all editors.
The Page size controls how many sentences are visible in the annotation area. The more sentences are visible, the slower the user interface will react. This setting may not apply to all editors.
The Auto-scroll setting controls if the annotation view is centered on the sentence in which the last annotation was made. This can be useful to avoid manual navigation. This setting may not apply to all editors.
The Collapse arcs setting controls whether long ranging relations can be collapsed to save space on screen. This setting may not apply to all editors.
The Read-only palette controls the coloring of annotations on read-only layers. This setting overrides any per-layer preferences.
Layer preferences
In this section you can select which annotation layers are displayed during annotation and how they are displayed.
Hiding layers is useful to reduce clutter if there are many annotation layers. Mind that hiding a layer which has relations attached to it will also hide the respective relations. E.g. if you disable POS, then no dependency relations will be visible anymore.
The Palette setting for each layer controls how the layer is colored. There are the following options:
-
static / static pastelle - all annotations receive the same color
-
dynamic / dynamic pastelle - all annotations with the same label receive the same color. Note that this does not imply that annotations with different labels receive different colors.
-
static grey - all annotations are grey.
Mind that there is a limited number of colors such that eventually colors will be reused. Annotations on chain layers always receive one color per chain.
Export
Annotations are always immediately persistent in the backend database. Thus, it is not necessary to save the annotations explicitly. Also, losing the connection through network issues or timeouts does not cause data loss. To obtain a local copy of the current document, click on export button. The following frame will appear:
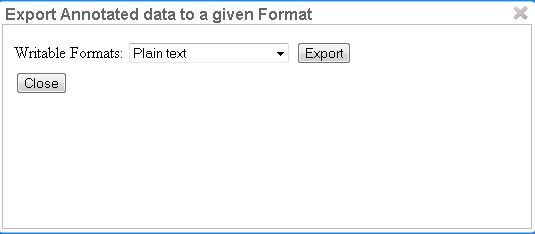
Choose your preferred format. Please take note of the facts that the plain text format does not contain any annotations and that the files in the binary format need to be unpacked before further usage. For further information the supported formats, please consult the corresponding chapter Formats.
The document will be saved to your local disk, and can be re-imported via adding the document to a project by a project manager. Please export your data periodically, at least when finishing a document or not continuing annotations for an extended period of time.
Search
The search module allows to search for words, passages and annotations made in the documents of a given project. Currently, the default search is provided by MTAS (Multi Tier Annotation Search), a Lucene/Solr based search and indexing mechanism (https://github.com/textexploration/mtas).
To perform a search, access the search sidebar located at the left of the screen, write a query and press the Search button. The results are shown below the query in a KWIC (keyword in context) style grouped by document. Clicking on a result will open the match in the main annotation editor.

The search only considers documents in the current project and only matches annotations made by the current user.
| Very long annotations and tokens (longer than several thousand characters) are not indexed and cannot be found by the search. |
Clicking on the search settings button (cog wheel) shows additional options:
-
Current document only limits the search to the document shown in the main annotation editor. When switching to another document, the result list does not change automatically - the search button needs to be pressed again in order to show results from the new document.
-
Rebuild index may help fixing search issues (e.g. no or only partial results), in particular after upgrading to a new version of INCEpTION. Note that this process may take quite some time depending on the number of documents in the project.
-
Grouping by allows to group the search results by feature values of the selected annotation feature. By default the search results will be grouped by document title if no layer and no feature is selected.
-
Low level paging will apply paging of search results directly at query level. This means only the next n results are fetched every time a user switches to a new page of results (where n is the page size). Thus the total number of results for a result group is unknown. This option should be activated if a query is expected to yield a very large number of results so that fetching all results at once would slow down the application too much. + This option can only be activated if results are being grouped by document.
Creating/Deleting Annotations for Search Results
The user can also use the search to create and/or delete annotations for a set of selected search results.
This means that annotations will be created/deleted at the token offsets of the selected search results. Search results can be selected via the checkbox on the left. Per default all search results are selected. If a result originates from a document which the user has already marked as finished, there is no checkbox since such documents cannot be modified anyway.
The currently selected annotation in the annotation editor serves as template for the annotations that are to be created/deleted. Note that selecting an annotation first is necessary for creating/deleting annotations in this way.
| The slots and slot fillers of slot features are not copied from the template to newly created annotations. |
Clicking on the create settings button (cog wheel) shows additional options:
-
Override existing will override an existing annotation of the same layer at a target location. If this option is disabled, annotations of the same layer will be stacked if stacking is enabled for this layer. Otherwise no annotation will be created.
Clicking on the delete settings button (cog wheel) shows additional options:
-
Delete only matching feature values will only delete annotations at search results that exactly match the currently selected annotation including all feature values. If this option is disabled all annotations with the same layer as the currently selected annotation will be deleted regardless of their feature values. Note that slot features are not taken into account when matching the selected annotation against candidates to be deleted.
Mtas search syntax
The INCEpTION Mtas search provider allows queries to be executed using CQL (Corpus Query Language), as shown in the following examples. More examples and information about CQL syntax can be found at https://meertensinstituut.github.io/mtas/search_cql.html.
When performing queries, the user must reference the annotation types using the layer names, as defined in the project schema. In the same way, the features must be referenced using their names as defined in the project schema. In both cases, empty spaces in the names must be replaced by an underscore.
Thus, Lemma refers to the Lemma layer, Lemma.Lemma refers to the the Lemma feature in the
Lemma layer. In the same way, Named_entity refers to Named entity layer, and
Named_entity.value refers to the value feature in the Named entity layer.
Annotations made over single tokens can be queried using the […] syntax, while annotations
made over multiple tokens must be queried using the <…/> syntax.
In the first case, the user must always provide a feature and a value. The following syntax returns all single token annotations of the LayerX layer whose FeatureX feature have the given value.
[LayerX.FeatureX="value"]
In the second case, the user may or not provide a feature and a value. Thus, the following syntax will return all multi-token annotations of the LayerX layer, regardless of their features and values.
<LayerX/>
On the other hand, the following syntax will return the multi-token annotations whose FeatureX feature has the given value.
<LayerX.FeatureX="value"/>
Notice that the multi-token query syntax can also be used to retrieve single token annotations (e.g. POS or lemma annotations).
Text queriess
Galicia
"Galicia"
The capital of Galicia
"The" "capital" "of" "Galicia"
Span layer queries
[Lemma.Lemma="sign"]
<Named_entity/>
<Named_entity.value="LOC"/>
[Lemma.Lemma="be"] [Lemma.Lemma="sign"]
"house" [POS.PosValue="VERB"]
[POS.PosValue="VERB"]<Named_entity/>
<Named_entity/>{2}
<Named_entity/> <Named_entity/>
<Named_entity/> [] <Named_entity/>
<Named_entity/> []? <Named_entity/>
<Named_entity/> []{2} <Named_entity/>
<Named_entity/> []{1,3} <Named_entity/>
(<Named_entity.value="OTH"/> | <Named_entity.value="LOC"/>)
[POS.PosValue="VERB"] within [Lemma.Lemma="sign"]
[POS.PosValue="DET"] within <Named_entity/>
[POS.PosValue="DET"] !within <Named_entity/>
<Named_entity/> containing [POS.PosValue="DET"]
<Named_entity/> !containing [POS.PosValue="DET"]
<Named_entity.value="LOC"/> intersecting <SemArg/>
(<Named_entity.value="OTH"/> | <Named_entity.value="LOC"/>) within <SemArg/>
(<Named_entity.value="OTH"/> | <Named_entity.value="LOC"/>) intersecting <SemArg/>
<s> []{0,50} <Named_entity.value="PER"/> []{0,50} </s> within <s/>
Relation layer queries
INCEpTION allows queries over relation annotations as well. When relations are indexed, they are indexed by the position of their target span. That entails that match highlighted in the query corresponds to text of the target of the relation.
For the following examples, we assume a span layer called component and a relation layer called rel attached to it. Both layers have a string feature called value.
<rel.value="foo"/>
<rel-source="foo"/>
<rel-target="foo"/>
<rel-source.value="foo"/>
<rel-target.value="foo"/>
<rel.value="bar"/> fullyalignedwith <rel-target.value="foo"/>
<rel.value="bar"/> fullyalignedwith (<rel-source.value="foo"/> fullyalignedwith <rel-target.value="foo"/>)
Concept feature queries
<KB-Entity="Bordeaux"/>
The following query returns all mentions of ChateauMorgonBeaujolais or any of its subclasses in the associated knowledge base.
<Named_entity.identifier="ChateauMorgonBeaujolais"/>
Mind that the label of a knowledge base item may be ambiguous, so it may be necessary to search by IRI.
<Named_entity.identifier="http://www.w3.org/TR/2003/PR-owl-guide-20031209/wine#ChateauMorgonBeaujolais"/>
<Named_entity.identifier-exact="ChateauMorgonBeaujolais"/>
(<Named_entity.identifier-exact="ChateauMorgonBeaujolais"/> | <Named_entity.identifier-exact="AmericanWine"/>)
Statistics
The statistics section provides useful statistics about the project. Currently, the statistics are provided by MTAS (Multi Tier Annotation Search), a Lucene/Solr based search and indexing mechanism (https://github.com/textexploration/mtas).
High-level statistics sidebar
To reach the statistics sidebar, go to Annotation, open a document and choose the statistics sidebar on the left, indicated by the clipboard icon. Select a granularity and a statistic which shall be displayed. After clicking the calculate button, the results are shown in the table below.
| Clicking the Calculate button will compute all statistics and all granularities at once. The dropdowns are just there to reduce the size of the table. Therefore, depending on the size of the project, clicking the calculate button may take a while . The exported file always contains all statistics, so it is significantly larger than the displayed table. |
For the calculation of the statistics, all documents which the current user has access to and all are considered. They are computed for all layer/feature combinations. Please make sure that the name of the layer/feature combinations are valid (e.g. they don’t contain incorrect bracketing).
-
Granularity: Currently, there are two options to choose from, per Document and per Sentence. Understanding what’s actually computed by them is illustrated best by an example. Assume you have 3 documents, the first with 1 sentence, the second with 2 sentences and the third with 3 sentences. Let Xi be the number of occurrences of feature X (e.g. the Feature "value" in the Layer "named entity") in document i (i = 1, 2, 3). Then per Document is just the vector Y = (X1, X2, X3), i.e. we look at the raw occurrences per Document. In contrast, per Sentence calculates the vector Z = (X1/1, X2/2, X3/3), i.e. it divides the number of occurrences by the number of sentences. This vector is then evaluated according to the chosen statistic (e.g. Mean(Y) = (X1 + X2 + X3)/3, Max(Z) = max(X1/1, X2/2, X3/3)).
-
Statistic: The kind of statistic which is displayed in the table. Let (Y1, …, Yn) be a vector of real numbers. Its values are calculated as shown in the Granularity section above.
-
Maximum: the greatest entry, i.e. max(Y1, …, Yn)
-
Mean: the arithmetic mean of the entries, i.e. (Y1 + … + Yn)/n
-
Median: the entry in the middle of the sorted vector, i.e. let Z = (Z1, …, Zn) be a vector which contains the same entries as Y, but they are in ascending order (Z1 < = Z2 < = … < = Zn). Then the median is given by Z(n+1)/2 if n is odd or (Zn/2 + Z(n/2)+1)/2 if n is even
-
Minimum: the smallest entry, i.e. min(Y1, …, Yn)
-
Number of Documents: the number of documents considered, i.e. n
-
Standard Deviation: 1/n * ( (Y1 - Mean(Y))2 + … + (Yn - Mean(Y))2)
-
Sum: the total number of occurrences across all documents, i.e. Y1 + … + Yn
-
| The two artificial features token and sentence are contained in the artificial layer Segmentation and statistics for them are computed. Note that per Sentence statistics of Segmentation.sentence are trivial so they are omitted from the table and the downloadable file. |
-
Hide empty layers: Usually, a project does not use all layers. If a feature of a layer does never occur, all its statistics (except Number of Documents) will be zero. Tick this box and press the Calculate button again to omit them from the displayed table. If you then download the table, the generated file will not include these layers.
After some data is displayed in the table, it is possible to download the results. For this, after clicking the Calculate button there will appear a Format Dropdown and an Export button below the table. Choose your format and click the button to start a download of the results. The download will always include all possible statistics and either all features or only the non-null features.
-
Formats: Currently, two formats are possible, .txt and .csv. In the first format, columns are separated by a tab "\t" whereas in the second format they are separated by a comma ",".
Recommenders
After configuring one or more recommender in the Project Settings, they can be used during annotation to generate predictions. In the annotation view, predictions are shown as grey bubbles. Predictions can be accepted by clicking once on them. In order to reject, use a double-click. For an example how recommendations look in action, please see the screenshot below.
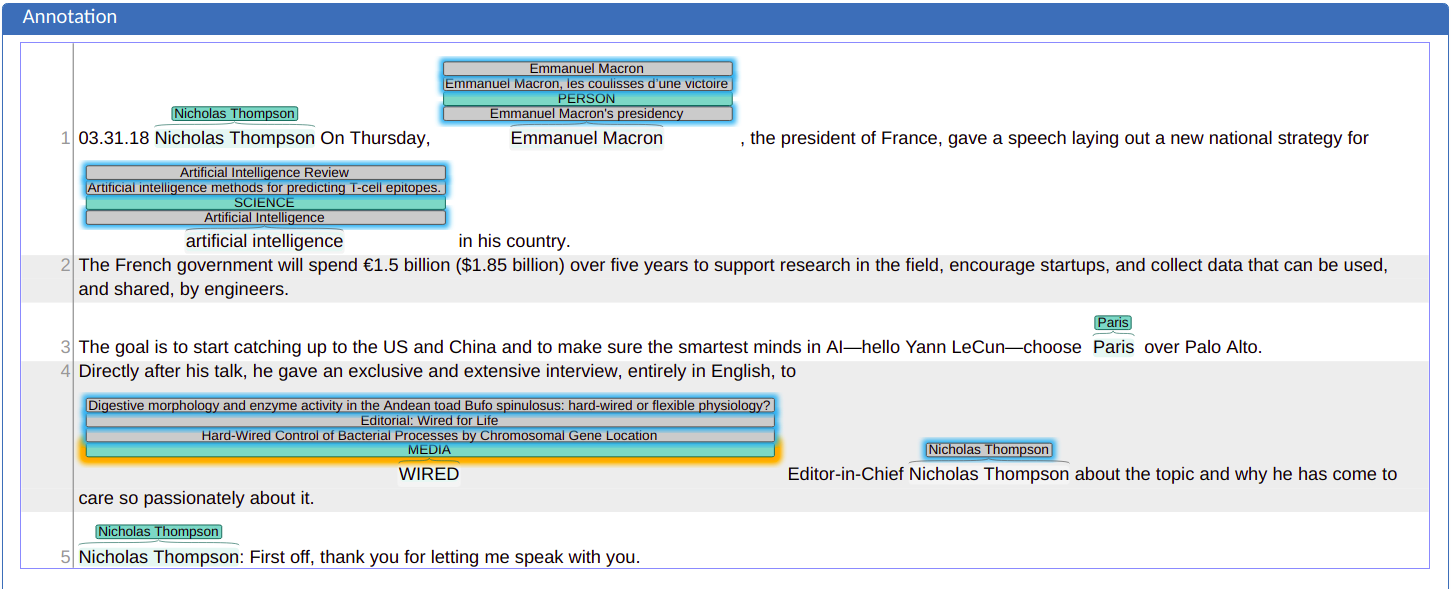
Suggestions generated by a specific recommender can be deleted by removing the corresponding recommender in the Project Settings. Clicking Reset in the Workflow area will remove all predictions, however it will also remove all hand-made annotations.
Accept/reject buttons
Experimental feature. To use this functionality, you need to enable it first by adding recommender.action-buttons-enabled=true to the settings.properties file (see the Admin Guide).
|
It is possible to enable explicit Accept and Reject buttons in the annotation interface. These appear left and right of the suggestion marker as the mouse hovers over the marker.
Recommender Sidebar
Clicking the chart icon in the left sidebar tray opens the recommendation sidebar which provides access to several functionalities:
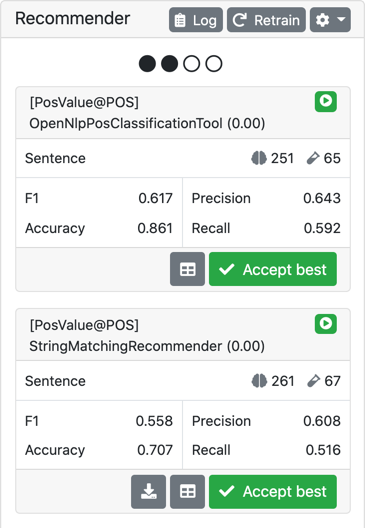
- View the state of the configured recommenders
-
The icon in the top-right corner of the info box indicates the state of the recommender, e.g. if it is active, inactive, or if information on the recommender state is not yet available due to no self-evaluation or train/predict run having been completed yet.
- View the self-evaluation results of the recommenders
-
When evaluation results are available, the info box shows sizes of the training and evaluation data it uses for self-evaluation (for generating actual suggestions, the recommender is trained on all data), and the results of the self-evaluation in terms of F1 score, accuracy, precision and recall.
- View the confusion matrix for a recommender
-
When evaluation results are available, there is also the option to view the confusion matrix of the results. This is a square matrix showing all of the possible labels on each axis and indicating for each pair of labels how often during the self-evaluation run, one was mistaken for the other by the recommender.
- View the training log of the recommenders
-
The recommender log provides detailed information which recommenders did run or did not run on which layers. This can be useful if you believe that a recommender should be active but it is not. The log usually contains two sections. The first section contains the log messages for the currently visible suggestions. If a background training and prediction run has completed, there is also a second part contains the log messages for the suggestions that will become visible on the next user interaction.
- Manually trigger a re-training of all recommenders
-
You can manually clear and re-train all recommenders. This causes all suggestions to disappear immediately and a self-evaluation run followed by a training and prediction run is triggered. Once they have completed, the logs become available via the log button and the suggestions become available once the main editor is refreshed either via a user action (e.g. making an annotation) or e.g. by reloading the browser page.
- Bulk-accept the best recommendations of a given recommender
-
If you trust a recommender, you can bulk-accept its best annotations. In this case best means that if the recommender has generated multiple suggestions at the same location, the suggestion with the highest score is accepted.
- Export the model of the recommender
-
If a recommender supports exporting its trained model, then there is a button to download the model. Currently, only the String Matching Span Recommender supports this option. A Model exported from this recommender can be uploaded a gazetteer to a String Matching Span Recommender in the project settings.
Evaluation scores and recommender activation
The circles at the top of the sidebar indicate the progress towards the next recommender evaluation. Every change to the annotations triggers a new training and prediction run. If a run is already in progress, at most one additional run is queued. When a run starts, it always use the latest annotation data available at the time. Every 5th run, an additional evaluation step is triggered. This updates the recall, precision, accuracy and F1 scores in the sidebar. Also, if a recommender has been configured to activate only at a particular score threshold, then the recommender may get activated or deactivated depending on the evaluation results.
Additional settings
Additionally, there are several configuration options available from the settings dropdown accessible via the cogwheel icon:
- Configure the minimum score threshold for a suggestion to be visible
-
Sets a minimum score for an individual suggestion to become visible. Any suggestions with a lower score are not shown.
- Configure how many suggestions are shown for a given position
-
If there is more than one suggestion generated for a given position by all recommenders, then of all these suggestions only the n suggestions with the highest scores will be shown. Note though, that scores are not necessarily comparable between recommenders.
- Configure whether to show hidden suggestions
-
In some cases, you may wonder why a suggestion you expect to see does not appear. Then you can choose to show all hidden suggestions. Hovering the mouse over a previously hidden suggestion will include information on why that suggestion was hidden.
🧪 Curation Sidebar
Experimental feature. To use this functionality, you need to enable it first by adding curation.sidebar.enabled=true to the settings.properties file (see the Admin Guide).
|
Curation i.e. the process of combining finished annotated documents into a final curated document, can be done via the Curation Page in INCEpTION (see Curation) but also via the Curation Sidebar on the Annotation Page.

To start a curation session, you need to choose a curation target and press the start curation session buttion next to the curation target select box.
-
curation document: this is also used as the target when curating on the curation page. If you choose this target, you will notice that the username in the info line above the annotation document changes to
CURATION_USERwhile the curation session is in progress. -
my document: this option is available if the curator is also an annotator in the project. In this case, the annotators own document may be chosen as the curation target.
Once the session has started, annotations from annotators that have marked the document as finished will be visible. You can see a list of these annotators in the sidebar. If you want to see only annotations from specific annotators, you can enabled/disabled them as you like.
The user can copy annotations manually from other users into the curation document by clicking on them. The automatic merge can be triggered by clicking the Re-Merge button (sync icon). It will copy all annotations that all selected users agree on into the curation document.
Depending on the layer settings, once an annotation has been merged or an annotation has been manually created in the curation target document, annotations from annotators might be hidden. This happens for example when at a given position in the curation target document an annotation exists and stacking is not enabled on the respective annotation layer. If you want to temporarily see all annotations from the selected annotators, use the Show all curatable annotations checkbox.
The curation session remains active for a given project, even if you leave the annotation page and come back at a later time.
To stop a curation session, use the stop curation session button next to the curation target select box.
It is possible to start/stop a curation session via the URL. Adding the URL query parameter
curationSession=on to an annotation page URL will start a curation session (if none is running)
while curationSession=off will stop a running session. By default, the session is started using
the curation document as the curation target. By setting the parameter curationTargetOwn=true, the
curation target can be changed to the current users own document - if the user has the annotator
role in addition to the curator role. This parameter only takes effect when curationSession=on is
also set. Mind that curation sessions in a project run until terminated. If you want directly link
to a document on the annotation page and ensure that no curations session is running, be sure to
add the curationSession=off parameter.
Example: http://localhost:8080/p/PROJECT/annotate/DOC-ID?curationSession=on&curationTargetOwn=true.
Active Learning
Active learning is a family of methods which seeks to optimize the learning rate of classification algorithms by soliciting labels from a human user in a particular order. This means that recommenders should be able to make better suggestions with fewer user interactions, allowing the user to perform quicker and more accurate annotations. Note that Active Learning only works if there are recommenders and if these recommenders actually generate recommendations which are usually shown as grey bubbles over the text.
Open the Active Learning sidebar on the left of the screen. You can choose from a list of all layers for which recommenders have been configured and then start an active learning session on that layer.
The system will start showing recommendations, one by one, according to the uncertainty sampling learning strategy. For every recommendation, it shows the related text, the suggested annotation, the score and a delta that represents the difference between the given score and the closest score calculated for another suggestion made by the same recommender to that text. Additionally, there is a field which shows the suggested label and which allows changing that label - i.e. to correct the suggestion provided by the system. The recommendation is also highlighted in the central annotation editor.
One can now Annotate, Reject or Skip this recommendation in the Active Learning sidebar:
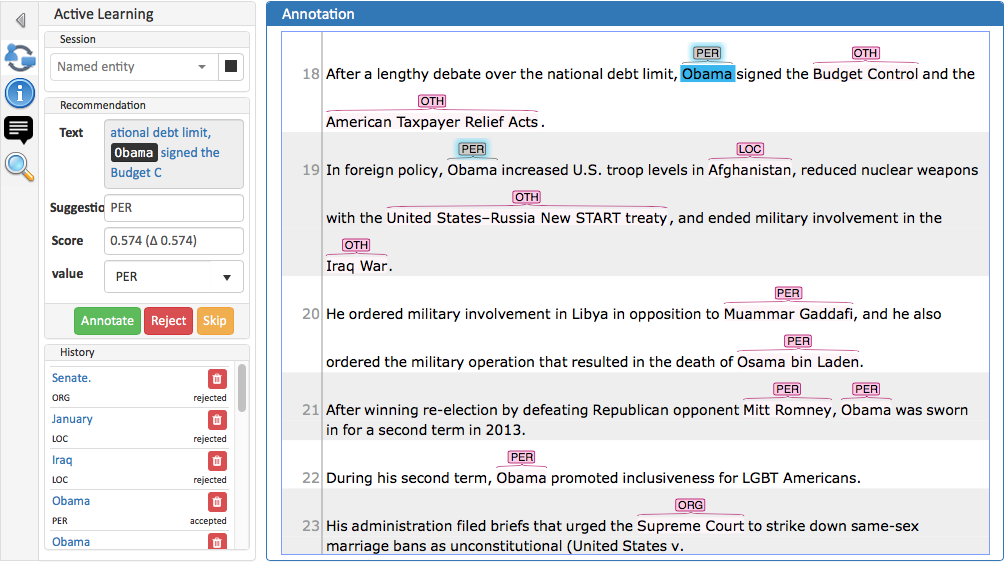
When using the Annotate, Reject or Skip buttons, the system automatically jumps to the next suggestion for the user to inspect. However, at times it may be necessary to go back to a recently inspected suggestion in order to review it. The History panel shows the 50 most recent actions. Clicking on the text of an item loads it in the main annotation editor. It is also possible to delete items from the history, e.g. wrongly rejected items.
The history panel displays whether a given suggestion was accepted, corrected or rejected, but this information can only be indicative. It represents a snapshot of the moment where the user made the choice. As the recommender is continuously updated by the system, the suggestions constantly change. It may happen that a suggestion which is shown as rejected in the sidebar is at a later time not even generated anymore by the recommender. Thus, deleting an item from the history will not always cause the suggestion from which it was generated to reappear. Resetting a document also clears the Active Learning history.
INCEpTION allows the user to create annotations as usual in the main annotation editor panel, even when in an Active Learning session. However, there is only a limited interaction with actions performed in the main annotation editor. If a suggestion is accepted or rejected in the main annotation editor, this is recorded in the history. However, if a user manually creates an annotation which causes a suggestion to disappear by overlapping with it, the history does not record this as a correction. For example, if the system generates a suggestion for Paul. (including the final sentence punctuation) but the user manually creates an annotation only for Paul (without the punctuation), the system does not recognize it as a correction.
Accepting/correcting, rejecting and skipping a suggestion in the sidebar cause the main annotation editor to move to the next suggestion. However, when a suggestion is accepted or rejected via the main editor, the generated annotation is opened in the annotation detail editor panel on the right side and the editor does not move to the next suggestion. For actions made in the main editor, it is assumed that the user may want to perform additional actions (e.g. set features, create more annotations in the vicinity) - jumping to the next suggestion would interfere with such intentions. That said, the next suggestion is loaded in the active learning sidebar and the user can jump to it by clicking on the suggestion text in the sidebar.
When removing an accepted/corrected item from the history and the annotation which was generated from this item is still present (i.e. it has not been deleted by other means), the user is asked whether the associated annotation should also be deleted.
Suggestions that are skipped disappear at first. However, once all other suggestions have been processed, the system asks whether the skipped suggestions should now be reviewed. Accepting will remove all skipped items from the history (even those that might no longer be visible in the history because of its on-screen size limit).
Concept Linking
Concept Linking is the task of identifying concept mentions in the text and linking them to their corresponding concepts in a knowledge base. Use cases of Concept Linking are commonly found in the area of biomedical text mining, e.g. to facilitate understanding of unexplained terminology or abbreviations in scientific literature by linking biological entities.
Contextual Disambiguation
Concept names can be ambiguous. There can be potentially many different concepts having the same name (consider the large number of famous people called John Smith). Thus, it is helpful to rank the candidates before showing them to the user in the annotation interface. If the ranking works well, the user can quickly choose on of the top-ranking candidates instead of having to scroll through a long list.
To link a concept mention to the knowledge base, first select the mention annotation, then select the concept feature in the right sidebar of the annotation editor and start typing the name of a concept. A ranked list of candidates is then displayed in the form of a drop-down menu. In order to make the disambiguation process easier, descriptions are shown for each candidate.
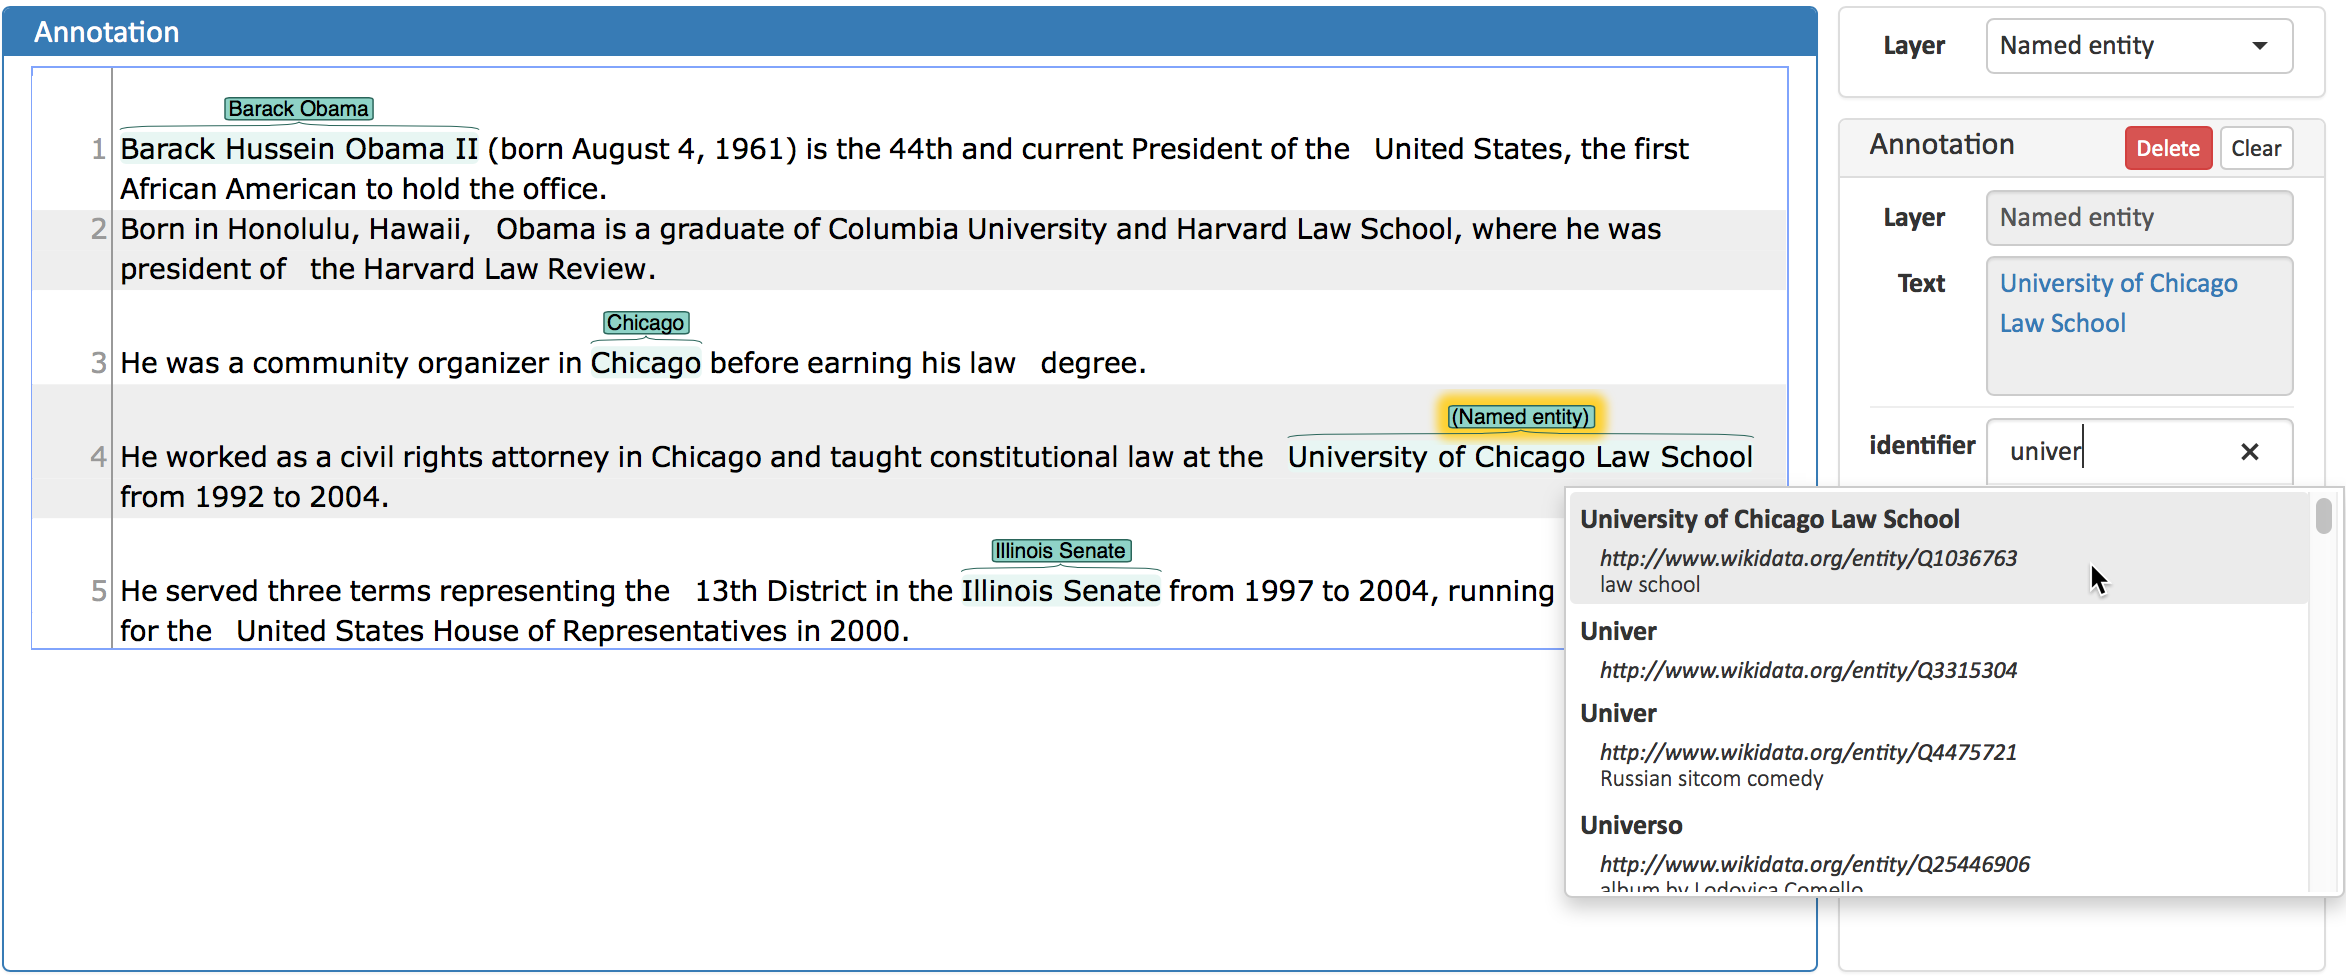
The suggestions are updated every time it receives new input.
Automated Concept Suggestions
The Named Entity Linker (NEL) displays three highest-ranked candidates as suggestions boxes over each mention annotated as Named Entity. The user can accept, reject or ignore these suggestions. If a suggestion is rejected, it is not showed again. It is possible to combine the NEL with the existing Named Entity Recommenders for the NE type, which makes the annotation process even faster. The recommender needs to be set up in the Project Settings.
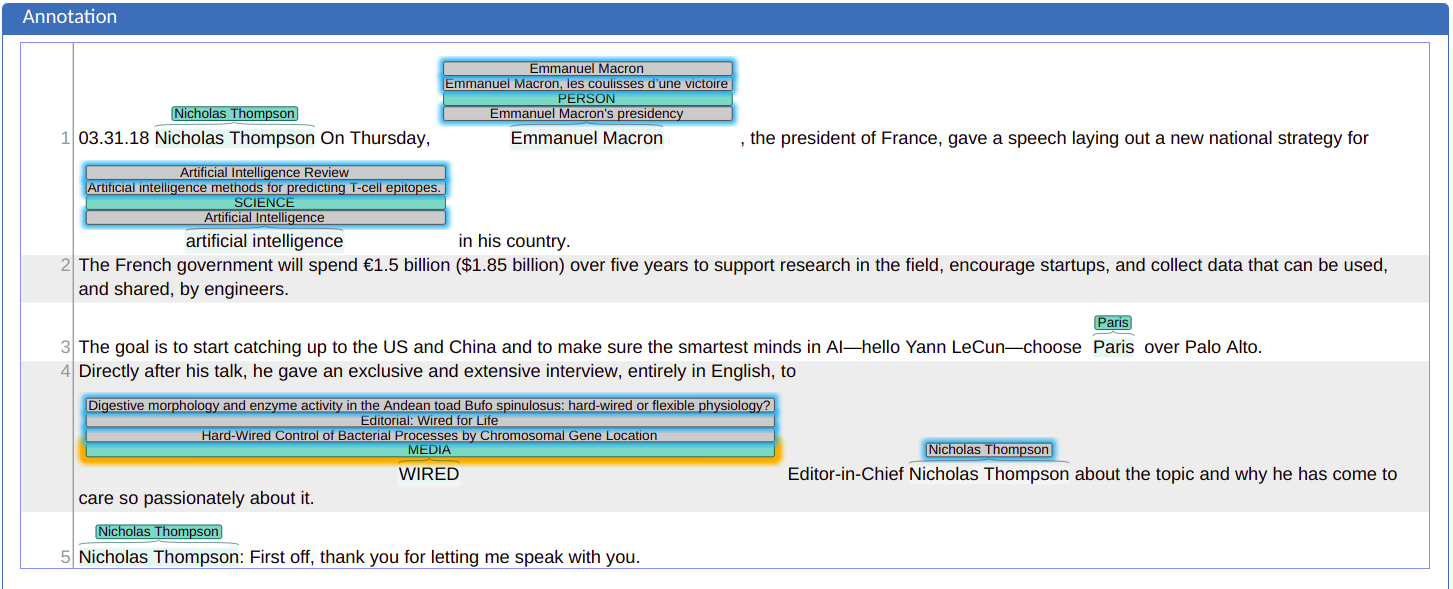
Images
Linking text to images can be useful e.g. when dealing with OCRed data or with text describing images. To support such cases, INCEpTION supports image features. Image features can be to annotation layers just like and other type of features. When selecting an annotation containing an image feature, the a text field is used as the feature editor. Enter an image URL into this field in order to link the annotation to an image. It is presently not possible to upload images to INCEpTION - the image must be accessible via an URL, e.g. from an IIIF server.
Open the images sidebar to get an overview over all images linked to any of the annotations currently visible on screen.
| The sidebar attempts to add a border of an appropriate color to each image. For light images, a dark border is added and for dark images, a light border is added. However, this is only possible if the image server supports cross-origin resource sharing (CORS). The website enable-cors.org provides tips on how to configure your image server to support CORS. If CORS is not supported by the image server, rendering performance will degrade as there is an attempt to re-load the image without CORS and without trying to determine the border color - but the application should still work and the images should still show. |
If the images are not hosted on the same server as INCEpTION, you may have to specify
the remote server in the security.csp.allowed-image-sources property to enable users to access these
images from their browsers within INCEpTION. This is a multi-valued property, so you have to
set its values as security.csp.allowed-image-sources[0]=https://my-first-image.host,
security.csp.allowed-image-sources[1]=https://my-second-image.host in the settings.properties
file.
|
Curation
| This functionality is only available to curators. |
Opening a Document for Curation
When navigating to the Curation Page, the procedure for opening projects and documents is the same as in Annotation. The navigation within the document is also equivalent to Annotation.
The table reflects the state of the document. A document can be in-progress, finished, curation-in-progress or curation-finished.
Curating a document
On the left, there is a sidebar titled Units, an overview of the chosen document is displayed. Units are represented by their number inside the document. Click on a unit in order to select it and to to edit it in the central part of the page.
The units are shown using different colors that indicate their state. Since the calculation of the state can take significant time, it is not updated as changes are made in the main editor pane. To update the coloring of the unit overview, use the Refresh button. When switching between documents, the overview is automatically refreshed.
| In order for the unit overview to consider a unit as Curated, the curation pane must contain an annotation for all positions that any of the annotators have annotated. This implies that the Curated state requires the curator to have made an annotation. It is not possible at this time to mark a unit as curated in which an annotator has made an annotator, but the curator has not (e.g. because the curator considers the annotator’s annotation to be entirely wrong and misplaced). |
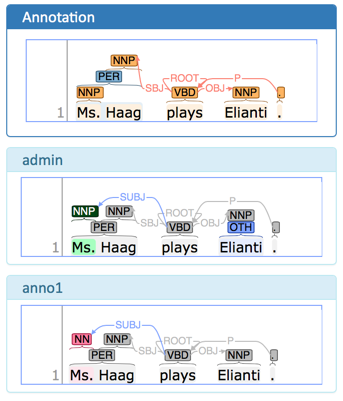
The center part of the annotation page is divided into the Annotation pane which is a full-scale annotation editor and contains the final data from the curation step.
Below it are multiple read-only panes containing the annotations from individual annotators. Clicking on an annotation in any of the annotator’s panes transfers the respective annotation to the Annotation pane. There is also a small state icon for each annotator. If you click on that icon, you can change the state, e.g. from finished back to in progress. Note if you do that, the respective annotators document will no longer be available for curation. When the last finished annotation for a document is reopened, you will be forced to leave curation.
When a document is opened for the first time in the curation page, the application analyzes agreements and disagreements between annotators. All annotations on which all annotators agree are automatically copied to the Annotation pane. Any annotations on which the annotators disagree are skipped.
The annotator’s panes are color-coded according to their relation with the contents of the Annotation pane and according to the agreement status. The colors largely match the colors also used in the status over in the left sidebar.
| The upper Annotation pane that the curator uses to edit annotations is not color-coded. It uses whatever coloring strategy is configured in the Settings dialog. |
Green |
Accepted by the curator: the annotation matches the corresponding annotation in the Annotation pane. |
Cyan |
Rejected by the curator: *the annotation does not match the corresponding annotation in the *Annotation pane. |
Orange |
Annotators agree: the annotators all agree but curator has not accepted the annotation yet (there is no corresponding annotation in the Annotation pane). |
Red |
Annotators disagree: the annotators disagree and the curator has not yet taken any action (there is also no corresponding annotation in the upper Annotation pane). |
Purple |
Annotation is incomplete: not all annotators have provided a annotation for this position and the curator has not yet taken any action (there is no corresponding annotation in the upper Annotation pane). |
Left-click on an annotation in one of the lower panels to merge it. This action copies the annotation to the upper panel. The merged annotation will turn green in the lower panel from which it was selected. If other annotators had a conflicting opinion, these will turn red in the lower panels of the respective annotators.
Right-click on an annotation in the lower panels to bring up a menu with additional options.
-
Merge all XXX: merge all annotations of the given type from the selected annotator. Note that this overrides any annotations of the type which may previously have been merged or manually created in the upper panel.
Merging strategies
INCEpTION supports several different strategies for pre-merging data from the annotators to the curated document. The default strategy is Merge completely agreeing non-stacked annotations, but this default can be changed by the project manager in the project settings. It is also possible to update the default settings from the Re-merge dialog on the curation page.
Merge completely agreeing non-stacked annotations
This merge strategy merges an annotation if all annotators have created an annotation and assigned the same label at a given position (i.e. complete and agreeing annotations). If any of the annotators did not create an annotation at the position or assigned a different label than any of the others, the annotation is not merged.
Annotator 1 |
Annotator 2 |
Merge result |
Reason |
|
|
merged |
agreement |
annotation without label |
annotation without label |
merged |
agreement |
|
no annotation |
not merged |
incomplete |
|
|
not merged |
disagreement |
anything |
anything |
not merged |
stacked |
Merge incomplete agreeing non-stacked annotations
This merge strategy merges an annotation if all annotators assigned the same label at a given position (i.e. annotations) even if not all annotators have created an annotation at that position. There are situations where it is desirable to merge annotations from all annotators for a given position, even if some did not provide it. For example, if your project has two annotators, one working on POS tagging and another working on lemmatization, then as a curator, you might simply want to merge the annotators from the two.
Annotator 1 |
Annotator 2 |
Annotator 3 |
Merge result |
Reason |
|
|
|
merged |
agreement |
annotation without label |
annotation without label |
annotation without label |
merged |
agreement |
|
|
no annotation |
merge |
incomplete agreement |
|
|
no annotation |
not merged |
incomplete disagreement |
|
|
|
not merged |
complete disagreement |
|
anything |
anything |
not merged |
stacked |
Merge using thresholds
This is the most powerful and flexible strategy. It is also the only strategy so far that supports merging stacked annotations.
The strategy is controlled by three parameters:
-
User threshold: the minimum amount of annotators that must have voted for a given label for the label to be considered at all. If fewer annotators have voted for the label, then it is completely ignored.
-
Confidence threshold: the minimum confidence of a label. The confidence for a label is calculated by counting the number of annotators that provided a given label dividing it by by the the total number annotators that annotated a given position (
votes(label) / all_votes</code>). The user threshold is applied before counting votes to calculate confidence. The confidence interacts with the number of valid labels you expect. E.g. if you expect that there could be four valid labels (and therefore set the top-voted parameter to4), then the best confidence that a single label can have achieve is25%(= 100% / 4). If you would set a higher threshold than this, it would never be possible to merge all four labels at a given position. -
Top-voted: how many labels are merged. When set to
1, only the single most-voted label is merged. If there is a tie on the most-voted label, then nothing is merged. When set to2or higher, the respectivenmost-voted labels are pre-merged. If there is any tie within thenmost-voted labels, then all labels that still meet the lowest score of the tie are merged as well. For example, if set to2and three annotators voted for labelXand another two anotators voted forYandZrespectively, thenYandZhave a tie at the second rank, so both of them are merged. Note that this setting only affects annotations on layers that allow stacking annotations. For other layers, an implicit setting of1is used here.
Anonymized curation
By default, the curator can see the annotators names on the curation page. However, in some cases, it may not be desirable for the curator to see the names. In this case, enable the option Anonymous curation in the project detail settings. Users with the curator role will then only see an anonymous label like Anonymized annotator 1 instead of the annotator names. Users who are project managers can still see the annotator names.
| The order of the annotators is not randomized - only the names are removed from the UI. Only annotators who have marked their documents as finished are shown. Thus, which annotator receives which number may changed depending on documents being marked as finished or put back into progress. |
Workload Management
The workload management determines which documents may be accessed and annotated by which users. It also provides an overview which documents have already been annotated and who annotated them. Curators and managers can access workload management.
Static assignment
Use static assignment if annotators should be able to freely choose which documents they want to annotate in which order and/or if you want to precisely control which annotator should be able to access which document.
To enable the static assignment workload manager, go to the Workload tab in the project settings.
In this mode, the workload management page allows you to monitor the progress of your annotation project. It also allows you to change the status of the annotation and curation documents. This allows you:
-
to control which users should annotator which documents,
-
to re-open document marked as finished so annotators can correct mistakes
-
to close documents to prevent annotators from further working on them
-
to reset documents so annotators can start over from scratch
Annotation state management
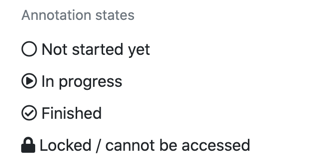
To change the annotation state of a document, click on the table cell in the row for the respective document and in the column for the respective user.
It is possible to discard all annotations by a user for a particular document by right-clicking on the table cell and choosing Reset. This is a permanent action that cannot be undone. The state is then set back to new and the user has to start over.
In order to lock a document for a user who has already started annotating, the document first needs to be reset and then it can be locked.
| Current state | New state |
|---|---|
Not started yet (new) |
Locked |
Locked |
Not started yet (new) |
In progress |
Finished |
Finished |
In progress |
Curation state management
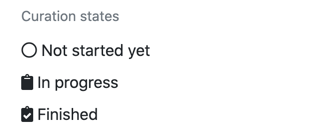
To change the curation state of a document, click on the table cell in the row for the respective document and in the column Curation.
It is possible to discard all the curation for particular document by right-clicking on the table cell and choosing Reset. This is a permanent action that cannot be undone. The state is then set back to new and the curation process has to start over.
| Current state | New state |
|---|---|
Not started yet (new) |
(no change possible until curation starts) |
In progress |
Finished |
Finished |
In progress |
Bulk changes
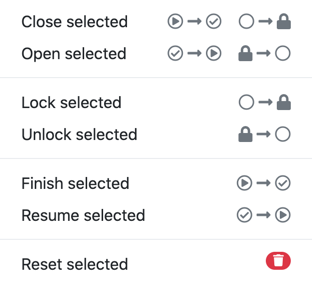
To facilitate management in projects with many users and documents, it is possible to enable the Bulk change mode by clicking the respective button in the table title.
In bulk-change mode, checkboxes appear for every row and every annotator column. These can be used to select the entire row and/or column. It is possible to select multiple rows/columns. The selected cells are highlighted in the table. Note that selecting a column means that all the rows for that column are selected, even though due to paging only a subset of them may visible at any time in the table. Also, if you select a row, that row remains selected even if you switch to another table page.
Once you have selected the document rows / annotator columns you want to change, use the dropdown menu next to the Bulk change button to select a bulk action.
When applying a bulk action, only those cells which permit the requested transition are affected. For example, image you select an annotator column containing documents that are new, in progress and some that are locked. Applying the Finish selected bulk action now will affect only the documents that are already in progress but not any of the new or locked documents.
To facilitate wrapping up annotations for a user or document, there is the combo action Close all which will lock any documents on which work has not started yet and mark and ongoing annotations as finished.
Filtering
It is possible to filter the table by document name and/or user name. If a filter has been set, then bulk actions are applied only to those rows and column which match the filter and which are selected for the bulk operation.
The document name and user name filters can be set in two ways: * "contains" match or * regular expression
The regular expression mode can be enabled by activating the checkbox (.) next to the
filter text field. For example, with the checkbox enabled, you could search for ^chapter01. to match
all documents whose name starts with chapter01 or for train|test to match all documents containing
train or test in their name.
Navigation between documents
By default, annotators and curators can navigate freely between accessible documents in the matrix workload mode. However, there can be cases where users should be directed from an external system only to specific documents and they should not be offered the ability to simply navigate to another document. In this case, the option Allow annotators to freely navigate between documents can be turned off in the matrix workload settings panel in the project settings.
| This only disables the navigation elements. Direct access to accessible documents through the URL is still possible. An external workload management system would need to explicitly lock documents to prevent users from accessing them. |
Ability to re-open documents
When an annotator marks a document as Finished, the document becomes uneditable for them. By default, the only way to re-open a document for further annotation is that a curator or project manager opens the workload management page and changes the state of the document there.
However, in some cases, it is more convenient if annotators themselves can re-open a document and continue editing it. The option Reopenable by annotators in the Settings dialog on the workload management can be enabled to allow annotators put finished documents back into the in progress state directly from the annotation page by clicking on the Finish/lock button in the action bar. If this option is enabled, the dialog that asks users to confirm that they wish to mark a document is finished is not shown.
| This option only allows annotators to re-open documents that they have closed themselves. If a document has been marked as finished by a project manager or curator, the annotators can not re-open it. On the workload management page, documents that have been explicitly closed by a curator/manager bear a double icon in their state column (e.g. finished (in progress)). |
Dynamic assgiment
Use dynamic assignment if you want to get your documents each annotated by a certain number of annotators and do not care about which annotator annotates which documents.
To enable the dynamic assignment workload manager, go to the Workload tab in the project settings.
When dynamic assignment is enabled, annotators can no longer actively choose which documents they want to annotate. Any functionality for opening a particular document or switching between documents on the annotation page are disabled. When the annotator opens the annotation page, a document is automatically selected for annotation. The only way to progress to the next document is by marking the current document as finished.
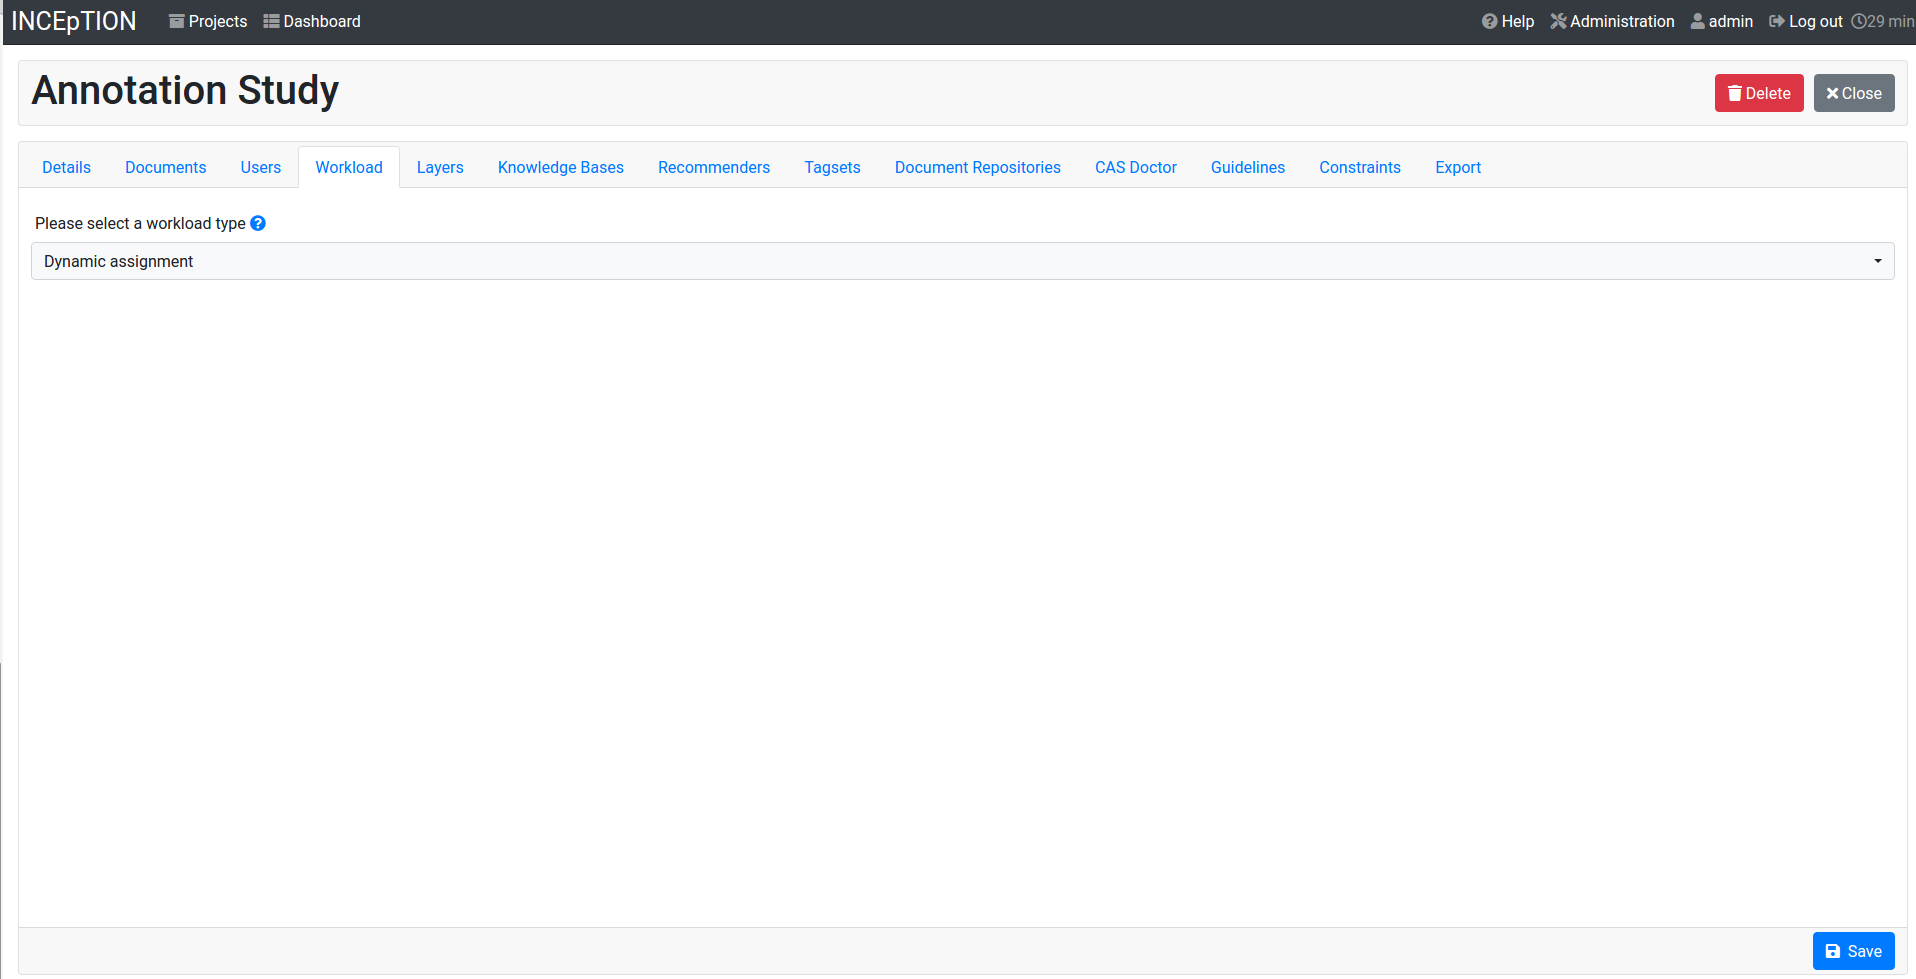
The dynamic workload management page gives the project manager a fast overview of all documents and users within the current project. Additionally, the automatic distribution of documents to annotators can be modified.
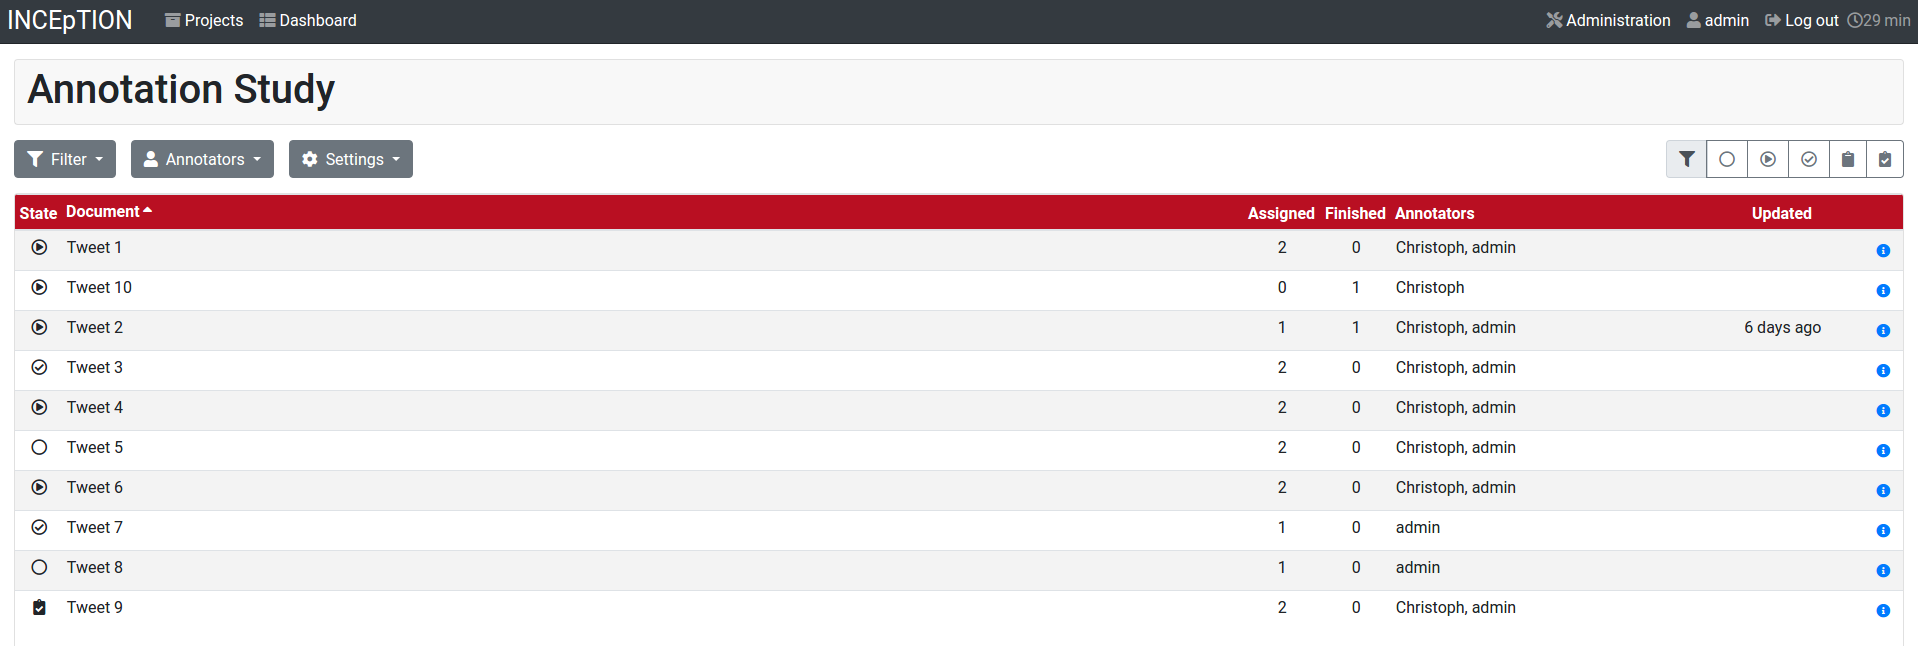
Therefore, it mainly consists of a substantial, but easy to understand table containing the data a project manager needs from their documents. This data is represented by a unique row for each individual document in the project. The following columns with the respective data are displayed:
-
State: state of the document within the project.
-
Document: document name.
-
Assigned: number of annotators, who are working currently on the document.
-
Finished: number of annotators, who have already finished their work on the document.
-
Annotators: names of all annotators, who are either working on the document or have already finished it.
-
Updated: time of the last change that has been made to the document. It either shows "today", "yesterday", "2 days ago" … , or when the last change is longer than 6 days ago, the exact date is shown.
You can also configure display and workload settings using the three buttons on the top left corner of the table: Filter, Annotators and Settings.
-
Filters: You can apply different filters to the document list e.g. show only documents that are annotated by one user or were working on in a specific time period. The filters are accumulative, which means that you can filter based on several criteria simultaneously.
-
Annotators: Allows to directly assign annotators to specific documents.
-
Settings: See below.
Finally, also a small quick filter is integrated to the workload page on the top right corner. Upon selecting different states, the table will be filtered towards these in real time. These states are the same as the ones represented in the first column State. As default, all states will be shown in the table.
Overall, the workload feature shall support annotation projects in their organization. Thanks to the table, the filtering and the options for the annotation workflow and the annotators, the project manager now has more flexibility and insight in his projects' progress. Also,the redesigned annotation flow ensures better results from the annotations, as the data will be better distributed throughout the project.
Click on an annotator badge in the annotators column to cycle through the annotation states. Right-click on the badge for additional actions such as the option to reset the annotations.
Dynamic workload settings
- Annotators per document
-
Controls how many annotators need to have marked a document as finished for the document to be considered as completely annotated. As soon as an annotator opens a document, the document becomes assigned to that user. A document will not automatically be assigned to more than the number of annotators configured here.
- Workflow policy
-
Controls the order in which documents are presented to annotators. Default workflow means, that the documents are simply passed to the annotators in alphabetical order. Randomized workflow, as the name already explains, selects randomly from all documents each time a new document is requested by an annotator.
- Handle abandoned documents
-
Whether to unassign a document from an annotator if the annotator has not marked the document as finished after a certain amount of time. If this option is not enabled, a manager or curator should regularly check the project status to ensure that no documents are stuck in an unfinished state because the assigned annotators do not work on them.
- Abandonation timeout
-
The number of minutes after the last update performed by an annotator before a document is considered to have been abandoned. Documents are never considered abandoned as long as the annotator is still logged into system. Typical settings are to consider a document as abandoned after 24 hours or 7 days.
- Abandonation state
-
The state into which to transition the document once it has been found to be abandoned. It is recommended to transition abandoned documents to the locked state. In this state, the document becomes available to other annotators, the annotations are not used e.g. in agreement calculations yet any annotations potentially already made by the annotator are kept. It is also possible to transition documents to the finished state. However, other annotators will then not get the option to complete the document and the (unfinished) annotations end up becoming available to e.g. the agreement calculations. Finally, it is possible to reset the document to the new state and to irrevocably discard any annotations the annotator may already have made. When an annotation has been found to be abandoned, it is marked with a yellow background and a person/clock symbol in the table. To take the annotations out of the abandoned state, you can right-click on the state badge to get a menu with possible actions. Select touch to update the annotation’s timestamp to the current time, taking the annotations out of the abandoned state with all annotations intact - this will give the annotator the opportunity to complete the annotations. After the abandoned state has been removed, you can also again click on the badge to change its state. You can also select reset to discard the annotations.
Agreement
| This functionality is only available to curators and managers. Agreement can only be calculated for span and relation layers. The set of available agreement measures depends on the layer configuration. |
This page allows you to calculate inter-annotator agreement between users. Agreement can be inspected on a per-feature basis and is calculated pair-wise between all annotators across all documents.
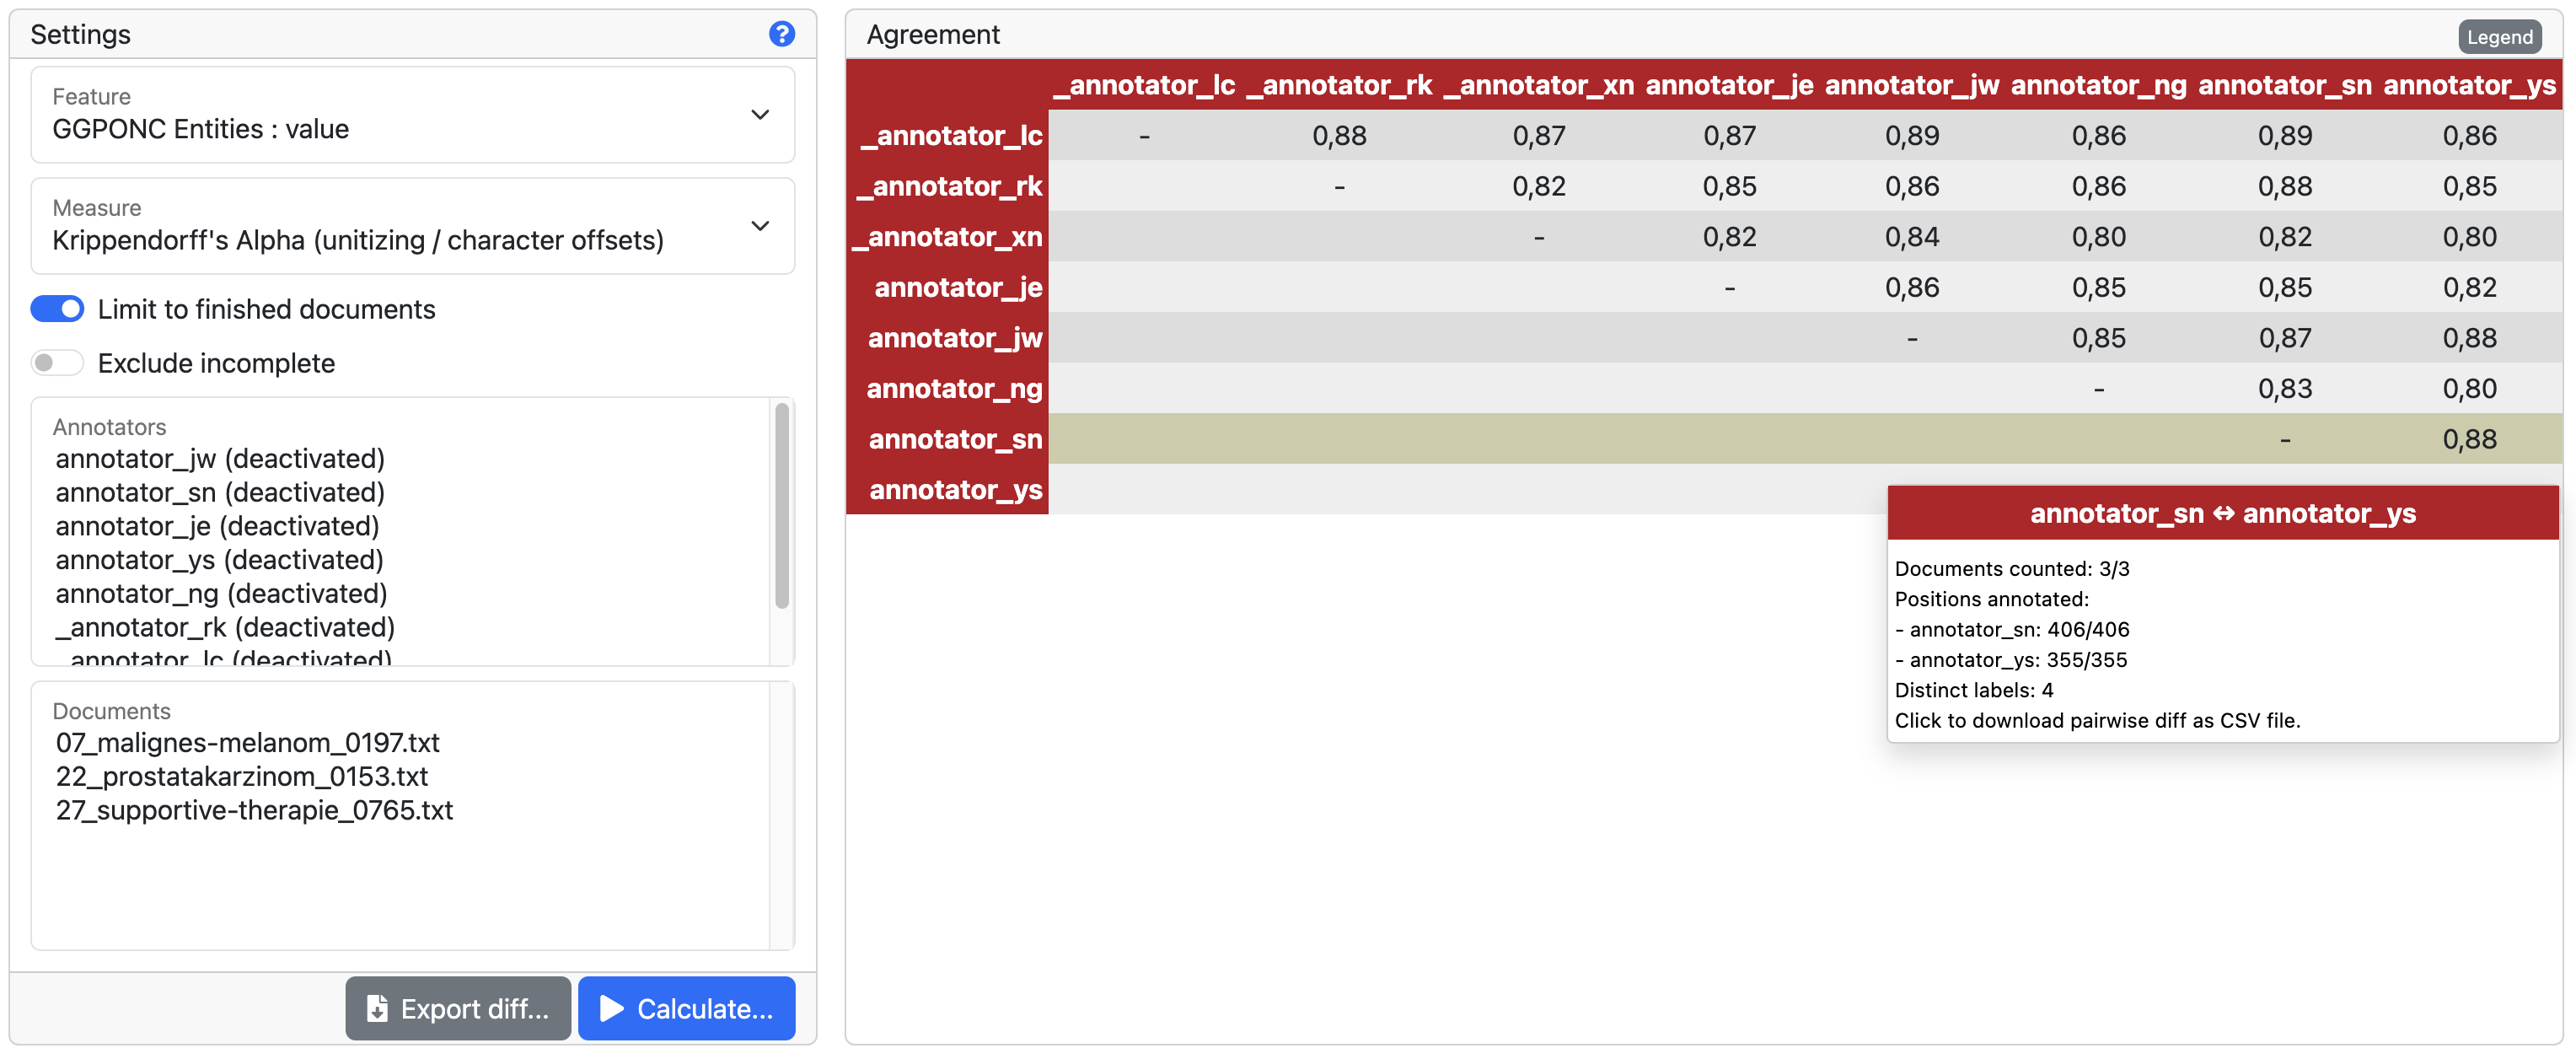
The Feature dropdown allows the selection of layers and features for which an agreement shall be computed.
A measure for the inter-annotator-agreement can be selected by opening the Measure dropdown menu. A short description of available measures and their differences follows in the Measures section.
Optionally, you can choose to limit the process to specific annotators or documents. If you do not make any selection here, all annotators and documents are considered. If you select annotators, at least two annotators must be selected. To select multiple annotators or documents, hold e.g. the Shift or CTRL/CMD keys while clicking depending on your browser and operating system.
The Calculate… button can be used to start the agreement calculation and the results will be shown in a Pairwise agreement matrix. Mind that the calculation may take a moment. You can inspect the progress of the calculation by clicking on the background tasks indicator in the page footer.
The Export diff… button can be used to export a CSV file comparing the annotations across all (selected) annotators and documents in a tabular fashion. Alternatively, a CSV file of the pair-wise comparison between two specific annotators can be exported by clicking on the agreement score in the upper triangle of the pairwise agreement table.
Measures
Several agreement measures are supported.
| Measure | Type | Short description |
|---|---|---|
Cohen’s kappa |
Coding |
Chance-corrected inter-annotator agreement for two annotators. The measure assumes a different probability distribution for all raters. Incomplete annotations are always excluded. |
Fleiss' kappa |
Coding |
Generalization of Scott’s pi-measure for calculating a chance-corrected inter-rater agreement for multiple raters, which is known as Fleiss' kappa and Carletta’s K. The measure assumes the same probability distribution for all raters. Incomplete annotations are always excluded. |
Krippendorff’s alpha (nominal) |
Coding |
Chance-corrected inter-rater agreement for multiple raters for nominal categories (i.e. categories are either equal (distance 0) or unequal (distance 1). The basic idea is to divide the estimated variance of within the items by the estimated total variance. |
Krippendorff’s alpha (unitizing) |
Unitizing |
Chance-corrected inter-rater agreement for unitizing studies with multiple raters. As a model for expected disagreement, all possible unitizations for the given continuum and raters are considered. Note that units coded with the same categories by a single annotator may not overlap with each other. |
Coding vs. Unitizing
Coding measures are based on positions. I.e. two annotations are either at the same position or not. If they are, they can be compared - otherwise they cannot be compared. This makes coding measures unsuitable in cases where partial overlap of annotations needs to be considered, e.g. in the case of named entity annotations where it is common that annotators do not agree on the boundaries of the entity. In order to calculate the positions, all documents are scanned for annotations and annotations located at the same positions are collected in configuration sets. To determine if two annotations are at the same position, different approaches are used depending on the layer type. For a span layer, the begin and end offsets are used. For a relation layer, the begin and end offsets of the source and target annotation are used. Chains are currently not supported.
Unitizing measures basically work by internally concatenating all documents into a single long virtual document and then consider partial overlaps of annotations from different annotations. I.e. there is no averaging over documents. The partial overlap agreement is calculated based on character positions, not on token positions. So if one annotator annotates the blackboard and another annotator just blackboard, then the partial overlap is comparatively high because blackboard is a longish word. Relation and chain layers are presently not supported by the unitizing measures.
Incomplete annotations
When working with coding measures, there is the concept of incomplete annotations. For a given position, the annotation is incomplete if at least one annotator has not provided a label. In the case of the pairwise comparisons that are used to generate the agreement table, this means that one annotator has produced a label and the other annotator has not. Due to the way that positions are generated, it also means that if one annotator annotates the blackboard and another annotator just blackboard, we are actually dealing with two positions (the blackboard, offsets 0-15 and blackboard, offsets 4-14), and both of them are incompletely annotated. Some measurs cannot deal with incomplete annotations because they require that every annotator has produced an annotation. In these cases, the incomplete annotations are excluded from the agreement calculation. The effect is that in the (the) blackboard example, there is actually no data to be compared. If we augment that example with some other word on which the annotators agree, then only this word is considered, meaning that we have a perfect agreement despite the annotators not having agreed on (the) blackboard. Thus, one should avoid measure that cannot deal with incomplete annotations such as Fleiss' kappa and Cohen’s kappa except for tasks such as part-of-speech tagging where it is known that positions are the same for all annotators and all annotators are required (not expected) to provide an annotation.
The agreement calculations considers an unset feature (with a null value) to be equivalent to a
feature with the value of an empty string. Empty strings are considered valid labels and are not
excluded from agreement calculation. Thus, an incomplete annotation is not one where the label is
missing, but rather one where the entire annotation is missing.
In general, it is a good idea to use at least a measure that supports incomplete data (i.e. missing labels) or even a unitizing measure which is able to produce partial agreement scores.
| Feature value annotator 1 | Feature value annotator 2 | Agreement | Complete |
|---|---|---|---|
|
|
yes |
yes |
|
|
no |
yes |
no annotation |
|
no |
no |
empty |
|
no |
yes |
empty |
empty |
yes |
yes |
null |
empty |
yes |
yes |
empty |
no annotation |
no |
no |
Stacked annotations
Multiple interpretations in the form of stacked annotations are not supported in the agreement calculation! This also includes relations for which source or targets spans are stacked.
Pairwise agreement matrix
To calculate the pairwise agreement, the measure is applied pairs of documents, each document containing annotations from one annotator. If an annotator has not yet annotated a document, the original state of the document after the import is considered. To calculate the overall agreement between two annotators over all documents, the average of the per-document agreements is used.
The lower part of the agreement matrix displays how many configuration sets were used to calculate agreement and how many were found in total. The upper part of the agreement matrix displays the pairwise agreement scores.
Annotations for a given position are considered complete when both annotators have made an
annotation. Unless the agreement measure supports null values (i.e. missing annotations),
incomplete annotations are implicitly excluded from the agreement calculation. If the agreement
measure does support incomplete annotations, then excluding them or not is the users' choice.
Evaluation Simulation
The evaluation simulation panel provides a visualization of the performance of the selected recommender with the help of a learning curve diagram. On the bottom right of the panel, the start button performs evaluation on the selected recommender using the annotated documents in the project and plots the evaluation scores against the training data size on the graph. The evaluation score can be one of the four metrics, Accuracy, Precision, Recall and F1. There is a drop down panel to change the metric. The evaluation might take a long time.
The training data use for the evaluation can be selected using the Annotator dropdown. Here, you can select to train on the annotations of a specific user. Selecting INITIAL_CAS trains on annotations present in the imported original documents. Selecting CURATION_USER trains on curated documents. The data is split into 80% training data and 20% test data. The system tries to split the training data in 10 blocks of roughly the same size. For each training run, an additional block is added to the training data for that run until in the last run, all training data is used.
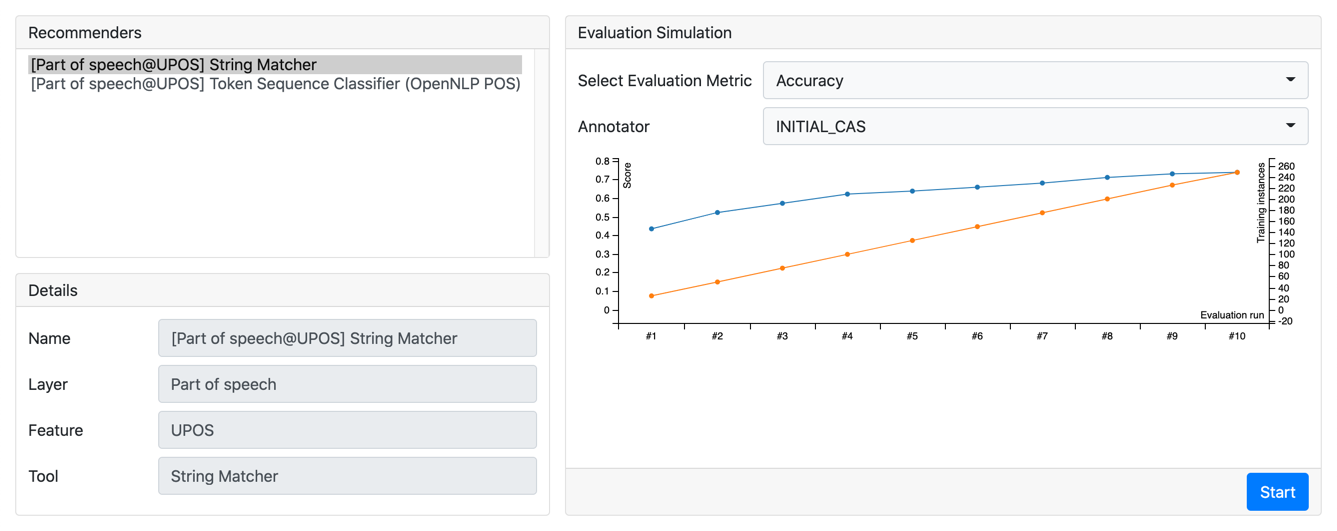
Knowledge Base
The knowledge base (KB) module of INCEpTION enables the user to create a KB from scratch or to import it from an RDF file. Alternatively, the user can connect to a remote KB using SPARQL. However, editing the content of remote KBs is currently not supported. This knowledge base can then be for instance used for entity linking.
This section briefly describes how to set up a KB in the KB management page on Projects Settings, explains the functionalities provided by the Knowledge Base page and covers the concept and property feature types.
| In order for a knowledge base to be searchable (e.g. from the Knowledge Base page), the configured knowledge base needs to have labels for all items (e.g. concepts, instances, properties) that should be found. |
Knowledge Base Page
The knowledge base page provides a concept tree hierarchy with a list of instances and statements, together with the list of properties as shown in the figure below. For local knowledge bases, the user can edit the KB contents here, which includes adding, editing and deleting concepts, properties, statements and instances.
The knowledge base page provides the specific mentions of concepts and instances annotated in the text in the Mentions panel which integrates the knowledge base page with the annotated text.
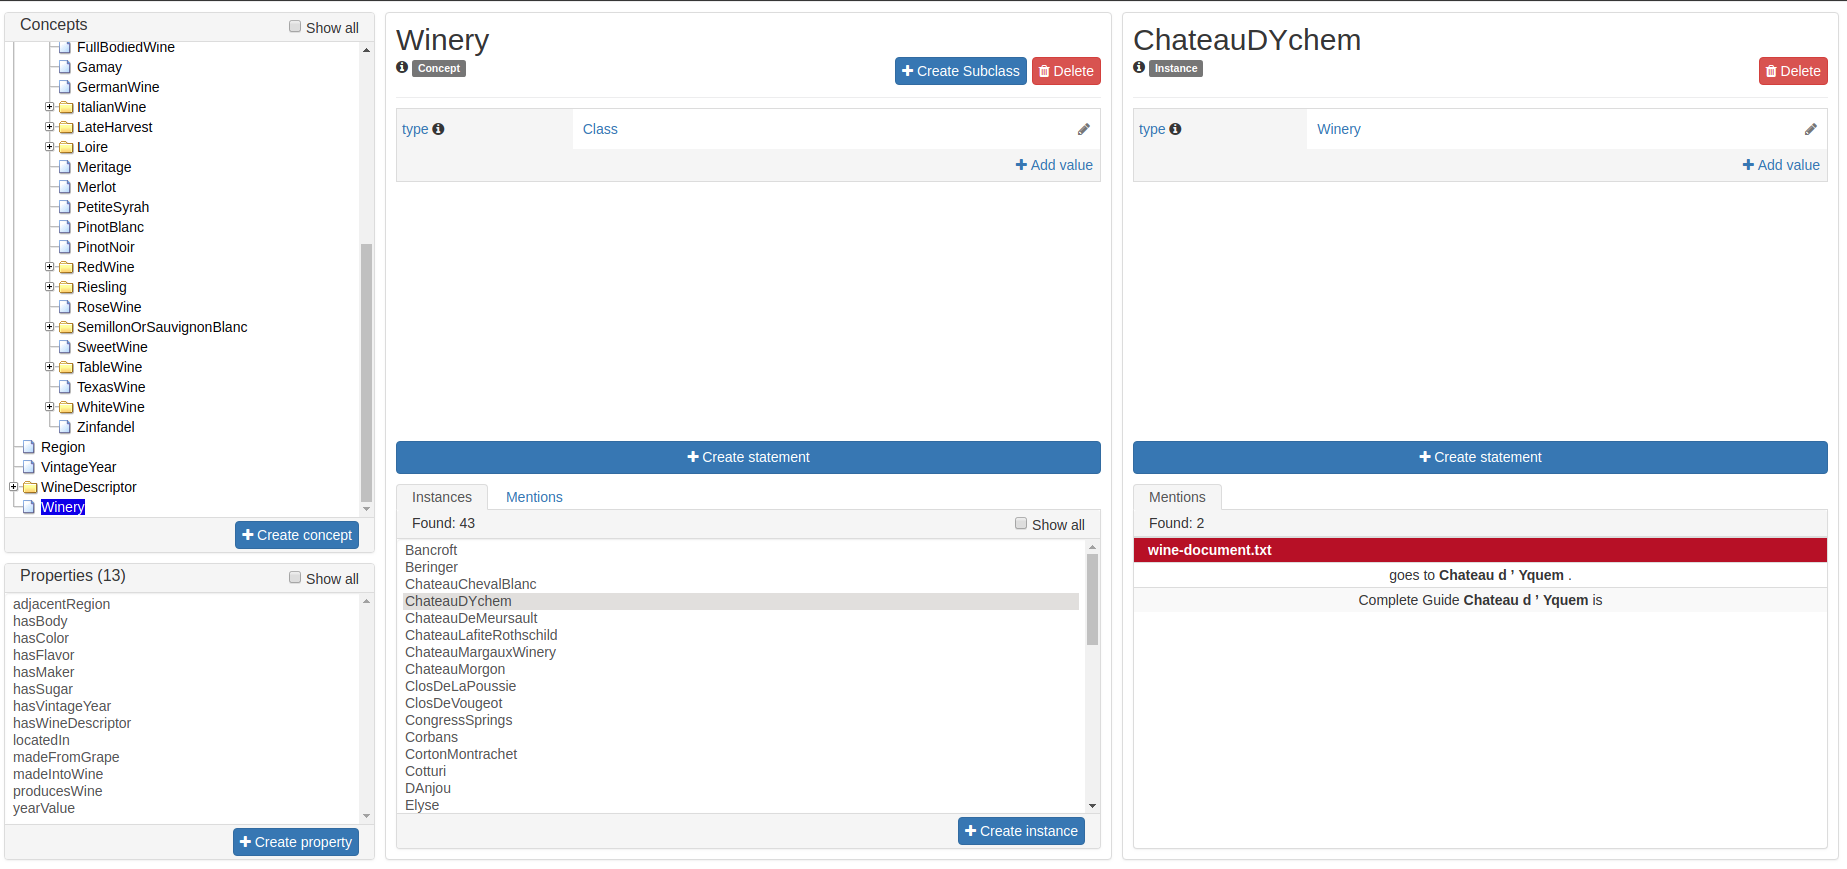
The concept tree in this page is designed using the subClass relationship for the configured mapping. Each concept associates itself with a list of instances (in case it has one) on the Instance panel which appear when we click on a specific concept along with the Mentions of the concept in the annotated text. The click on a specific instance shows the panel for the list of statements associated with the instance along with Mentions of the instance in the annotated text. In the left bottom side of the page, it lists the set of properties from the knowledge base. Clicking on the property showcases the statements associated with the property such as labels, domains, ranges, etc.
In case the user has the privilege to edit the knowledge base, the user may add statements for concepts, instances and properties.
Statement editors
INCEpTION allows the user to edit local knowledge bases. This includes adding statements or subclassing concepts and their instances.
In order to create a statement for a particular knowledge base entity, the Create Statement can be used.
When creating a new statement about an instance, a list of available properties is shown. After selecting the property of choice, the object of the statement has to be specified. The possible properties for a given subject are restricted by domain the domain of property, i.e. the property born_in would need an instance of human as the subject.
The same is true for the object of a statement: After choosing the property for a concept, the object has to be specified. The possible objects are limited by the range of the property if given. Right now, four different editors are available to specify features for:
-
Boolean: Allows either true or false
-
Numeric: Accepts integers or decimals
-
String: String with a language tag or an URI identifying a resource that is not in the knowledge base
-
KB Resource: This is provided as an option when the property has a range as a particular concept from the knowledge base. In this option, the user is provided with an auto-complete field with a list of knowledge base entities. This includes the subclass and instances of the range specified for the property.
Concept features
Concept features are features that allow referencing concepts in the knowledge base during annotation.
To create a new concept feature, a new feature has to be created under Projects Settings → Layers. The type of the new feature should be KB: Concept/Instance/Property. Features of this type also can be configured to either take only concepts, only instances, only properties or either (select any).
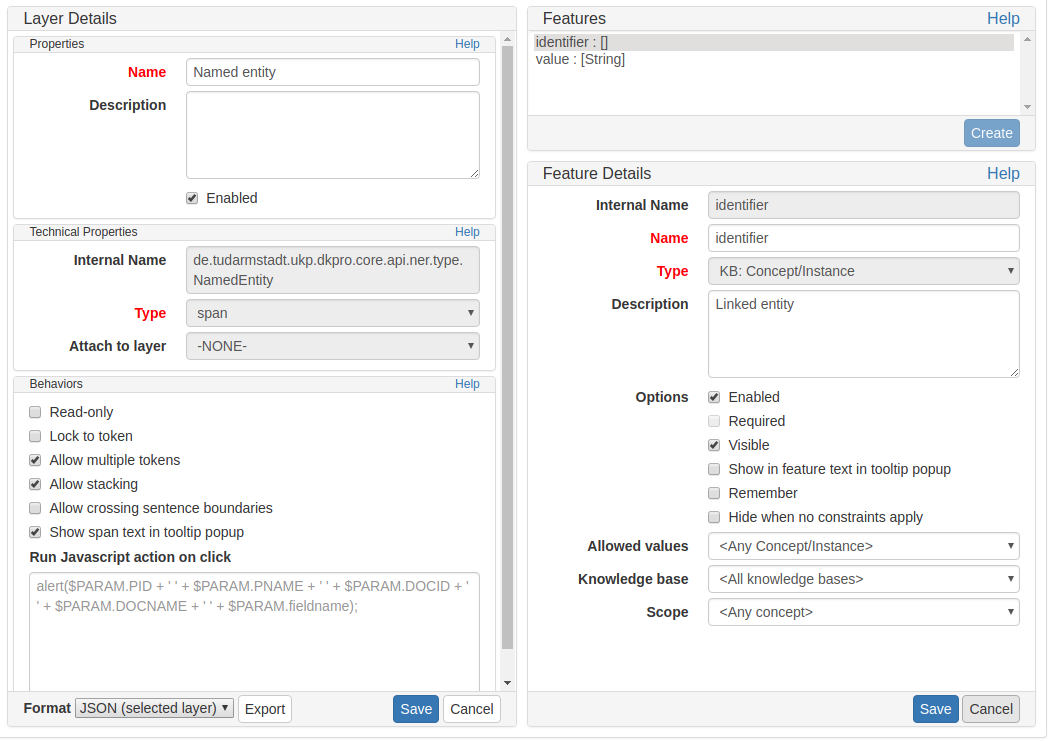
When creating a new annotation with this feature, then the user is offered a dropdown with possible entities from the knowledge base. This dropdown is then limited to only concepts or features or both when selecting the respective filter in the feature configuration.
The scope setting allows to limit linking candidates to a subtree of the knowledge base.
| Selecting scope means that full-text search cannot be used. This means that queries may become very slow if the scope covers a large number concepts or instances. Therefore, it is best not to choose too broad scopes. |
Projects
| This functionality is only available to managers of existing projects, project creators (users with the ability to create new projects), and administrators. Project managers only see projects in which they hold the respective roles. Project creators only see projects in which they hold the project manager role. |
This is the place to specify/edit annotation projects. You can either select one of the existing projects for editing, or click Create Project to add a project.
Click on Create Project to create a new project.

Here, you can specify the name of your project.
A suitable URL slug is automatically derived from the project name if you do not provide one yourself. The URL slug will be used in the browser URLs for the different pages belonging to the project. For example, if you project has the URL slug my-project, then it will be accessible under
an URL ending in /p/myproject. The URL slug must be unique for all projects. Only lower-case characters (a-z), numbers (0-9), dashes (-) and underscores (_) are allowed for the slug. Also, it must be at least 3 characters and can be at most 40 characters long. The slug must start with a letter.
Finally, you can provide a project description here which is displayed on the project dashboard.
When you have not save the project yet, you can cancel the creation of the project via the Close button. To delete a project after you have saved (i.e. created) it, use the Delete button.
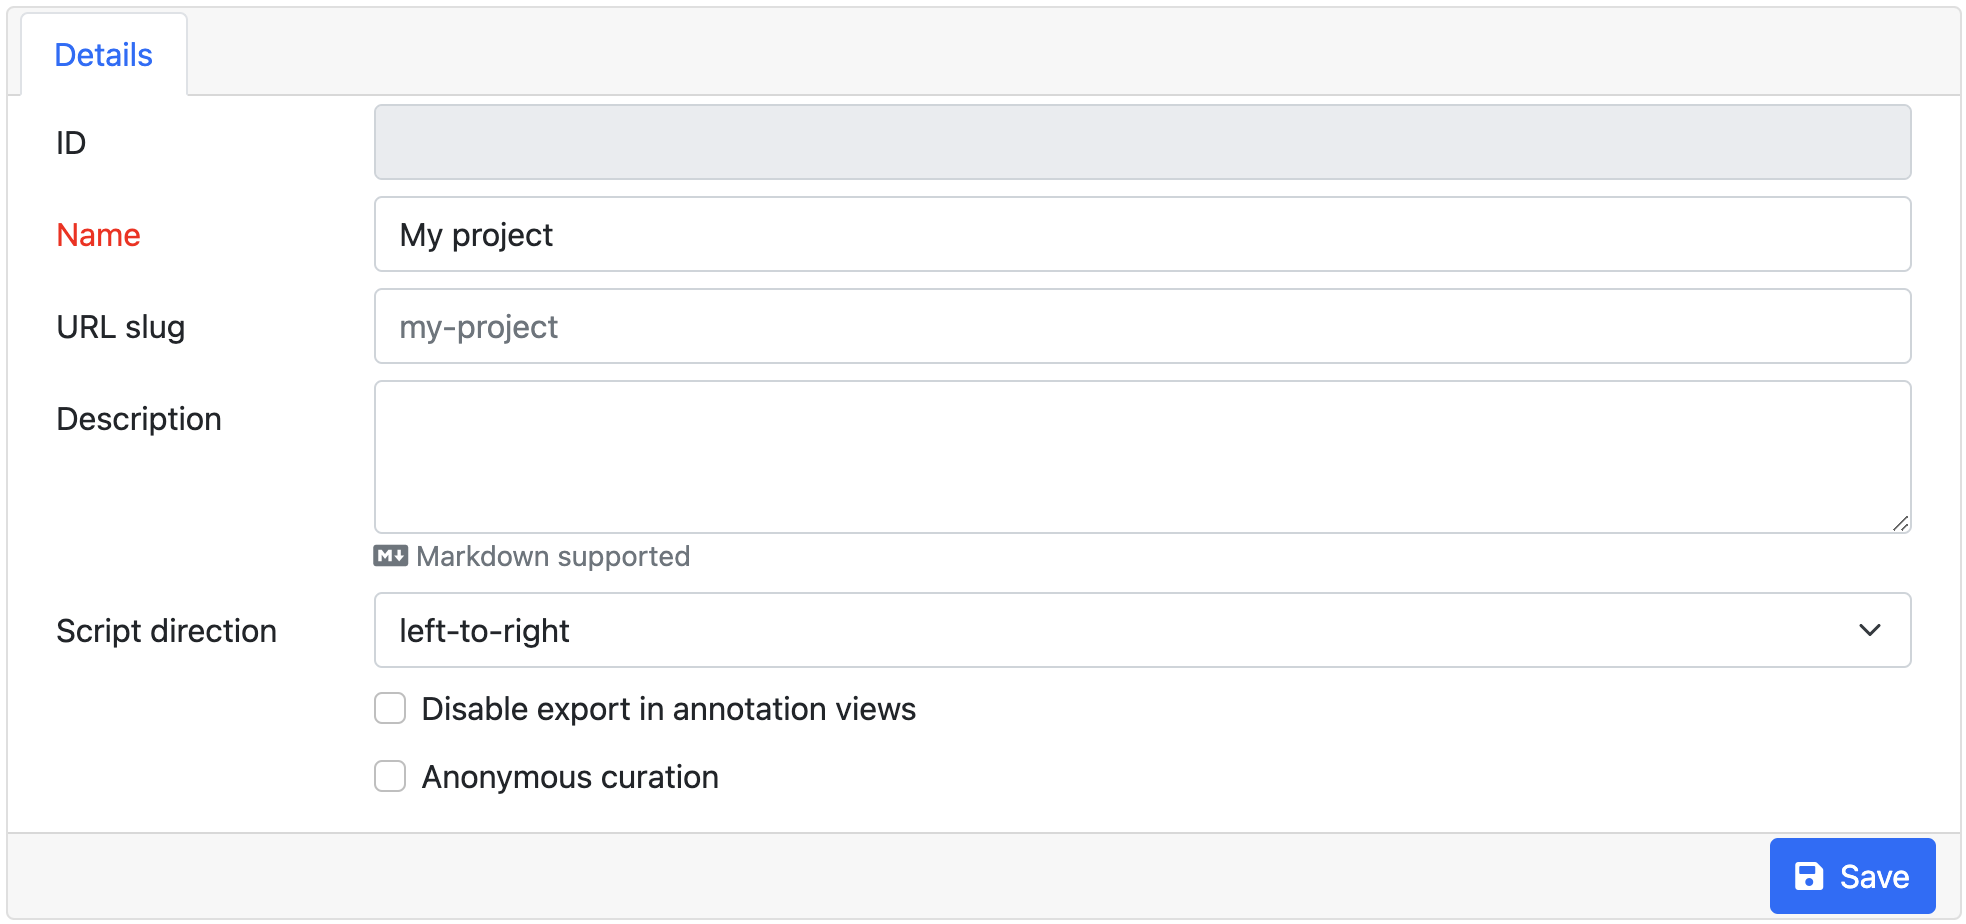
After saving the project, additional panes will appear where you can further configure the project.
Import
Here, you can import project archives such as the example projects provided on our website or projects exported from the Export tab.
When a user with the role project creator imports a project, that user automatically becomes a manager of the imported project. However, no permissions for the project are imported!
| If the current instance has users with the same name as those who originally worked on the import project, the manager can add these users to the project and they can access their annotations. Otherwise, only the imported source documents are accessible. |
When a user with the role administrator imports a project, the user can choose whether to import the permissions and whether to automatically create users who have permissions on the imported project but so far do not exist. If this option to create missing users disabled, but the option to import permissions is enabled, then projects still maintain their association to users by name. If the respective user accounts are created manually after the import, the users will start showing up in the projects.
| Automatically added users are disabled and have no password. They must be explicitly enabled and a password must be set before the users can log in. |
Users
After clicking on the Users tab, you are displayed with a new pane in which you can add new users by clicking on the Add users text field. You get a dropdown list of enabled users in the system which can be added to the project. Any users which are already part of the project are not offered. As you type the dropdown list with the users is filtered to match your input. By clicking on a username or by pressing enter you can select the corresponding user. You can keep typing to add more users to the project. When you press the Add button the selected users are added to your project.

| For privacy reasons, the administrator may choose to restrict the users shown in the dropdown. If this is the case, you have to enter the full name of a user before it appears in the dropdown and can be added. |
By default, the users are added to the project as annotators. If you want to assign additional roles, you can do so by clicking on the user and then on Permissions pane select the appropriate permissions.

After ticking the wished permissions, click on Save. To remove a user, remove all the permissions and then click on Save.
Documents
The documents in a project can be managed on the documents panel.
To upload one or more documents, use the folder icon in the Files to import field. A browser dialog will open which allows you to navigate to some folder on your computer, select files, and then upload them. Typically, you can select multiple files in this dialog either by holding the control key on your keyboard then then selecting them one-by-one with the mouse - or by clicking on the first file, then holding shift on the keyboard and then clicking on the last file - thereby selecting all files in between the two. Note that if you upload multiple files, they must all have the same format.
After selecting the files, use the Format dropdown to choose which format your files are in. A project can contain files in different formats.
Finally, use the Import button to upload the files and add them to the project.

To delete a document from the project, you have to click on it and then click on Delete in the right lower corner. Again, you can select multiple files for deletion using with the aid of the control or shift keys on the keyboard.
While it is possible to upload multiple documents at once, there are limits to how many documents can be uploaded in a single upload operation. For a start, it can take quite some time to upload thousands of documents. Also, the server configuration limits the individual file size and total batch size (the default limit is 100MB for both). Finally, browsers differ in their capability of dealing with large numbers of documents in an upload. In a test with 5000 documents of each ca. 2.5kb size including Chrome, Safari and Firebird, only Chrome (80.0.3987.122) completed the operation successfully. Safari (13.0.5) was only able to do upload about 3400 documents. Firebird (73.0.1) froze during the upload and was unable to deliver anything to the server. With a lower number of documents (e.g. 500), none of the browsers had any problems.
Layers
All annotations belong to an annotation layer. Each layer has a structural type that defines if it is a span, a relation, or a chain. It also defines how the annotations behave and what kind of features it carries.
Creating a custom layer
This section provides a short walk-through on the creation of a custom layer. The following sections act as reference documentation providing additional details on each step. In the following example, we will create a custom layer called Sentiment with a feature called Polarity that can be negative, neutral, or positive.
-
Create the layer Sentiment
-
Go to the Layers tab in your project’s settings and press the Create layer button
-
Enter the name of the layer in Layer name: Sentiment
-
Choose the type of the layer: Span
-
Enable Allow multiple tokens because we want to mark sentiments on spans longer than a single token.
-
Press the Save layer button
-
-
Create the feature Polarity
-
Press the New feature button
-
Choose the type of the feature: Primitive: String
-
Enter the name of the feature: Polarity
-
Press Save feature
-
-
Create the tagset Polarity values
-
Go to the Tagsets tab and press Create tagset
-
Enter the name of the tagset: Polarity values
-
Press Save tagset
-
Press Create tag, enter the name of the tag: negative, press Save tag
-
Repeat for neutra and positive
-
-
Assign the tagset Polarity values to the feature Polarity
-
Back in the Layers tab, select the layer: Sentiment and select the feature: Polarity
-
Set the tagset to Polarity values
-
Press Save feature
-
Now you have created your first custom layer.
Built-in layers
INCEpTION comes with a set of built-in layers that allow you to start annotating immediately. Also, many import/export formats only work with these layers as their semantics are known. For this reason, the ability to customize the behaviors of built-in layers is limited and it is not possible to extend them with custom features.
| Layer | Type | Enforced behaviors |
|---|---|---|
Chunk |
Span |
Lock to multiple tokens, no overlap, no sentence boundary crossing |
Coreference |
Chain |
(no enforced behaviors) |
Dependency |
Relation over POS, |
Any overlap, no sentence boundary crossing |
Lemma |
Span |
Locked to token offsets, no overlap, no sentence boundary crossing |
Named Entity |
Span |
(no enforced behaviors) |
Part of Speech (POS) |
Span |
Locked to token offsets, no overlap, no sentence boundary crossing |
The coloring of the layers signal the following:
| Color | Description |
|---|---|
green |
built-in annotation layer, enabled |
blue |
custom annotation layer, enabled |
red |
disabled annotation layer |
To create a custom layer, select Create Layer in the Layers frame. Then, the following frame will be displayed.
At times, it is useful to export the configuration of a layer or of all layers, e.g. to copy them to another project. There are two options:
-
JSON (selected layer): exports the currently selected layer as JSON. If the layer depends on other layers, these are included as well in the JSON export.
-
UIMA (all layers): exports a UIMA type system description containing all layers of the project. This includes built-in types (i.e. DKPro Core types) and it may include additional types required to allow loading the type system description file again. However, this type system description is usually not sufficient to interpret XMI files produced by INCEpTION. Be sure to load XMI files together with the type system description file which was included in the XMI export.
Both types of files can be imported back into INCEpTION. Note that any built-in types that have have been included in the files are ignored on import.
Properties
| Property | Description |
|---|---|
Name |
The name of the layer (obligatory) |
Type |
The type of the layer (see below) |
Description |
A description of the layer. This information will be shown in a tooltip when the mouse hovers over the layer name in the annotation detail editor panel. |
Enabled |
Whether the layer is enabled or not. Layers can currently not be deleted, but they can be disabled. |
| When a layer is first created, only ASCII characters are allowed for the layer name because the internal UIMA type name is derived from the initial layer name. After the layer has been created, the name can be changed arbitrarily. The internal UIMA type name will not be updated. The internal UIMA name is e.g. used when exporting data or in constraint rules. |
The layer type defines the structure of the layer. Three different types are supported: spans, relations, and chains.
| Type | Description | Example |
|---|---|---|
Span |
Continuous segment of text delimited by a start and end character offset. The example shows two spans. |
|
Relation |
Binary relation between two spans visualized as an arc between spans. The example shows a relation between two spans. For relation annotations the type of the spans which are to be connected can be chosen in the field Attach to layer. Here, only non-default layers are displayed. To create a relation, first the span annotation needs to be created. |
|
Chain |
Directed sequence of connected spans in which each span connects to the following one. The example shows a single chain consisting of three connected spans. |
|
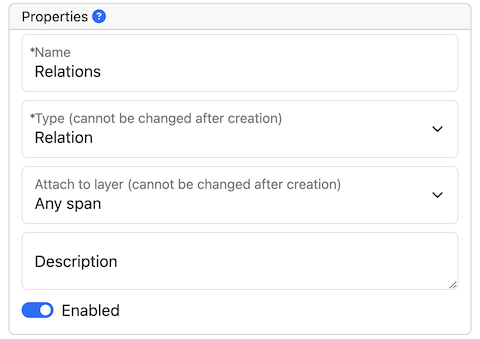
Behaviours
| Behavior | Description |
|---|---|
Read-only |
The layer may be viewed but not edited. |
Show text on hover |
Whether the text covered by the annotation is shown in the popup panel that appears when hovering with the mouse over an annotation label. Note that this popup may not be supported by all annotation editors. |
Render mode (relation) |
Determines when to render relations as arcs. Possible settings are Always (always render arcs), Never (never render arcs), and When selected (render arcs only when one of the relation endpoints or the relation itself is selected). Note that this setting is only available for relation layers. |
Validation |
When pre-annotated data is imported or when the behaviors settings are changed, it is possible that annotations exist which are not conforming to the current behavior settings. This setting controls when a validation of annotations is performed. Possible settings are Never (no validation when a user marks a document as finished) and Always (validation is performed when a user marks a document as finished). Mind that changing the document state via the Monitoring page does not trigger a validation. Also, problematic annotations are highlighted using an error marker in the annotation interface. NOTE: the default setting for new projects/layers is Always, but for any existing projects or for projects imported from versions of INCEpTION where this setting did not exist yet, the setting is initialized with Never. |
Granularity (span, chain) |
The granularity controls at which level annotations can be created. When set to Character-level, annotations can be created anywhere. Zero-width annotations are permitted. When set to Token-level or Sentence-level annotation boundaries are forced to coincide with token/sentence boundaries. If the selection is smaller, the annotation is expanded to the next larger token/sentence covering the selection. Again, zero-width annotations are permitted. When set to Single tokens only may be applied only to a single token. If the selection covers multiple tokens, the annotation is reduced to the first covered token at a time. Zero-width annotations are not permitted in this mode. Note that in order for the Sentence-level mode to allow annotating multiple sentences, the Allow crossing sentence boundary setting must be enabled, otherwise only individual sentences can be annotated. |
Overlap |
This setting controls if and how annotations may overlap. For span layers, overlap is defined in terms of the span offsets. If any character offset that is part of span A is also part of span B, then they are considered to be overlapping. If two spans have exactly the same offsets, then they are considered to be stacking. For relation layers, overlap is defined in terms of the end points of the relation. If two relations share any end point (source or target), they are considered to be overlapping. If two relations have exactly the same end points, they are considered to be stacking. Note that some export formats are unable to deal with stacked or overlapping annotations. E.g. the CoNLL formats cannot deal with overlapping or stacked named entities. |
Allow crossing sentence boundary |
Allow annotations to cross sentence boundaries. |
Behave like a linked list (chain) |
Controls what happens when two chains are connected with each other. If this option is disabled, then the two entire chains will be merged into one large chain. Links between spans will be changed so that each span connects to the closest following span - no arc labels are displayed. If this option is enabled, then the chains will be split if necessary at the source and target points, reconnecting the spans such that exactly the newly created connection is made - arc labels are available. |
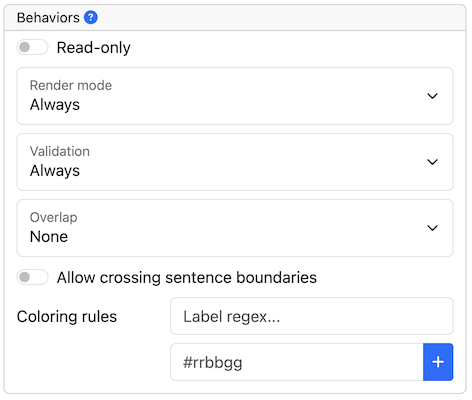
Features
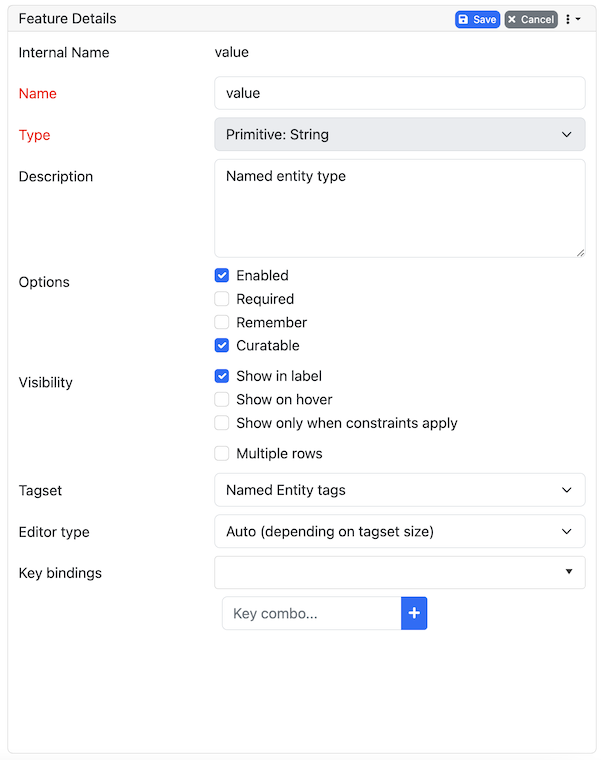
In this section, features and their properties can be configured.
| When a feature is first created, only ASCII characters are allowed for the feature name because the internal UIMA name is derived from the initial layer name. After the feature has been created, the name can be changed arbitrarily. The internal UIMA feature name will not be updated. The internal UIMA name is e.g. used when exporting data or in constraint rules. |
| Features cannot be added to or deleted from built-in layers. |
The following feature types are supported.
| Type | Description |
|---|---|
|
Textual feature that can optionally be controlled by a tagset. It is rendered as a text field or as a combobox if a tagset is defined. |
|
Boolean feature that can be true or false and is rendered as a checkbox. |
|
Numeric feature for integer numbers. |
|
Numeric feature for decimal numbers. |
|
Link feature that can point to any arbitrary span annotation |
other span layers (Span layers) |
Link feature that can point only to the selected span layer. |
| Property | Description |
|---|---|
Internal name |
Internal UIMA feature name |
Type |
The type of the feature (obligatory, see below) |
Name |
The name of the feature (obligatory) |
Description |
A description that is shown when the mouse hovers over the feature name in the annotation detail editor panel. |
Enabled |
Features cannot be deleted, but they can be disabled |
Show in label |
Whether the feature value is shown in the annotation label. If this is disabled, the feature is only visible in the annotation detail editor panel. |
Show on hover |
Whether the feature value is shown in the popup panel that appears when hovering with the mouse over an annotation label. Note that this popup may not be supported by all annotation editors. |
Remember |
Whether the annotation detail editor should carry values of this feature over when creating a new annotation of the same type. This can be useful when creating many annotations of the same type in a row. |
Curatable |
Whether the feature is considered when comparing whether annotations are equal and can be pre-merged during curation. This flag is enabled by default. When it is disabled, two annotations will be treated as the same for the purpose of curation, even if the feature value is different. The feature value will also not be copied to a pre-merged or manually merged annotation. Disabling this flag on all features of a layer will cause annotations to be only compared by their positions. |
String features
A string feature either holds a short tag (optionally from a restricted tag set) or a note (i.e. a multi-line text).
When no tagset is associated with the string feature, it is displayed to the user simply as a single line input field. You can enable the multiple rows option to turn it into a multi-line text area. If you do so, additional options appear allowing to configure the size of the text area which can be fixed or dynamic (i.e. automatically adjust to the text area content).
Optionally, a tagset can be associated with a string feature (unless you enabled multiple rows). If string feature is associated with a tagset, there are different options as to which type of editor type (i.e. input field) is displayed to the user.
| Editor type | Description |
|---|---|
Auto |
An editor is chosen automatically depending on the size of the tagset and whether annotators can add to it. |
Radio group |
Each tag is shown as a button. Only one button can be active at a time. Best for quick access to small tagsets. Does not allow annotators to add new tags (yet). |
Combo box |
A text field with auto-completion and button that opens a drop-down list showing all possible tags and their descriptions. Best for mid-sized tagsets. |
Autocomplete |
A text field with auto-completion. A dropdown opens when the user starts typing into the field and it displays matching tags. There is no way to browse all available tags. Best for large tagsets. |
The tagset size thresholds used by the Auto mode to determine which editor to choose can be
globally configured by an administrator via the settings.properties
file. Because the radio group editor does not support adding new tags (yet), it chosen automatically
only if the associated tagset does not allow annotators to add new tags.
| Property | Description |
|---|---|
Tagset |
The tagset controlling the possible values for a string feature. |
Show only when constraints apply |
Display the feature only if any constraint rules apply to it (cf. Conditional features) |
Editor type |
The type of input field shown to the annotators. |
Multiple Rows |
If enabled the textfield will be replaced by a textarea which expands on focus. This also enables options to set the size of the textarea and disables tagsets. |
Dynamic Size |
If enabled the textfield will dynamically resize itself based on the content. This disables collapsed and expanded row settings. |
Collapsed Rows |
Set the number of rows for the textarea when it is collapsed and not focused. |
Expanded Rows |
Set the number of rows for the textarea when it is expanded and not focused. |
Number features
| Property | Description |
|---|---|
Limited |
If enabled a minimum and maximum value can be set for the number feature. |
Minimum |
Only visible if Limited is enabled. Determines the minimum value of the limited number feature. |
Maximum |
Only visible if Limited is enabled. Determines the maximum value of the limited number feature. |
Editor Type |
Select which editor should be used for modifying this features value. |
Link features
| Property | Description |
|---|---|
Role labels |
Allows users to add a role label to each slot when linking anntations. If disabled the UI labels of annotations will be displayed instead of role labels. This property is enabled by default. |
Multiplicity |
Determines how links are compared to each other e.g. when calulating agreement or when merging annotations during curation. Use Target can be linked in multiple different roles if a link target can appear in multiple roles with respect to the same source span. In this mode, if an annotator links multiple targets using the same role, the links will be considered stacked and not be not auto-merged by curation or used for agreement calculation. Use Target should be linked in only one role if you expect that a link target should only appear in a single roles with respect to the same source span. In this mode, if an annotator links the same target in multiple roles, the links will be considered stacked and not be auto-merged by curation or used for agreement calculation. Use Target can be linked in multiple roles (same or different) if you expect that a link target should be linked multiple times with different roles as well as different targets can be linked with the same role. In this mode, there is no stacking. |
Tagset |
The tagset controlling the possible values for the link roles. |
Default slots |
For each of the specificed roles, an empty slot will be visible in the UI. This can save the annotator time to create a slot for frequently used slots. |
Key bindings
Some types of features support key bindings. This means, you can assigning a combination of keys to a
particular feature value. Pressing these keys on the annotation page while a annotation is selected
will set the feature to the assigned value. E.g. you could assign the key combo CTRL P to the
value PER for the value feature on the Named Entity layer. So when you create a Named Entity
annotation and then press the CTRL P, the value would be set to PER.
If the focus is on an input field, the key bindings are suppressed. That means, you could even
assign single key shortcuts like p for PER while still be able to use p when entering text
manually into an input field. Normally, the focus would jump directly to the first feature editor
after selecting an annotation. But this is not the case if any features have key bindings defined,
because it would render the key bindings useless (i.e. you would have to click outside of the
feature editor input field so it looses the focus, thus activating the key bindings).
When defining a key binding, you have to enter a key combo consisting of one or more of the following key names:
-
Modifier keys:
Ctrl,Shift,Alt,Meta -
Letter keys:
a,b,c,d,e,f,g,h,i,j,k,l,m,n,o,p,q,r,s,t,u,v,w,x,y,z -
Number keys:
0,1,2,3,4,5,6,7,8,9 -
Function keys:
F1,F2,F3,F4,F5,F6,F7,F8,F9,F10,F11,F12 -
Navigation keys:
Home,End,Page_up,Page_down,Left,Up,Right,Down -
Other keys:
Escape,Tab,Space,Return,Enter,Backspace,Scroll_lock,Caps_lock,Num_lock,Pause,Insert,Delete
Typically you would combine zero or more modifier keys with a regular key (letter, number, function key, etc). A combination of multiple number or letter keys does not work.
| Mind that you need to take care not to define the same key binding multiple times. Duplicate definitions are only sensible if you can ensure that the features on which they are defined will never be visible on screen simultaneously. |
Coloring rules
Coloring rules can be used to control the coloring of annotations. A rule consists of two parts: 1) a regular expression that matches the label of an annotation, 2) a hexadecimal color code.
A simple color rule could be use the pattern PER and the color code #0000ff (blue). This would
display all annotations with the label PER on the given layer in blue.
In order to assign a specific color to all annotations from the given layer, use the pattern .*.
It is also possible to assign a color to multiple label at once by exploiting the fact that the
pattern is a regular expression. E.g. PER|OTH would match annotations with the label PER as well
as with the label OTH. Mind not to add extra space such as PER | OTH - this would not work!
Be careful when creating coloring rules on layers with multiple features. If there are two features
with the values a and b, the label will be a | b. In order to match this label in a coloring
rule, the pipe symbol (|) must be escaped - otherwise it is interpreted as a regular expression
OR operator: a \| b.
Remote Lookup Feature
Experimental feature. To use this functionality, you need to enable it first by adding annotation.feature-support.lookup.enabled=true to the settings.properties file.
|
A remote lookup feature is basically a string feature, but it can query an external service for possible values. The feature editor is a auto-complete field. When the user starts entering a value into that field, it is sent to a configurable remote URL as a query. The expectation is that the response from the remote service is a JSON structure that contains possible completions.
A remote lookup service must support a lookup and a query functionality:
Title |
Query |
Method |
GET |
Consumes |
none |
Produces |
application/json;charset=UTF-8 |
URL params |
|
Data params |
none |
Success response |
|
Title |
Lookup |
Method |
GET |
Consumes |
none |
Produces |
application/json;charset=UTF-8 |
URL params |
|
Data params |
none |
Success response |
|
Error response |
|
Annotation
Here the project manager can configure settings that affect the experience on the annotation page.
Default sidebar
Certain functionalities such as for example document-level annotations are accessible via a sidebar on the annotation page. A project manager may choose a default sidebar here which will be expanded by default when a new annotator opens a document for annotation. Note that this does not affect any annotators that are already working in the current project. Thus, the manager should set the default sidebar before adding annotators to the project. Not all pipelines are available to all users. If the selected default sidebar is not available to a user, this setting has no effect. A typical use for this setting is to set the document metadata sidebar as the default sidebar such that annotators can open a document and immediately edit the document-level annotations without first having to search for the sidebar.
Annotation sidebar
This setting allows configuring groups which are always visible in the annotation sidebar on the annotation page when the sidebar is in group by label mode.
Consider a situation where annotators should always locate one or more mentions of a particular concept in every document. Configuring the labels of these concepts as pinned groups will show them in the sidebar, even if the annotator has not yet created an annotation for them. This can help the annotator to see which concepts still need to be located and annotated in the text.
This functionality can also be used to enforce a particular order of groups if the automatic alphabetic sorting is not convenient.
Note that groups are formed by the label of an annotation which consists of the concatenated feature values. Thus, for annotations that have multiple features included in their labels, you need to pay close attention to exactly match the rendered labels in your pinned groups (wildcards are not supported!). You might consider excluding non-essential features from the label by unchecking the option Visible in the settings for the respective feature.
Knowledge Bases
In the Projects Settings, switch to the Knowledge Bases tab, then click New… on the bottom and a dialogue box shows as in the figure below.
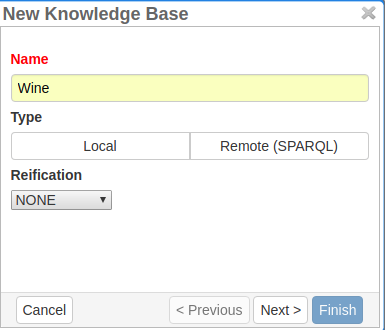
To create a local or remote knowledge base, one needs to choose Local or Remote for the type. For the reification, NONE is the default case, but to support qualifiers, one needs to choose WIKIDATA.
For the local KB, the user can optionally choose a RDF file from which to import the initial data. Alternatively, the user can skip the step to create an empty KB to create a knowledge base from scratch. It is also always possible to import data from an RDF file after the creation of a KB. It is also possible to multiple RDF files into the same KB, one after another.
For remote KBs, INCEpTION provides the user with some pre-configured knowledge base such as WikiData, British Museum, BabelNet, DBPediaa or Yago. The user can also set up a custom remote KB, in which case the user needs to provide the SPARQL endpoint URL for the knowledge base as in the figure below.
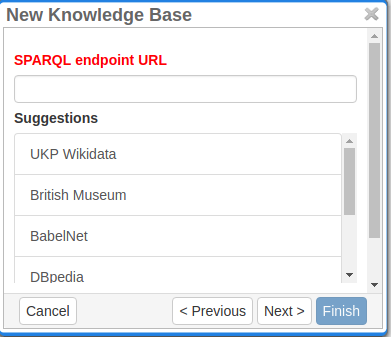
Settings
There are various settings for knowledge bases.
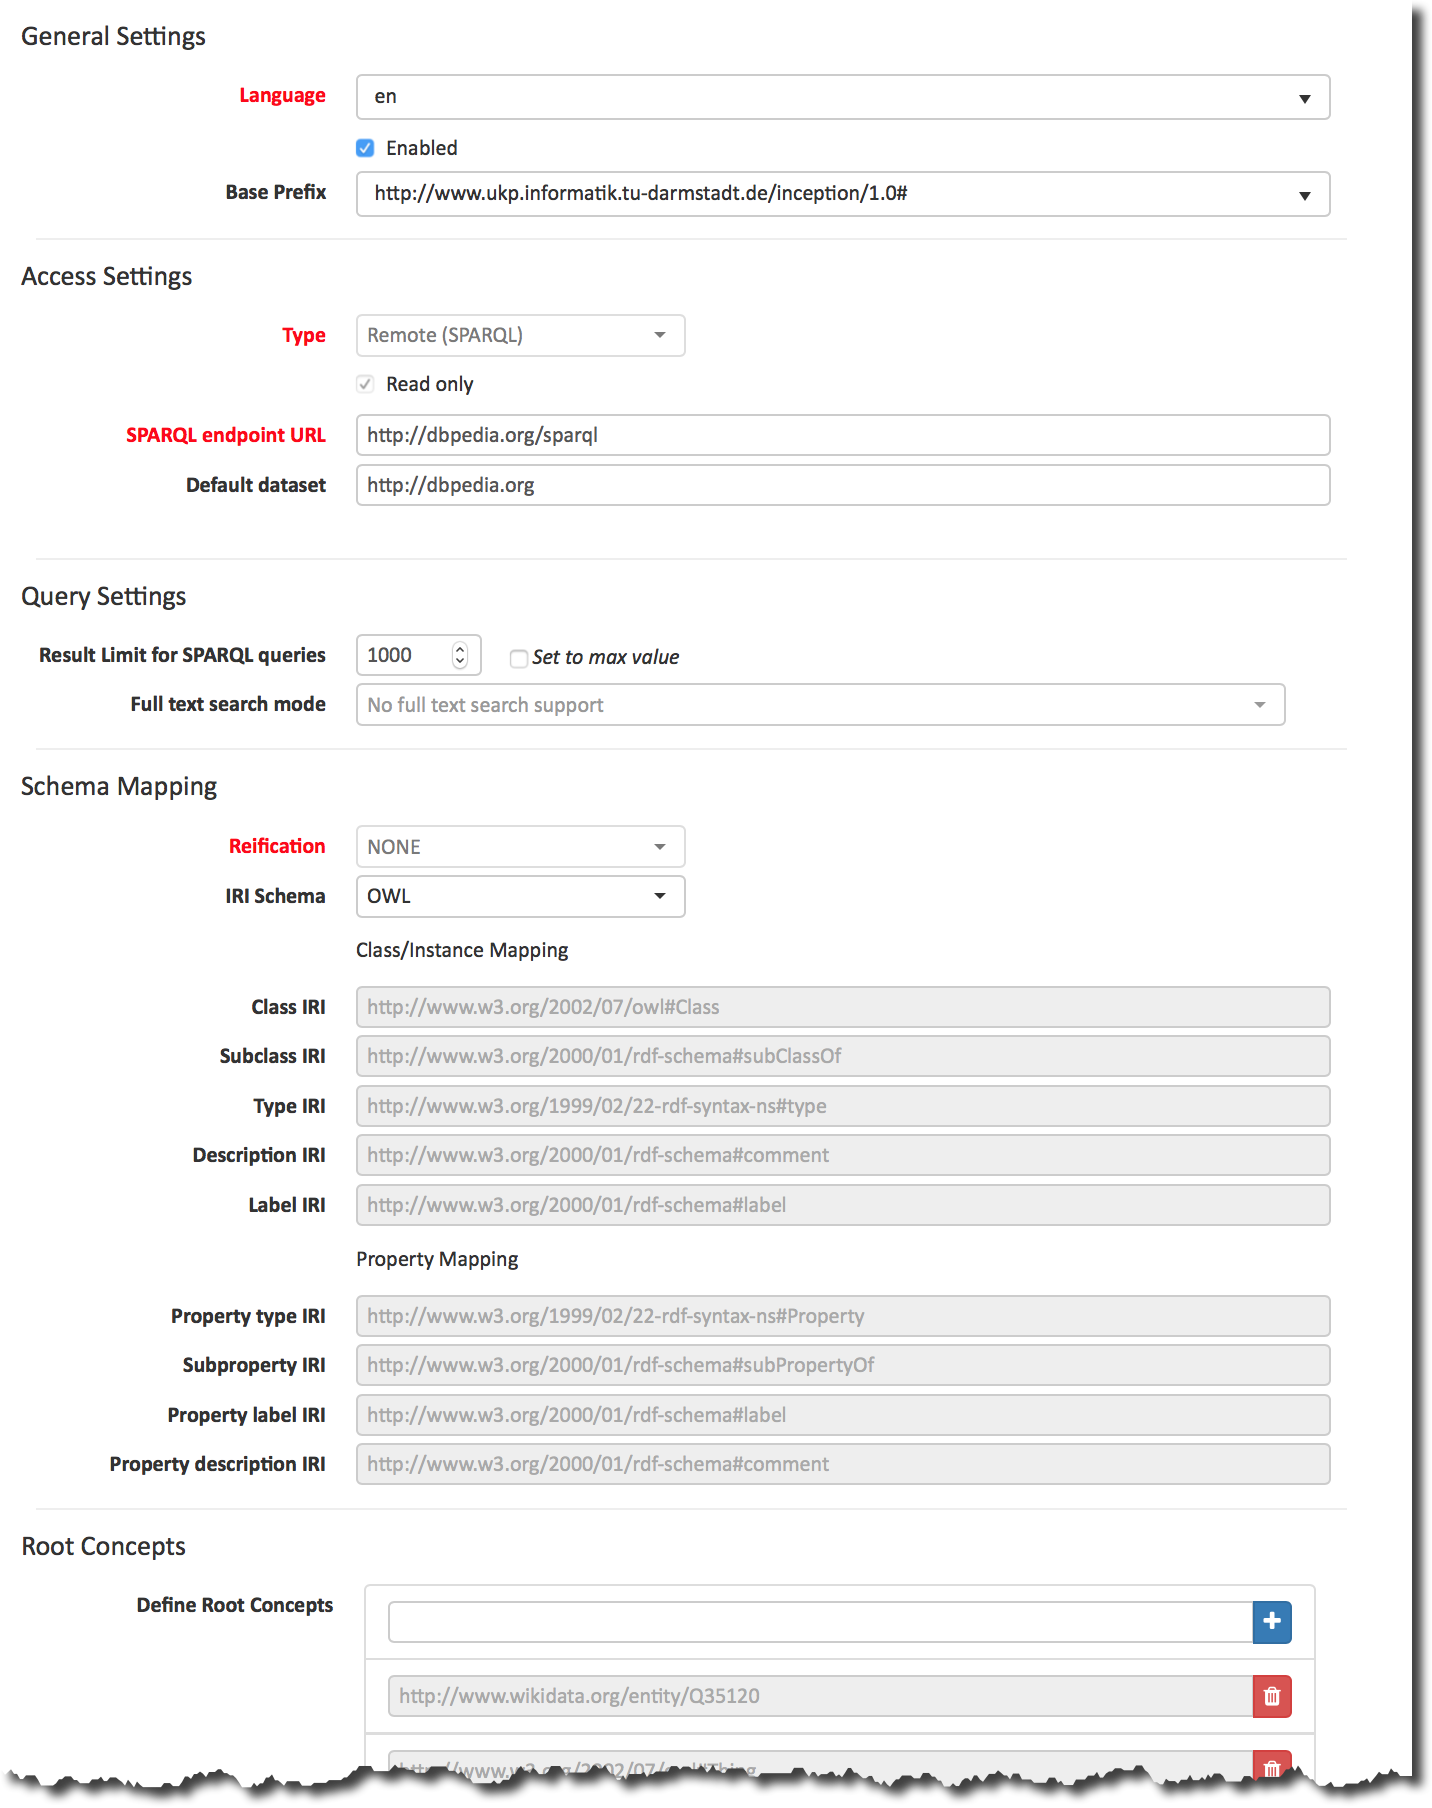
Local KBs
-
Read only: Whether the KB can be modified. This setting is disabled by default. Enabling it prevents making changes to the KB and allows for more effective query caching.
Remote KBs
The remote knowledge bases, there are the following settings:
-
SPARQL endpoint URL: The SPARQL URL used to access the knowledge base
-
Skip SSL certificate checks: Enable to skip the verification of SSL certificates. This can help if the remote server is using a self-signed certificate. It should be avoided to use this option in production. Instead, better install the remote certificate into your Java environment so it can be validated.
-
Default dataset: A SPARQL endpoint may server multiple datasets. This setting can be used to restrict queries to a specific one. Consult with the operator of the SPARQL server to see which datasets are available.
| Changing the URL of a remote KB currently only takes affect after INCEpTION is restarted! The updated URL will be shown in the settings, but queries will still be sent to the old URL until you restart INCEpTION. This also means that if you add, remove or change HTTP "Basic" authentication that are part of the URL, they will not take effect until you restart. It is usually easier to delete the remote KB configuration and create it from scratch with the new URL. |
Query settings
-
Use fuzzy matching: enables fuzzy matching when searching the knowledge base. The effect is slightly different depending on the backend being used and it can significantly slow down the retrieval process. It is normally a good idea to leave this feature off. If you would like to retrieve items from the knowledge base which only approximately match a query (e.g. you would like that an entry
Johnis matched if you enterJohanor vice versa), then you could try this out. -
Result limit for SPARQL queries: this is used to limit the amount of data retrieved from the remote server, e.g when populating dropdown boxes for concept search.
Schema mapping
Different types of knowledge base schemata are supported via a configurable mapping mechanism. The user can choose one of the pre-configured mapping or provide a custom mapping.
| Setting | Description | Example |
|---|---|---|
Class IRI |
Identifies a concept as a class |
Detailshttp://my-kb/foo is a class |
Subclass IRI (property) |
Indicates the sub-class relation between two classes |
Detailshttp://my-kb/foo is a sub-class of http://my-bb/bar |
Type IRI (property) |
Indicates the is-a relation between an instance and a class |
Detailshttp://my-kb/foo is an instance of http://my-bb/bar |
Label IRI (property) |
Name of the class or instance |
Detailshttp://my-kb/foo has a name |
Description IRI (property) |
Description of a class or instance |
Detailshttp://my-kb/foo has a description |
Property IRI |
Identifies a concept as a property |
Detailshttp://my-kb/foo is marked as being a property |
Sub-property IRI (property) |
Indicates the sub-property relation between two properties |
Detailshttp://my-kb/foo is a sub-property of http://my-bb/bar |
Property label IRI (property) |
Name of the property |
Detailshttp://my-kb/foo has a name |
Property description IRI (property) |
Description of the property |
Detailshttp://my-kb/foo has a description |
Deprecation property IRI (property) |
Description of the property. The marked item is not deprecated if the property value is |
Detailshttp://my-kb/foo is deprecated |
Root Concepts
The knowledge base browser displays a class tree. By default, it tries to automatically determine the root classes of this tree. However, for very large KBs this can be slow. Also you might not be interested in browsing the entire KB but would rather focus on specific subtrees. In such cases, you can define the root concepts explicitly here.
| This setting currently affects only class tree in the knowledge base browser. You can still search for concepts that are outside of the subtrees induced by the root concepts using the search field on the knowledge-base page and you can also still link concept features. to concepts outside the subtrees. In order to limit a concept feature to a particular subtree, use the Scope setting in the concept feature settings. |
Additional Matching Properties (Synonyms)
When searching for a concept e.g. in the annotation editor, by default the search terms are matched only against the concept name (label). There should only be one label for each concept (although there can be multiple label entries for a concept in the knowledge base, but theses should refer to different languages). However, it is common that this one label is actually only the preferred label and there could be any number of synonyms through which the concept can also be found. Thus, here you can enter a list of properties which should also be considered when searching for a concept.
| Not all remote SPARQL knowledge bases may support additional matching properties. If a full text index is used (recommended!), then the full text index may have to be configured to index all properties listed here. |
Full text search
Full text search in knowledge bases enables searching for entities by their textual context, e.g. their label. This is a prerequisite for some advanced features such as re-ranking linking candidates during entity linking.
Unfortunately, the SPARQL standard does not define a uniform way to perform full text searches. INCEpTION offers support for full text search in a broad range of backend servers supporting the SPARQL protocol.
If you select an FTS support that does not match the SPARQL server you are connecting to, you will likely get errors. If you are not sure, select Unknown to fall back to using standard SPARQL operations only - this will be very slow though and unviable for larger knowledge bases.
Apache Jena Fuseki
To enable the full text index on the Fuseki server side, set the options options text:storeValues and
text:multilingualSupport both to true (cf. Text Dataset Assembler documentation).
Fuseki databases are usually accessible via SPARQL at http://localhost:3030/DATABASE-NAME/sparql or
http://localhost:3030/DATABASE-NAME/query.
Stardog
To enable full text search in a Stardog database, create the database with the option
search.enabled=true.
stardog-admin db create -n DATABASE-NAME -o search.enabled=true -- knowledgebase.ttl
Stardog databases are usually accessible via SPARQL at http://localhost:5820/DATABASE-NAME/query.
You may have to specify credentials as part of the URL to gain access.
SPARQL Endpoint Authentication
INCEpTION supports endpoints require authentication. The following authentication mechanisms are supported.
-
HTTP basic authentication
-
OAuth (client credentials)
To enable authentication, select one of the options from the Authentication dropdown menu.
| To protect you credentials while sending them to the remote side, it is strongly recommended to use a HTTPS connection to the SPARQL endpoint and keep SSL certificate checking enabled. |
This is a simple mechanism that sends a username and password on every request.
This mechanism uses the client ID and client secret to obtain an authentication token which is then used for subsequent requests. Once the token expires, a new token is requested.
Legacy feature. It is also possible to use HTTP basic authentication by prefixing the
SPARQL URL with the username and password (http://USERNAME:PASSWORD@localhost:5820/mock/query).
However, this is not recommended. For example, the password will be visible to anybody being able to
access the knowledge base settings. This option is only supported for backwards compatibility and will
be removed in future versions.
|
Importing RDF
| You can only import data into local KBs. Remote KBs are always read-only. |
KBs can be populated by importing RDF files. Several formats are supported. The type of the file is determined by the file extension. So make sure the files have the correct extension when you import them, otherwise nothing might be imported from them despite a potentially long waiting time. The application supports GZIP compressed files (ending in .gz, so e.g. .ttl.gz), so we recommend compressing the files before uploading them as this can significantly improve the import time due to a reduced transfer time across the network.
| Format | Extension |
|---|---|
RDF (XML) |
|
RDF Schema (XML) |
|
OBO |
|
OWL (XML) |
|
OWL Functional Syntax |
|
N-Triples |
|
Turtle |
|
Recommenders
Recommenders provide annotation support by predicting potential labels. These can be either accepted or rejected by the user. A recommender learns from this interaction to further improve the quality of its predictions.
Recommenders are trained every time an annotation is created, updated or deleted. In order to determine whether the annotations are good enough, recommenders are evaluated on the annotation data. During recommender evaluation a score for each recommender is calculated and if this score does not meet the configured threshold, the recommender will not be used.
Recommenders can be configured in the Project Settings under the Recommenders tab. To create a new recommender, click Create. Then, the layer, feature and the classifier type has to be selected.
Overall recommender settings
The option wait for suggestions from non-trainable recommenders when opening document can be enabled overall. It is accessible from the settings dropdown on the recommender list panel. When this option is enabled, the system will wait for responses from all non-trainable recommenders in the project when a user is opening a document before actually displaying the document to the user. If this option is not checked, then recommendations may only appear after the user has performed some action such as creating an annotation.
| Enable this option only if all of your non-trainable recommenders have a fast response time, as otherwise your users may complain about a long delay when opening documents. |
The option show suggestions when viewing annotations from another user configures whether to display annotation suggestions when viewing annotations from another user (e.g. as project manager, you can select to view annotations from any annotator in the open document dialog).
Per-recommender settings
By default, the name of new recommenders are auto-generated based on the choice of layer, feature and tool. However, you can deactivate this behavior by unchecking the auto-generate option next to the name field.
Recommenders can be enabled and disabled. This behaviour is configured by the Enabled checkbox. Recommenders that are disabled are not used for training and prediction and are not evaluated.
The Activation strategy describes when a recommender should be used for prediction. Right now, there are two options: either set a threshold on the evaluation score (if the evaluation score is lower than the threshold, the recommender is not used for predicting until annotations have changed) or always enable it. If the option Always active is disabled and the score threshold is set to 0, the recommender will also be always executed, but internally it is still evaluated.
Some recommenders are capable of generating multiple alternative suggestions per token or span. The maximum number of suggestions can be configured by the Max. recommendations field.
Sometimes it is desirable to not train on all documents, but only on e.g. finished documents. In order to control documents in which state should be used for training, the respective ones can be selected from the States used for training.
To save a recommender, click Save. To abort, click Cancel. To edit an existing recommender, it can be selected from the left pane, edited and then saved. Recommenders can be deleted by clicking on Delete. This also removes all predictions by this recommender.
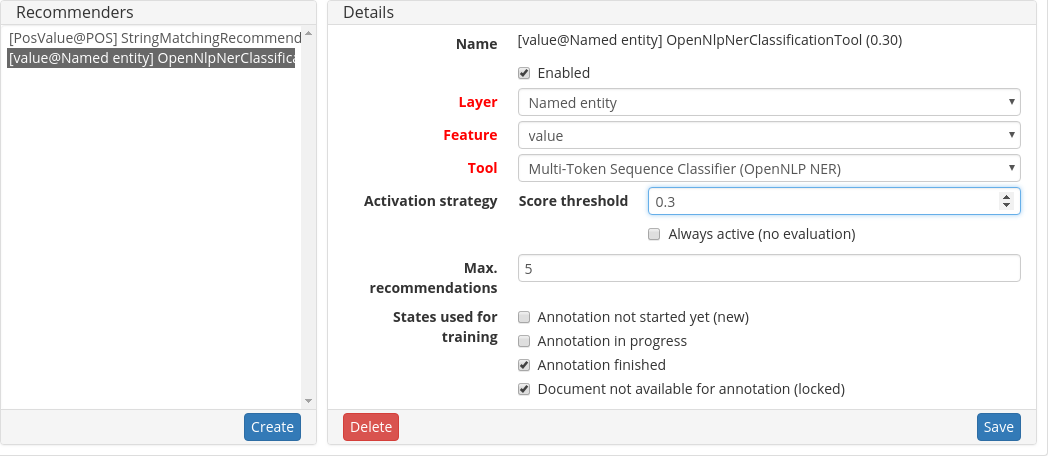
| Stacked annotations: If you configured a recommender on a layer that allows stacking (i.e. multiple annotations of the same layer type at the same position in the text), accepting a suggestion will always create a new annotation with the suggested feature value. Even if annotation(s) of the same type already exist at this position, the suggested feature value will not be added to this annotation, but a new one will be created instead. |
String Matcher
The string matching recommender is able to provide a very high accuracy for tasks such as named entity identification where a word or phrase always receives the same label. If an annotation is made, then the string matching recommender projects the label to all other identical spans, therefore making it easier to annotate repeated phenomena. So if we annotate Kermit once as a PER, then it will suggest that any other mentions of Kermit should also be annotated as PER. When the same word or phrase is observed with different labels, then the matcher will assign the relative frequency of the observations as the score for each label. Thus, if Kermit is annotated twice as PER and once as OTH, than the score for PER is 0.66 and the score for OTH is 0.33.
The recommender can be used for span layers that anchor to single or multiple tokens and where cross-sentence annotations are not allowed. It can be used for string features or features which get internally represented as strings (e.g. concept features).
Gazeteers
It is possible to pre-load gazeteers into string matching recommenders. A gazeteer is a simple text
file where each line consists of a text and a label separated by a tab character. The order of
items in the gazeteer does not matter. Suggestions are generated considering the longest match. Comment lines start with a #. Empty lines are ignored.
# This is a comment
Obama	PER
Barack Obama	PER
Illinois	LOC
Illinois State Senate	ORG
Hawaii	LOC
Indonesia	LOC
Character-level layers
For layers which are configured to have a character-level annotation granularity, the string matching recommender will still try to match only at the beginning of tokens. However, it will not require that the end of a match also ends at a token boundary. This helps e.g. in situations where punctuation is not correctly detected as being a separate token.
| For layers with character-level granularity or layers which allow cross-sentence annotations, the evaluation scores of the recommender may not be exact. |
🧪 String Matcher for Relations
Experimental feature. To use this functionality, you need to enable it first by adding recommender.string-matching.relation.enabled=true to the settings.properties file (see the Admin Guide).
|
The string matching relation recommender can be used to predict relations, i.e. it predicts if there is a connection between two annotations and what the relation’s feature value might be. You need a base layer with a feature on it in addition to a relation layer on top configured for it to work.
As an example, we define a base layer called Locations. We add a
String feature named value on it. Then, we define a relation layer on top of it called Located, with a String feature
named relation.
During configuration, we first need to select the feature of the relation that should be predicted.
We create a String matcher for relations, choose the relation layer to be Located and the base layer
feature as value. This recommender now saves tuples of (source:value, target:value, relation). If it encounters a
sentence that contains locations with the same source and target value, it predicts a relation between them with the label
it saw before.
For instance, given the following text
Darmstadt is in Hesse.
Hanover is in Lower Saxony.
we annotate Darmstadt and Hanover as a location with value=city and Hesse and Lower Saxony as a location with value=state. We draw a relation between Darmstadt and Hesse with a label of located in. The recommender then predicts that Hanover is also located in Lower Saxony, because it learned that a relation between city and state should have label located in.
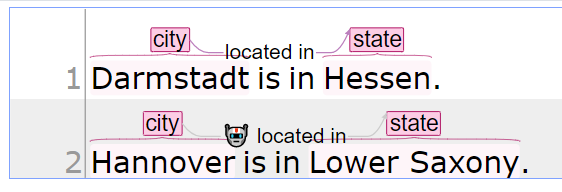
This recommender currently does not work for base layers that allow stacking.
This recommender is not enabled by default, please refer to the admin guide for how to enable it.
Sentence Classifier (OpenNLP Document Categorizer)
This recommender is available for sentence-level annotation layers where cross-sentence annotations are disabled. It learns labels using a sentence-level bag-of-word model using the OpenNLP Document Categorizer.
Token Sequence Classifier (OpenNLP POS)
This recommender uses the OpenNLP Part-of-Speech Tagger to learn a token-level sequence tagging model for layers that anchor to single tokens. The model will attempt to assign a label to every single token. The model considers all sentences for training in which at least a one annotation with a feature value exists.
Multi-Token Sequence Classifier (OpenNLP NER)
This recommender uses the OpenNLP Name Finder to learn a sequence tagging model for multi-token annotations. The model generates a BIO-encoded representation of the annotations in the sentence.
| If a layer contains overlapping annotations, it considers only the first overlapping annotation and then skips all annotation until it reaches one that does not overlap with it. |
🧪 Ollama
Experimental feature. To use this functionality, you need to enable it first by adding recommender.ollama.enabled=true to the settings.properties file (see the Admin Guide).
|
This recommender allows to obtain annotation suggestions using large language models (LLMs) supported by Ollama. In order to use it, you first need to install Ollama and run it.
$ brew install ollama
$ ollama pull mistral
$ ollama serve
By default, Ollama runs on http://localhost:11434/ and INCEpTION uses this as the default endpoint for communicating with it. If you run Ollama on a different host (e.g. one that has a more powerful GPU) or port, you can adjust this URL in the recommender settings.
If INCEpTION can successfully connect to Ollama, the model combo-box will offer all models that are available on the respective endpoint. If you want to use a model that is not listed here, you first need to ollama pull it.
Now you can configure how to generate the prompts that are sent to Ollama and how to interpret its response using the following settings:
-
Prompting mode: here you can choose to generate one prompt per sentence, per annotation or per document.
-
Response format: here you can choose how to read the response from Ollama. The choice is between default (i.e. text) and a JSON format.
-
Extraction mode: here you can choose how interpret the response from Ollama. The availability of different extraction modes depends on the type of layer for which the recommender is configured. Choose response as label e.g. for classification or summarization tasks. It puts the response from the LLM directly into the feature that you configured the recommender to operate on. Choose Mentions from JSON (span layer) for information extraction tasks where you ask the LLM e.g. to identify and categorize certain types of entities in the text.
-
Prompt: Here you can finally define the prompt that is sent to Ollama. The prompt should usually consist of an instruction and a piece of text to which the instruction is to be applied. Depending on the prompting mode, there are different variables that can be used in the prompt. The most important variable is
textand it corresponds to the sentence text, annotated words or document text, depending on the prompting mode.
The recommender comes with several example configurations that you can choose from a drop-down field.
🧪 ChatGPT
Experimental feature. To use this functionality, you need to enable it first by adding recommender.chatgpt.enabled=true to the settings.properties file (see the Admin Guide).
|
This recommender allows to obtain annotation suggestions using ChatGPT and other services compatible with the ChatGPT API.
In order to use this recommender, you have to generate a ChatGPT API key and set it in the recommender configuration. Once you have done this, you can select a model form the model drop-down list.
For further information on how to configure the modes of the recommender, please refer to 🧪 Ollama.
| Handle of rate limits is presently not implemented. |
🧪 AzureAI OpenAI
Experimental feature. To use this functionality, you need to enable it first by adding recommender.azureai-openai.enabled=true to the settings.properties file (see the Admin Guide).
|
This recommender allows to obtain annotation suggestions using large language models (LLMs) supported by Azure AI OpenAI. In order to use it, you need an Azure AI account, deploy an OpenAI model there and obtain an API key for accessing that deployment.
For further information on how to configure the modes of the recommender, please refer to 🧪 Ollama.
Named Entity Linker
This recommender can be used with concept features on span layers. It does not learn from training data, but instead attempts to match the context of the entity mention in the text with the context of candidate entities in the knowledge base and suggests the highest ranked candidate entities. In order for this recommender to function, it is necessary that the knowledge base configured for the respective concept feature supports full text search.
External Recommender
This recommender allows to use an external web-service to generate predictions.
You can find an example implementation of several external recommenders in the INCEpTION External Recommender repository on GitHub.
For more details on the protocol used in the communication with the external services, please refer to the developer documentation.
The remote recommender service can be accessed via an encrypted HTTPS connection. However, this will fail unless the certificate is either signed by a well-known certificate authority or has been imported into the certificate store of the Java virtual machine.
For testing purposes, the validation of the SSL certificate can be disabled in the
external recommender settings. However, the SSL certificate will still need to contain a host
name that matches the URL of the external recommender. If you also need to disable host name
verification, you need to start INCEpTION with the system property
jdk.internal.httpclient.disableHostnameVerification. Note this needs to be specified on the
command line and not in the settings.properties file.
|
WebLicht
The WebLicht recommender allows you to use CLARIN WebLicht services to generate annotation recommendations. In order to do so, first need to obtain an API key here.
After making the basic settings and entering the API key, Save the recommender. Doing so allows you to attach a processing chain definition file. With out such a file, the recommender will not work. We will provide some example settings here to go along with the example processing chain that we will be building below:
-
Layer: Named entity
-
Feature: value
-
Tool: WebLicht recommender
-
URL: Do not change the default value unless you really know what you are doing (e.g. developing custom WebLicht services).
-
Input format: Plain text
Next, log in to WebLicht to build a processing chain.
The simplest way to build a chain is this:
-
Choose a sample input. Make sure the language of the input matches the language of the documents in your INCEpTION project. WebLicht will only allow you to add NLP services to the chain which are compatible with that language. For our example, we will choose
[en] Example Food. Press OK. -
Choose easy mode. This allows you to conveniently select a few common types of annotations to generate.
-
Choose Named Entities. For our example, we choose to generate named entity annotations, so we select this from the list on the left.
-
Download chain. Click this button to download the chain definition. Once downloaded, it is a good idea to rename the file to something less cryptic than the default auto-generated ID, e.g. we might rename the file to
WebLicht_Named_Entities_English.xml.
Back in the recommender settings, click Browse in the Upload chain field and select the processing chain definition file you have just generated. Then click the Upload button that appears in the field.
For good measure, Save the whole settings once more. When you now open a document in the annotation page, you should be able to see recommendations.
The WebLicht recommender can currently be used with the following built-in annotation layers:
-
Part of speech
-
Lemma
-
Named entities (only the
valuefeature)
By default, the recommender sends data as plain text to WebLicht. This means that the processing chain needs to run a tokenizer and sentence splitter. Since these might generate boundaries different from the one you have in INCEpTION, some of the recommendations might look odd or may not be displayed at all. This can be avoided by sending data in the WebLicht TCF format. If you select this format, the tokens and sentence boundaries will be sent to WebLicht along with the text. You will then also need to specify the language of the documents that you are going to be sending. Note that even when selecting the TCF format, only text, language, tokens and sentences are sent along - no other annotations. Also, only the target layer and feature will be extracted from the processing chain’s results - no other annotations.
However, building a processing chain that takes TCF as input is a bit more difficult. When building
the chain, you need to upload some TCF file containing tokens, sentences, and the proper language
in the Input selection dialog of WebLicht. One way to get such a file is to open one of your
documents in the annotation page, export it in the TCF format, then opening the exported file in a
text editor an manually fixing the lang attribute on the tc:TextCorpus XML element. We know that
this is a bit inconvenient and try to come up with a better solution.
European Language Grid
This recommender allows to use some European Language Grid (ELG) web-services to generate predictions.
In order to use the recommender, you need to have an ELG account. When you add an ELG recommender to a project and the project has not yet signed in to an ELG account, you will see three steps offered in the ELG session panel:
-
A link to through which you can obtain an ELG authentication token. When you follow the link, you have to log in using your ELG account and then a token is shown to you.
-
Copy that token into the Success code field.
-
Finally, press the sign in button.
Then you can find a service via the Service auto-complete field. E.g. if you enter entity into the field, you will get various services related to entity detection. Choose one to configure the recommender to use it.
| ELG services have a quota. If the recommender suddenly stops working, it might be that your account has exceeded its quota. |
Tagsets
To manager the tagsets, click on the tab Tagsets in the project pane.
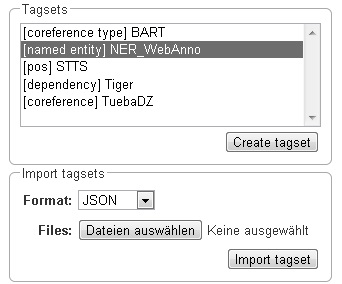
To edit one of the existing tagsets, select it by a click. Then, the tagset characteristics are displayed.
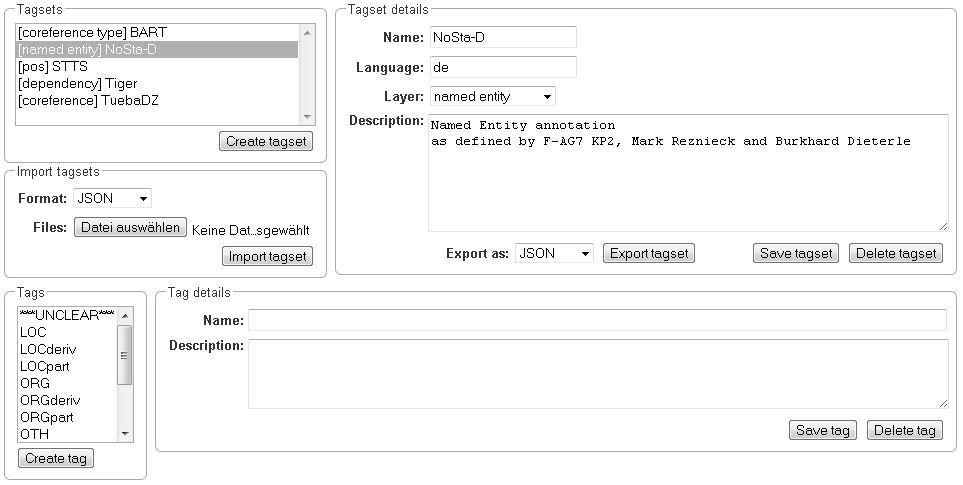
In the Frame Tagset details, you can change them, export a tagset, save the changes you made on it or delete it by clicking on Delete tagset. To change an individual tag, you select one in the list displayed in the frame Tags. You can then change its description or name or delete it by clicking Delete tag in Tag details. Please do not forget to save your changes by clicking on Save tag. To add a new tag, you have to click on Create tag in Tag details. Then you add the name and the description, which is optional. Again, do not forget to click Save tag or the new tag will not be created.
To create an own tagset, click on Create tagset and fill in the fields that will be displayed in the new frame. Only the first field is obligatory. Adding new tags works the same way as described for already existing tagsets. If you want to have a free annotation, as it could be used for lemma or meta information annotation, do not add any tags.
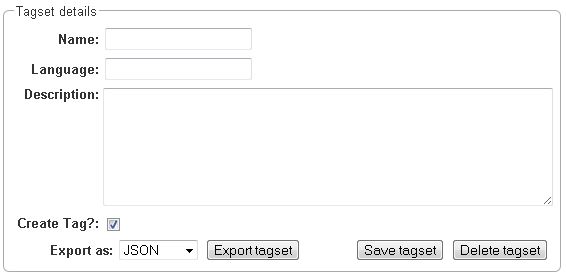
To export a tagset, choose the format of the export at the bottom of the frame and click Export tagset.
Export
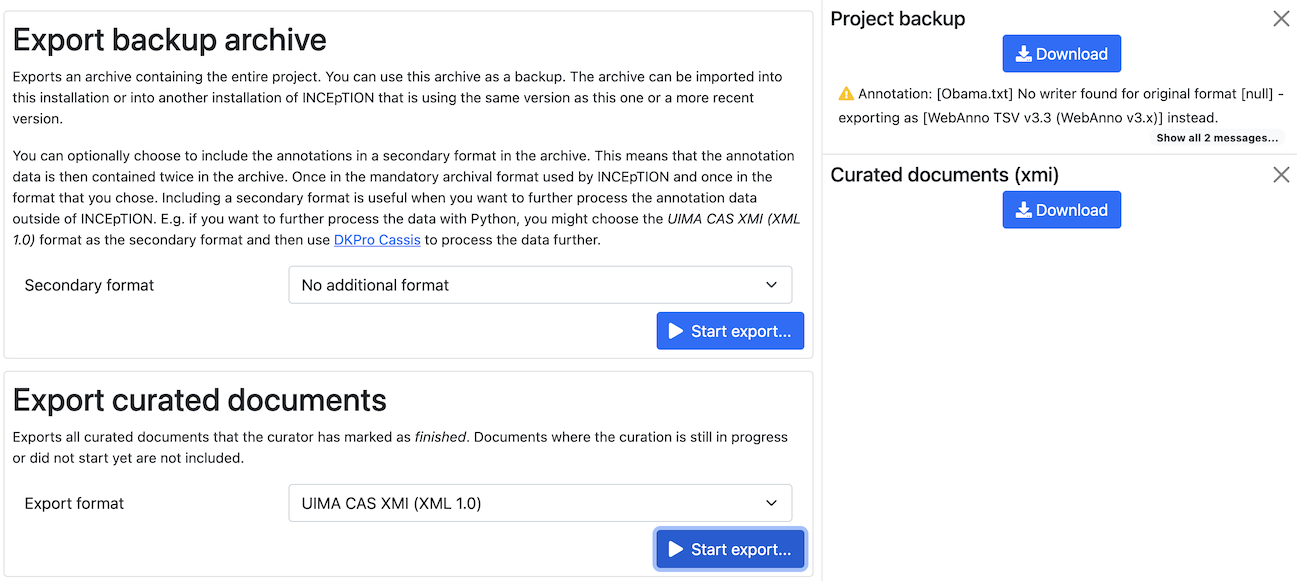
Here you can export the project for different purposes. Once an export process has been started, its progress can be see in the right sidebar. If an export takes very long, you can keep it running and check back regularly to see its state. You can even log out and log in later. Once the export is complete, you have 30 minutes to download it before it gets cleaned up automatically. Any user with project manager permissions can visit this page and view the exports. When a user cancels an export or downloads an export, it is removed from the list. If there are any messages, warnings or errors, you should inspect them before cancelling or downloading the export. While an export is running, only the latest messages is displayed and it can happen that messages are skipped. Once the export is complete (either successfully or failed), the full list of messages is accessible.
Export backup archive
This export is for the purpose of creating a backup, of migrating it to a new INCEpTION version, of migrating to a different INCEpTION instance, or simply in order to re-import it as a duplicate copy.
The export is an archive which can be re-imported again since it includes the annotations in the format internally used by the application.
In addition to the internal format, the annotations can optionally be included in a secondary format in the export. Files in this secondary format are ignored if the archive is re-imported into INCEpTION. This format is controlled by the Secondary Format drop-down field. When AUTO is selected, the file format corresponds to the format of the source document. If there is no write support for the source format, the file is exported in the WebAnno TSV3 format instead. If the original file format did not contain any annotations (e.g. plain text files) or only specific types of annotations (e.g. CoNLL files), the secondary annotation files will also have none or limited annotations.
| Some browsers automatically extract ZIP files into a folder after the download. Zipping this folder and trying to re-import it into the application will generally not work because the process introduces an additional folder level within the archive. The best option is to disable the automatic extraction in your browser. E.g. in Safari, go to Preferences → General and disable the setting Open "safe" files after downloading. |
When exporting a whole project, the structure of the exported ZIP file is as follows:
-
<project ID>.json - project metadata file
-
annotation
-
<source document name>
-
<user ID>.XXX - file representing the annotations for this user in the selected format. project automatically generated suggestions
-
-
-
annotation_ser
-
<source document name>
-
<user ID>.ser - serialized CAS file representing the annotations for this user project automatically generated suggestions
-
-
-
curation
-
<source document name>
-
CURATION_USER.XXX - file representing the state of curation in the selected format.
-
-
-
curation_ser
-
<source document name>
-
CURATION_USER.ser - serialized UIMA CAS representing the state of curation
-
-
-
log
-
<project ID>.log - project log file
-
-
source - folder containing the original source files
🧪 Invite Links
Experimental feature. To use this functionality, you need to enable it first by adding sharing.invites.enabled=true to the settings.properties file (see the Admin Guide).
|
Project managers can generate invite links to their projects which allow users to easily join their project. For this, visit the Project Settings and click on Share Project. Clicking on Allow joining the project via a link will generate the invite link that can then be copied and given to users (e.g. via email).
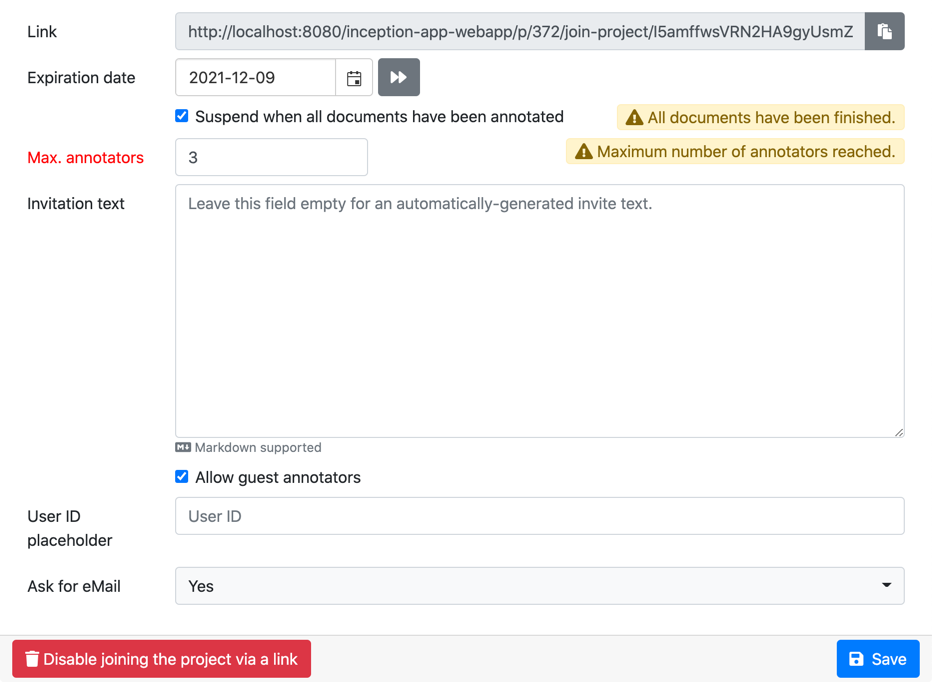
The user can now follow the invite link by entering it into a browser. She might be prompted to log into INCEpTION and is then automatically added to the project with annotator rights and directed to the project dashboard page. She can now start annotating.
Invite life time
The life time of an invite link can be controlled in several ways:
-
By date: you can set an expiration date indicating a date until which the annotation will be valid.
-
By annotator count: you can set a limit of annotators for project. If the number of users in the project reaches this number, the invite link can no longer be used to join.
-
By project state: the invite can be configured to stop working once all documents in the document have been annotated. What exactly all documents have been annotated means depends on the workload management strategy that has been configured. E.g. for a project using the dynamic workload management, the annotations of the project are considered to complete once the required number of annotators per document have marked all their documents as finished.
If any of the configured conditions are triggered, an alert is shown next do the condition and the invite link cannot be used anymore.
Guest annotators
Experimental feature. To use this functionality, you need to enable it first by adding sharing.invites.guests-enabled=true to the settings.properties file (see the Admin Guide).
|
By default, users need to already have a INCEpTION account to be able to use the link. However, by activating the option Allow guest annotators, a person accessing the invite link can simply enter any user ID they like and access the project using that ID. This ID is then valid only via the invite link and only for the particular project. The ID is not protected by a password. When the manager removes the project, the internal accounts backing the ID are automatically removed as well.
It is possible to replace the user ID input field placeholder with a different text. This is useful if you e.g. want your users to user a specific information as their user ID. E.g. if you use this feature in a classroom scenario, you might find it convenient if the students provide their matriculation number.
| Make sure to avoid multiple users signing in with the same user ID - INCEpTION does not support being used from multiple browsers / windows / computers concurrently with the same user ID! |
Optionally the invite can be configured to require guest annotators to enter an email address in addition to the user ID. If a user provides an email address along with the user ID, then for subsequent logins, the user needs to provide the same email address. If a different email address is provided, then the login is rejected.
| When importing a project with guest annotators, the annotations of the guests can only be imported if the respective guest accounts do not yet exist in the INCEpTION instance. This means, it is possible to make a backup of a project and to import it into another INCEpTION instance or also into the original instance after deleting the original project. However, when importing a project as a clone of an existing project in the same instance, the imported project will not have any guest annotators. |
🧪 Project Versioning
Experimental feature. To use this functionality, you need to enable it first by adding versioning.enabled=true to the settings.properties file (see the Admin Guide).
|
Project managers can create snapshots of all documents in the project as well as its layer configuration via the versioning panel.
This is done via a git repository stored in the .inception folder.
This git repository can also be used to push to a remote repository, e.g. saving on Github or Gitlab.
We currently only support pushing via HTTPS.
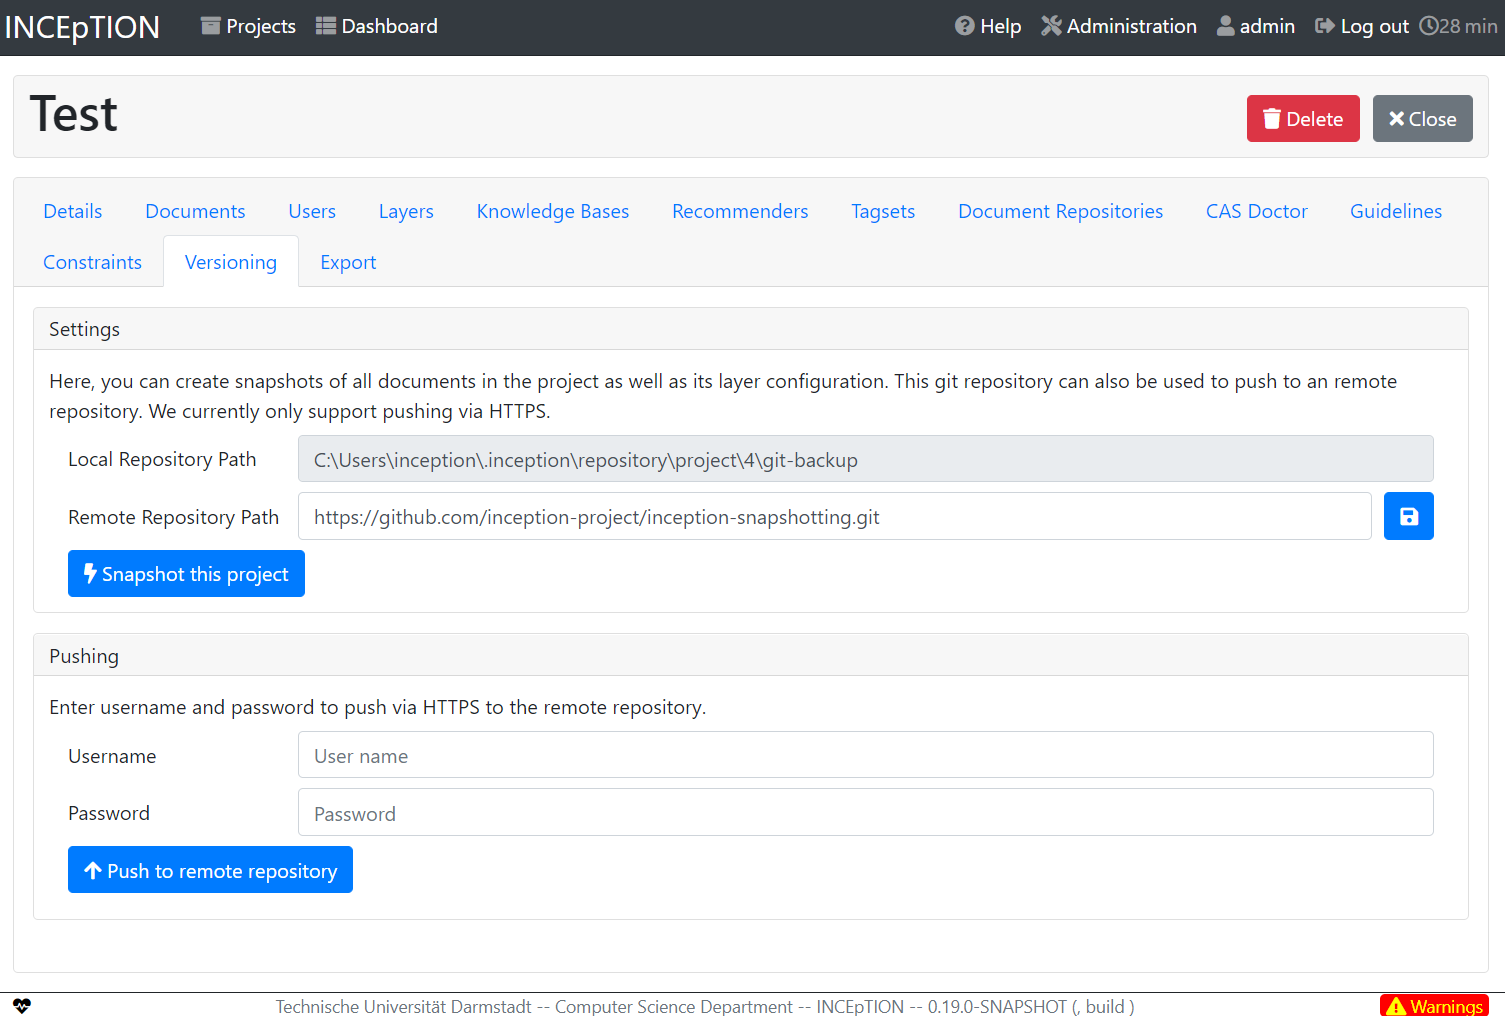
If you want to roll back to an earlier version, then you need to manually check out the old version in the local or remote git repository, load the old layer configuration manually in the layer settings and replace source and annotation documents via the remote API (see the Admin Guide).
User Management
| This functionality is only available to administrators. |
After selecting this functionality, a frame which shows all users is displayed. By selecting a user, a frame is displayed on the right.
Now you may change his role or password, specify an e-mail address and dis- or enable his account by placing the tick.
| Disabling an account prevents the user from logging in. The user remains associated with any projects and remains visible in the project user management and the project workload management. |
To create a new user, click on Create in the left frame. This will display a similar frame as the one described in the last paragraph. Here you have to give a login-name to the new user.
In both cases, do not forget to save your changes by pressing the Save button.
-
User roles
Role |
Description |
ROLE_USER |
User. Required to log in to the application. Removal of this role from an account will prevent login even for users that additionally hold the ROLE_ADMIN! |
ROLE_ADMIN |
Administrator. Can manage users and has access to all other functionalities. |
ROLE_PROJECT_CREATOR |
Project creator. Can create new projects. |
ROLE_REMOTE |
Remote API access. Can access the remote API. |
Advanced functionalities
Corpus building
In order to annotate text, it is first necessary to actually have text documents. Not every text documented is worth annotating. For this reason, INCEpTION allows connecting to external document repositories, to search these repositories for interesting documents, and to import relevant documents.
Search page
If document repositories have been configured in a project, the Search page becomes accessible through the project dashboard. On the top left of the search page you can select in a dropdown menu which document repository you want to query. All document repositories that were created in the project settings should be selectable here and are identified by their Name. The field next to it is the query text field in which the search queries are entered. After entering a query, search by pressing the Enter key or by a clicking on the Search button. The documents in the document repository which match the search query are returned as the search results and then shown as a table. The table displays 10 results at a time and more can be accessed through the paging controls which are located above the table. Depending on the repository, you may see a document title or ID, text snippets with highlights indicating matches of your query in the document, and a score which represents the relevance of the document to the query. If a document has not yet been imported into your project, there is an Import button which extracts the document from the repository and adds it to the project, thereby making it available for annotation. If the document has already been imported, there is an Open button instead. Clicking on the document title or ID opens a preview page where the document text can be viewed before importing it.
| Normally the ability to add new documents to a project is limited to project managers and it is only possibly via the Documents tab in the project settings. However, any user can import a document from an external repository. |
External search sidebar
The external search functionality can be used in the sidebar of the annotation page as well and can be opened by clicking on the globe-logo on the sidebar at the left of the annotation page. It essentially offers the same functionality as the external search page accessible via the project dashboard. Being able to search directly from the annotation page may be more convenient though because the user does not have to keep switching between the search page and the annotation page. Additionally, clicking on a search result in the external search sidebar automatically imports the document into your project and opens it in the annotation view.
Document repositories
Document repositories can be added via the Document repository tab in the project settings.
OpenSearch
Selecting the OpenSearch repository type allows connecting to remote OpenSearch instances.
In order to set up a connection to an OpenSearch repository, the following information needs to be provided:
-
Remote URL: the URL where the OpenSearch instance is running (e.g.
http://localhost:9200/) -
Index Name: the name of the index within the instance (e.g.
mycorpus) -
Search path: the suffix used to access the searching endpoint (usually
_search) -
Object type: the endpoint used to download the full document text (usually
texts) -
Field: the field of the documents in the OpenSearch repository that is used for matching the search query (default
doc.text)
From this information, two URLs are constructed:
-
the search URL:
<URL>/<index name>/<search path> -
the document retrieval URL as:
<URL>/<index name>/<object type>/<document id>
| From the remote URL field, only the protocol, hostname and port information is used. Any path information appearing after the port number is discarded and replaced by the index name and search path as outlined above. |
The individual documents should contain following two fields as their source:
-
doc: should contain the subfield text which is the full text of the document
-
metadata: should contain subfields like language, source, timestamp and uri to provide further information about the document
The Random Ordering setting allows to switch the ranking of results from the default ranking used by the OpenSearch server to a random order. The documents returned will still match the query, but the order does not correspond to the matching quality anymore. When random ordering is enabled, no score is associated with the search results. If desired, the random seed used for the ordering can be customized.
The Result Size setting allows to specify the number of document results that should be retrieved when querying the document repository. The possible result sizes lie between 1 and 10000 documents.
If the default Field setting doc.text is used, then the JSON structure for indexed documents
should look as follows:
{
  "metadata": {
    "language": "en",
    "source": "My favourite document collection",
    "timestamp": "2011/11/11 11:11",
    "uri": "http://the.internet.com/my/document/collection/document1.txt",
    "title": "Cool Document Title"
  },
  "doc": {
    "text": "This is a test document"
  }
}
Setting up a simple OpenSearch document repository
In this example, we use Docker to get OpenSearch and ElasticVue up and running very quickly. Note, that the docker containers we start here will not save any data permanently. It is just for you to get an idea of how the setup works. In a productive environment, you need to use a proper installation of OpenSearch.
-
Open a terminal and run OpenSearch as a Docker service
$ docker run -p 9200:9200 -p 9300:9300 -e "discovery.type=single-node" -e "http.cors.enabled=true" -e "http.cors.allow-origin=http://localhost:9090" -e "http.cors.allow-headers=*" opensearchproject/opensearch:1 -
Open a second terminal and run ElasticVue as a Docker service
$ docker run -p 9090:8080 cars10/elasticvue -
Open a browser and access ElasticVue at
http://localhost:9090- tell ElasticVue to connect tohttps://localhost:9200using the usernameadminand passwordadmin -
Switch to the Indices tab in ElasticVue
-
Create an index named
test -
Switch to the REST tab in ElasticVue
-
Set the HTTP Method to "POST" and enter
test/_doc/1as the Path (means "create a new document with ID 1 in collection test) -
Put the following JSON into the request body field
{ "metadata": { "language": "en", "source": "My favourite document collection", "timestamp": "2011/11/11 11:11", "uri": "http://the.internet.com/my/document/collection/document1.txt", "title": "Cool Document Title" }, "doc": { "text": "This is a test document" } } -
Click Send request
-
Start up INCEpTION
-
Create a new project
-
Add a document repository with the following settings (and click save):
-
Name:
My OpenSearch Document Repository -
Type:
OpenSearch -
Remote URL:
https://localhost:9200 -
SSL verification: disabled
-
Authentication type: basic
-
Username / password:
admin/admin -
Index name:
test -
Search path:
_search -
Object type:
_doc -
Field:
doc.text -
Result Size:
1000 -
Random ordering:
false
-
-
Switch to the Dashboard and from there to the Search page
-
Select the repository
My OpenSearch Document Repository -
Enter
documentinto the search field and press the Search button -
You should get result for the document you posted to the OpenSearch index in step 8
-
Click on Import
-
The import button should change to Open now - click on it to open the document in the annotation editor
Solr
Selecting the Solr repository type allows connecting to remote Solr instances.
In order to set up a connection to an Solr repository, the following information needs to be provided:
-
Remote URL: the URL where the Solr instance is running (e.g.
http://localhost:9200/) -
Index Name: the name of the collection (e.g.
techproducts) -
Search path: the suffix used to select the request handler. The '/select' request handler is the only supported for the moment.
-
Default Field: the field of the documents in the Solr repository that is used for searching (default
id). -
Text Field: the field of the document in the Solr repository that is used for retrieve all the text (default 'text')
From this information, two URLs are constructed:
-
the search URL:
<URL>/<index name>/<search path> -
the document retrieval URL as:
<URL>/<index name>/<search path>/<query with document id>
| From the remote URL field, only the protocol, hostname and port information is used. Any path information appearing after the port number is discarded and replaced by the index name and search path as outlined above. |
The individual documents must contain the following field as their source:
-
id: should contain a unique id for the document
-
text: collection should contain a field which contain the plain text of the document. By default it take the value "text". You can change it by the "Text Field" parameter.
The individual document should contain the following field as their source:
-
name or title : one of these two field should contain information about the title of the document. If no one of this field is set, the id is used
-
language, uri, timestamp : should contain this fields to provide further information about the document
The Random Ordering setting allows to switch the ranking of results from the default ranking used by the Solr server to a random order. The documents returned will still match the query, but the order does not correspond to the matching quality anymore. When random ordering is enabled, no score is associated with the search results. If desired, the random seed used for the ordering can be customized.
The Result Size setting allows to specify the number of document results that should be retrieved when querying the document repository. The possible result sizes lie between 1 and 10000 documents.
The Highlight feature is available on the Default Field (or Search Field). Be aware that if Solr does not include character by character or word by word analysis in the schema the highlight feature would not work.
If the default Text Field setting text is used, then the JSON structure for indexed documents
should look as follows:
"docs" : {
  "0" : {
    "id" : "ID"
    "text" : "Here goes the document text."
    "other_field" : "Content of other field"
  }
}
The '0' represent the result number. By default the document with the best score (matching score) is placed on the top.
PubAnnotation
PubAnnotation is a repository through which anyone can share their texts and annotations with others. It can be added as an external document repository by selecting the PubAnnotation repository type.
🧪 PubMed Central
Experimental feature. To use this functionality, you need to enable it first by adding external-search.pmc.enabled=true to the settings.properties file (see the Admin Guide). You should also add format.bioc.enabled=true to enable
support for the BioC format used by this repository connector.
|
PubMed Central® (PMC) is a free full-text archive of biomedical and life sciences journal literature at the U.S. National Institutes of Health’s National Library of Medicine (NIH/NLM). It can be added as an external document repository by selecting the PubMed Central repository type.
INCEpTION uses the BioC version of the PMC documents for import. This is only available for
Open Access texts. INCEpTION automatically adds a filter for open access results ("open access"[filter])
to the query. The BioC version of these texts may be available only with a delay INCEpTION automatically
excludes results that were published in the last 24h to try to keep the number of non-importable results low.
If you are still unable to import a result, try a bit later.
|
Constraints
Constraints reorder the choice of tags based on the context of an annotation. For instance, for a given lemma, not all possible part-of-speech tags are sensible. Constraint rules can be set up to reorder the choice of part-of-speech tags such that the relevant tags are listed first. This speeds up the annotation process as the annotator can choose from the relevant tags more conveniently.
The choice of tags is not limited, only the order in which they are presented to the annotator. Thus, if the project manager has forgotten to set up a constraint or did possible not consider an oddball case, the annotator can still make a decision.
Importing constraints
To import a constraints file, go to Project and click on the particular project name. On the left side of the screen, a tab bar opens. Choose Constraints. You can now choose a constraint file by clicking on Choose Files. Then, click on Import. Upon import, the application checks if the constraints file is well formed. If they conform to the rules of writing constraints, the constraints are applied.
Implementing constraint sets
A constraint set consists of two components:
-
import statement
-
scopes
-
Import statements* are composed in the following way:
import <fully_qualified_name_of_layer> as <shortName>;It is necessary to declare short names for all fully qualified names because only short names can be used when writing a constraint rule. Short names cannot contain any dots or special characters, only letters, numbers, and the underscore.
| All identifiers used in constraint statements are case sensitive. |
| If you are not sure what the fully qualified name of a layer is, you can look it up going to Layers in Project settings. Click on a particular layer and you can view the fully qualified name under Technical Properties. |
Scopes consist of a scope name and one or more rules that refer to a particular annotation layer and define restrictions for particular conditions. For example, it is possible to reorder the applicable tags for a POS layer, based on what kind of word the annotator is focusing on.
While scope names can be freely chosen, scope rules have a fixed structure. They consist of conditions and restrictions, separated by an arrow symbol (→).
Conditions consist of a path and a value, separated by an equal sign (=). Values always have to be embraced by double-quotes. Multiple conditions in the same rule are connected via the &-operator, multiple restrictions in the same rule are connected via the |-operator.
Typically a rule’s syntax is
<scopeName> {
  <condition_set> -> <restriction_set>;
}
This leads to the following structure:
<scopeName> {
  <rule_1>;
  ...
  <rule_n>;
}
Both conditions and restrictions are composed of a path and a value. The latter is always enclosed in double quotes.
<path>="<value>"A condition is a way of defining whether a particular situation in INCEpTION is based on annotation layers and features in it. Conditions can be defined on features with string, integer or boolean values, but in any case, the value needs to be put into quotes (e.g. someBooleanFeature="true", someIntegerFeature="2").
A condition set consists of one or more conditions. They are connected with logical AND as follows.
<condition> & <condition>A restriction set defines a set of restrictions which can be applied if a particular condition set is evaluated to true. As multiple restrictions inside one rule are interpreted as conjunctions, they are separated by the |-operator. Restrictions can only be defined on String-valued features that are associated with a tagset.
<restriction> | <restriction>A path is composed of one or more steps, separated by a dot. A step consists of a feature selector and a type selector.
Type selectors are only applicable while writing the condition part of a rule. They comprise a layer operator @ followed by the type (Lemma, POS, etc).
Feature selectors consist of a feature name, e.g.
pos.PosValueNavigation across layers is possible via
@<shortLayerName>Hereby all annotations of type <shortLayerName> at the same position as the current context are found.
The constraint language supports block comments which start with / and end with /. These
comments may span across multiple lines.
/* This is a single line comment */

/*
   This is a multi-
   line comment
*/
Constraint on a single layer
The simplest constraint rules only consider features on a single layer. In the following example, we constraint the values of the PosValue feature based on the value of the coarseValue feature.
import de.tudarmstadt.ukp.dkpro.core.api.lexmorph.type.pos.POS as Pos;

Pos {
  coarseValue = "NOUN" -> PosValue = "NN" | PosValue = "NNS" | PosValue = "NNP" | PosValue = "NNPS";
  coarseValue = "VERB" -> PosValue = "VB" | PosValue = "VBD" | PosValue = "VBG" | PosValue = "VBN";
}
Constraint between two span layers
The following simple example of a constraints file re-orders POS tags depending on Lemma values.
If the Lemma was annotated as can, the POS tags VERB and NOUN are highlighted. If the Lemma value is
the, the POS tag DET* is suggested first. The trick here is the @Lemma which tells the system to look for a Lemma annotation at the same position as the current POS annotation and then consider the features of that lemma.
import de.tudarmstadt.ukp.dkpro.core.api.segmentation.type.Lemma as Lemma;
import de.tudarmstadt.ukp.dkpro.core.api.lexmorph.type.pos.POS as Pos;

Pos {
  @Lemma.value = "can" ->
    coarseValue = "VERB" |
    coarseValue = "NOUN";

  @Lemma.value = "the" ->
    coarseValue = "DET";
}
In the UI, the tags that were matched by the constraints are bold and come first in the list of tags:
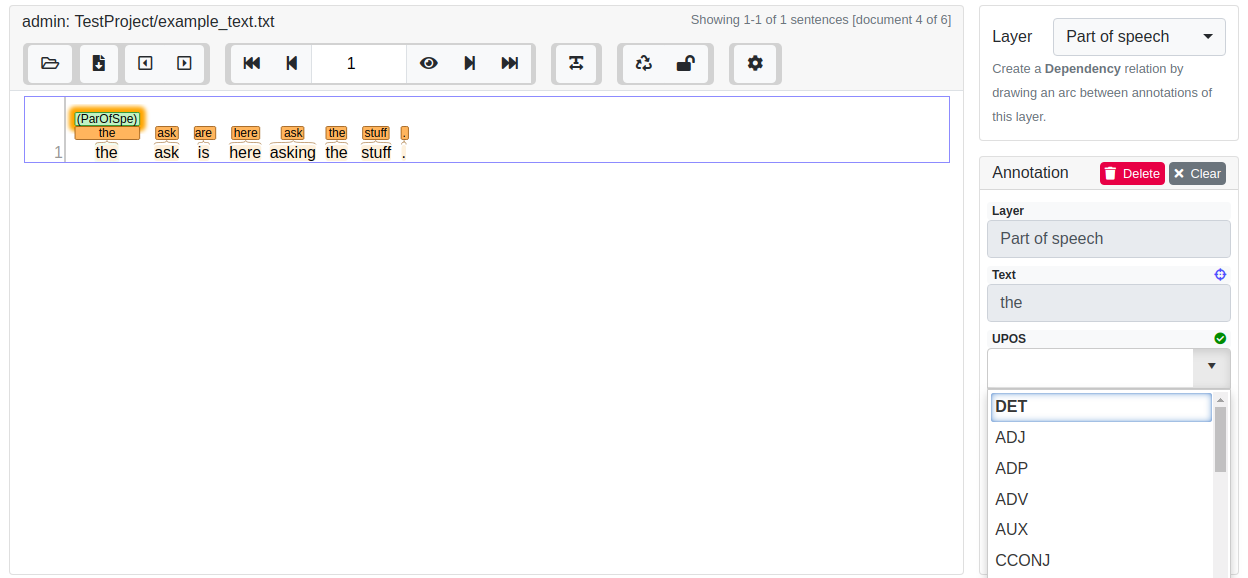
Constraining a relation layer based on its endpoints
It is possible to constrain the value of a feature on a relation layer based on features of the relation endpoints. Or said differently: you can restrict which relations are possible between certain entities. In the following example, we will used the pre-defined Dependency layer.
import de.tudarmstadt.ukp.dkpro.core.api.syntax.type.dependency.Dependency as DEPENDENCY;

DEPENDENCY {
 Governor.pos.PosValue = "NN" & Dependent.pos.PosValue = "DET" -> DependencyType = "det";
}
The DEPENDENCY { … } block says that the rules in that block apply to any annotations of the type …Dependency as define by the import.
Of course you do not need to use the alias DEPENDENCY or the …Dependency type, you can use any span or relation layer name and an alias
of your choice.
A relation layer (like …Dependency) always has two features called Governor and Dependent which represent the endpoints of the relation.
Dependent should be the TARGET of the relation (the side where the arrowhead should be) and Governor should be the SOURCE (i.e. the side without the arrowhead).
So when we read
<RELATION_LAYER> {
 Governor.<FEATURE> = "<VALUE>" ... -> ...
}
that means: looking at the current annotation of <LAYER>, match if the TARGET of the relation has a <FEATURE> with the given <VALUE>. Note that in the snippet above, we use not a simple <FEATURE> but actually a <FEATURE_PATH> …pos.PosValue which means that we first go to the annotation referred to by the pos feature on the TARGET and then continue to the PosValue feature. This is a special situation for the built-in Dependency layer which you do not need when using custom layers.
So the general structure for you to start from could be:
<RELATION_LAYER> {
 Governor.<SOURCE_FEATURE> = "<SOURCE_FEATURE_VALUE>" & Dependent.<TARGET_FEATURE> = "<TARGET_FEATURE_VALUE>" -> <RELATION_FEATURE> = "<RELATION_VALUE>"
}
Conditional features
Constraints can be used to set up conditional features, that is features that only become available in the UI if another feature has a specific value. Let’s say that for example you want to annotate events and only causing events should additionally offer a polarity feature, while for caused events, there should be no way to select a polarity.
Sticking with the example of annotating events, conditional features can be set up as following:
-
Go to the Layer tab of the project settings
-
Create a new tagset called Event category and add the tags causing and caused
-
Create a new tagset called Event polarity and add the tags positive and negative
-
Create a new span layer called Event
-
Add a string feature called category and assign the tagset Event category
-
Save the changes to the category feature
-
Add a string feature called polarity and assign the tagset Event polarity
-
Enabled the checkbox Hide Un-constraint feature on the polarity feature
-
Save the changes to the polarity feature
-
Create a new text file called
constraints.txtwith the following contents .
import webanno.custom.Event as Event;

Event {
  category="causing" -> polarity="positive" | polarity="negative";
}
-
Import
constraints.txtin the tab Constraints in the project settings.
When you now annotate an Event in this project, then the polarity feature is only visible and editable if the category of the annotation is set to causing.
| It is important that both of the features have tagsets assigned - otherwise the conditional effect will not take place. |
Constraints for slot features
Constraints can be applied to the roles of slot features. This is useful, e.g. when annotating predicate/argument structures where specific predicates can only have certain arguments.
Consider having a span layer SemPred resembling a semantic predicate and bearing a slot feature arguments and a string feature senseId. We want to restrict the possible argument roles based on the lemma associated with the predicate. The first rule in the following example restricts the senseId depending on the value of a Lemma annotation at the same position as the SemPred annotation. The second rule then restricts the choice of roles for the arguments based on the senseId. Note that to apply a restriction to the role of a slot feature, it is
necessary to append .role to the feature name (that is because role is technically a nested feature).
Thus, while we can write e.g. senseId = "Request" for a simple string feature, it is necessary to write arguments.role = "Addressee".
Note that some role labels are marked with the flag (!). This is a special flag for slot features and indicates that slots with these role labels should be automatically displayed in the UI ready to be filled. This should be used for mandatory or common slots and saves time as the annotator does not have to manually create the slots before filling them.
SemPred {
  /* Rule 1 */
  @Lemma.value = "ask" -> senseId = "Questioning" | senseId = "Request" | senseId = "XXX";
  /* .. other lemmata */
  /* Rule 2 */
  senseId = "Questioning" ->
    /* core roles */
    arguments.role = "Addressee" (!) | arguments.role = "Message" (!) | arguments.role = "Speaker" (!) |
    /* non-core roles */
    arguments.role = "Time" | arguments.role = "Iterations";
  /* .. other senses */
}
Constraints language grammar
// Basic structure ---------------------------------------
<file>            ::= <import>* | <scope>*
<scope>           ::= <shortLayerName> "{" <ruleset> "}"
<ruleset>         ::= <rule>*
<import>          ::= "import" <qualifiedLayerName>
                      "as" <shortLayerName>
<rule>            ::= <conds> "->" <restrictions> ";"

// Conditions --------------------------------------------
<conds>           ::= <cond> | (<cond> "&" <conds>)
<cond>            ::= <path> "=" <value>
<path>            ::= <featureName> | (<step> "." <path>)
<step>            ::= <featureName> | <layerSelector>
<layerSelector>   ::= <layerOperator>? <shortLayerName>
<layerOperator>   ::= "@" // select annotation in layer X

// Restrictions ------------------------------------------
<restrictions>    ::= <restriction> |
                      <restriction> "|" <restrictions>
<restriction>     ::= <restrictionPath> "=" <value>
                      ( "(" <flags> ")" )
<restrictionPath> ::= <featureName> |
                      <restrictionPath> "." <featureName>
<flags>           ::= "!" // core role
CAS Doctor
The CAS Doctor is an essential development tool. When enabled, it checks the CAS for consistency when loading or saving a CAS. It can also automatically repair inconsistencies when configured to do so. This section gives an overview of the available checks and repairs.
It is safe to enable any checks. However, active checks may considerably slow down the application, in particular for large documents or for actions that work with many documents, e.g. curation or the calculation of agreement. Thus, checks should not be enabled on a production system unless the application behaves strangely and it is necessary to check the documents for consistency.
Enabling repairs should be done with great care as most repairs are performing
destructive actions. Repairs should never be enabled on a production system. The repairs are
executed in the order in which they are appear in the debug.casDoctor.repairs setting. This is
important in particular when applying destructive repairs.
When documents are loaded, CAS Doctor first tries to apply any enabled repairs and afterwards applies enabled checks to ensure that the potentially repaired document is consistent.
Additionally, CAS Doctor applies enabled checks before saving a document. This ensures that a bug in the user interface introduces inconsistencies into the document on disk. I.e. the consistency of the persisted document is protected! Of course, it requires that relevant checks have been implemented and are actually enabled.
By default, CAS Doctor generates an exception when a check or repair fails. This ensures that inconsistencies are contained and do not propagate further. In some cases, e.g. when it is known that by its nature an inconsistency does not propagate and can be avoided by the user, it may be convenient to allow the user to continue working with the application while a repair is being developed. In such a case, CAS Doctor can be configured to be non-fatal. Mind that users can always continue to work on documents that are consistent. CAS Doctor only prevents loading inconsistent documents and saving inconsistent documents.
Configuration
| Setting | Description | Default | Example |
|---|---|---|---|
debug.casDoctor.fatal |
If the extra checks trigger an exception |
true |
false |
debug.casDoctor.checks |
Extra checks to perform when a CAS is saved (also on load if any repairs are enabled) |
unset |
list of checks |
debug.casDoctor.repairs |
Repairs to be performed when a CAS is loaded - order matters! |
unset |
list of repairs |
debug.casDoctor.forceReleaseBehavior |
Behave as like a release version even if it is a beta or snapshot version. |
false |
true |
To specify a list of repairs or checks in the settings.properties file, use the following syntax:
debug.casDoctor.checks[0]=Check1
debug.casDoctor.checks[1]=Check2
debug.casDoctor.checks[...]=CheckN
debug.casDoctor.repairs[0]=Repair1
debug.casDoctor.repairs[1]=Repair2
debug.casDoctor.repairs[...]=RepairN
Checks
All feature structures indexed
| ID |
|
| Related repairs |
Remove dangling chain links, Remove dangling relations, Re-index feature-attached spans, Remove dangling feature-attached span annotations |
This check verifies if all reachable feature structures in the CAS are also indexed. We do not currently use any un-indexed feature structures. If there are any un-indexed feature structures in the CAS, it is likely due to a bug in the application and can cause undefined behavior.
For example, older versions of INCEpTION had a bug that caused deleted spans still to be accessible through relations which had used the span as a source or target.
This check is very extensive and slow.
Feature-attached spans truly attached
| ID |
|
| Related repairs |
Re-attach feature-attached spans, Re-attach feature-attached spans and delete extras |
Certain span layers are attached to another span layer through a feature reference
from that second layer. For example, annotations in the POS layer must always be referenced from
a Token annotation via the Token feature pos. This check ensures that annotations on layers such
as the POS layer are properly referenced from the attaching layer (e.g. the Token layer).
Links reachable through chains
| ID |
|
| Related repairs |
Each chain in a chain layers consist of a chain and several links. The chain points to the first link and each link points to the following link. If the CAS contains any links that are not reachable through a chain, then this is likely due to a bug.
No multiple incoming relations
| ID |
|
Check that nodes have only one in-going dependency relation inside the same annotation layer. Since dependency relations form a tree, every node of this tree can only have at most one parent node. This check outputs a message that includes the sentence number (useful to jump directly to the problem) and the actual offending dependency edges.
No 0-sized tokens and sentences
| ID |
|
| Related repairs |
Zero-sized tokens and sentences are not valid and can cause undefined behavior.
Relation offsets consistency
| ID |
|
| Related repairs |
Checks that the offsets of relations match the target of the relation. This mirrors the DKPro Core convention that the offsets of a dependency relation must match the offsets of the dependent.
CASMetadata presence
| ID |
|
| Related repairs |
Checks if the internal type CASMetadata is defined in the type system of this CAS. If this is
not the case, then the application may not be able to detect concurrent modifications.
Dangling relations
| ID |
|
| Related repairs |
Checks if there are any relations that do not have a source or target. Either the source/end are not set at all or they refer to an unset attach feature in another layer. Note that relations referring to non-indexed end-points are handled by All feature structures indexed.
Negative-sized annotations check
| ID |
|
| Related repairs |
Checks if there are any annotations with a begin offset that is larger than their end offset. Such annotations are invalid and may cause errors in many functionalities of INCEpTION.
Negative-sized annotations check
| ID |
|
| Related repairs |
Checks that the begins and ends of all annotations are within the boundaries of a sentence. Annotations that are not within sentence boundaries may not be shown by certain annotation editors such as the default sentence-oriented brat editor. Also, sentence-oriented formats such as WebAnno TSV or CoNLL formats will not include any text and annotations of parts of the documents that is not covered by sentences or may produce errors during export.
Unreachable annotations check
| ID |
|
| Related repairs |
Checks if there are any unreachable feature structures. Such feature structures take up memory, but they are not regularly accessible. Such feature structures may be created as a result of bugs. Removing them is harmless and reduces memory and disk space usage.
All annotations start and end with characters
| ID |
|
| Related repairs |
Checks if all annotations start and end with a character (i.e. not a whitespace). Annotations that start or end with a whitespace character can cause problems during rendering. Trimming whitespace at the begin and end is typically as harmless procedure.
Document text starts with Byte Order Mark
| ID |
|
| Related repairs |
Checks if the document text starts with a Byte Order Mark (BOM).
Repairs
Re-attach feature-attached spans
| ID |
|
This repair action attempts to attach spans that should be attached to another span, but are not.
E.g. it tries to set the pos feature of tokens to the POS annotation for that respective token.
The action is not performed if there are multiple stacked annotations to choose from.
Stacked attached annotations would be an indication of a bug because attached layers are not allowed to stack.
This is a safe repair action as it does not delete anything.
Re-attach feature-attached spans and delete extras
| ID |
|
This is a destructive variant of Re-attach feature-attached spans. In addition to re-attaching unattached annotations, it also removes all extra candidates that cannot be attached. For example, if there are two unattached Lemma annotations at the position of a Token annotation, then one will be attached and the other will be deleted. Which one is attached and which one is deleted is undefined.
Re-index feature-attached spans
| ID |
|
This repair locates annotations that are reachable via a attach feature but which are not actually indexed in the CAS. Such annotations are then added back to the CAS indexes.
This is a safe repair action as it does not delete anything.
Repair relation offsets
| ID |
|
Fixes that the offsets of relations match the target of the relation. This mirrors the DKPro Core convention that the offsets of a dependency relation must match the offsets of the dependent.
Remove dangling chain links
| ID |
|
This repair action removes all chain links that are not reachable through a chain.
Although this is a destructive repair action, it is likely a safe action in most cases. Users are not able see chain links that are not part of a chain in the user interface anyway.
Remove dangling feature-attached span annotations
| ID |
|
This repair action removes all annotations which are themselves no longer indexed (i.e. they have been deleted), but they are still reachable through some layer to which they had attached. This affects mainly the DKPro Core POS and Lemma layers.
Although this is a destructive repair action, it is sometimes a desired action because the user may know that they do not care to resurrect the deleted annotation as per Re-index feature-attached spans.
Remove dangling relations
| ID |
|
This repair action removes all relations that point to unindexed spans.
Although this is a destructive repair action, it is likely a safe action in most cases. When deleting a span, normally any attached relations are also deleted (unless there is a bug). Dangling relations are not visible in the user interface. A dangling relation is one that meets any of the following conditions:
-
source or target are not set
-
the annotation pointed to by source or target is not indexed
-
the attach-feature in the annotation pointed to by source or target is not set
-
the annotation pointed to by attach-feature in the annotation pointed to by source or target is not indexed
Remove 0-size tokens and sentences
| ID |
|
This is a destructive repair action and should be used with care. When tokens are removed, also any attached lemma, POS, or stem annotations are removed. However, no relations that attach to lemma, POS, or stem are removed, thus this action could theoretically leave dangling relations behind. Thus, the Remove dangling relations repair action should be configured after this repair action in the settings file.
Upgrade CAS
| ID |
|
Ensures that the CAS is up-to-date with the project type system. It performs the same operation which is regularly performed when a user opens a document for annotation/curation.
This repair also removes any unreachable feature structures. Such feature structures may be created as a result of bugs. Removing them is harmless and reduces memory and disk space usage.
This is considered to be safe repair action as it only garbage-collects data from the CAS that is no longer reachable anyway.
Switch begin and end offsets on negative-sized annotations
| ID |
|
This repair switches the begin and end offsets on all annotations where the begin offset is larger than the begin offset.
Cover all text in sentences
| ID |
|
This repair checks if there is any text not covered by sentences. If there is, it creates a new sentence annotation on this text starting at the end of the last sentence before it (or the start of the document text) and the begin of the next sentence (or the end of the document text).
Trim annotations
| ID |
|
This repair adjusts annotation boundaries such that they do not include any whitespace at the beginning or end of the annotation.
| Run the checks again after applying this repair as certain annotations can become invalid if they get trimmed down to a length of zero. It may be necessary to apply another repair such as Remove 0-size tokens and sentences to remove these annotations. |
Remove Byte Order Mark
| ID |
|
This repair removes the Byte Order Mark at the start of the document and adjusts all annotation offsets accordingly.
Relace XML structure in the curation CAS
| ID |
|
This repair ensures the XML document structure that may have been extracted from the source document is also present in the curation CAS. Any potentially existing XML document structure int he curation CAS will be removed and replaced with the structure from the source document.
Annotation Guidelines
Providing your annotation team with guidelines helps assuring that every team member knows exactly what is expected of them.
Annotators can access the guidelines via the Guidelines button on the annotation page.
Project managers can provide these guidelines via the Guidelines tab in the project settings. Guidelines are provided as files (e.g. PDF files). To upload guidelines, click on Choose files, select a file from your local disc and then click Import guidelines. Remove a guideline document by selecting it and pressing the Delete button.
PDF Annotation Editor
The PDF annotation editor allows annotating text in PDF files. Usually, it opens automatically when opening a PDF file.
To annotate a span, simply mark the span with the mouse. When you press the left mouse button and drag the mouse, a highlight should appear. When you release the mouse button, the annotation should be created.
| If no highlight appears, then the PDF may not include text information at this location. You may try verifying if the text can be selected in other PDF-enabled tools like macOS Preview or Acrobat Reader. INCEpTION can only work with PDFs that include text information. If a PDF was OCRed, the text may not always be at the same location as you see it on screen. Try marking a larger region to see if you can "catch" it. |
A span annotation is rendered as a highlight with a small knob hovering above the start of the highlight. To select the annotation click on that knob. If the knob overlaps with another highlight, it might be hard to see. If you move the mouse over it, the knob reacts - that may help you find it. If there are multiple annotations starting at the same position, their knobs are stacked.
To create a relation, press the left mouse button on the knob and drag the mouse over to the knob of another span annotation.
PDF Annotation Editor (legacy)
Legacy feature. To use this functionality, you need to enable it first by adding ui.pdf-legacy.enabled=true to the settings.properties file.
|
Support for this feature will be removed in a future version. The replacement is PDF Annotation Editor.
Opening the PDF Editor
To switch to the PDF editor for an opened document, click on Settings in the
Document panel located at the top.
In the section General Display Preferences select PDF for the Editor field.
Save your settings.
The PDF editor will open.
Navigation
Once the editor is loaded you can see the opened PDF document.
To navigate through the document you can hover your mouse over the PDF panel and
use the mouse wheel for scrolling.
After clicking in the PDF panel it is also possible to use the Up and Down
keys of the keyboard.
For a faster navigation the Page Up and Page Down keys can be used.
In the PDF panel on the top left there are buttons for switching to the previous
or next page in the document.
Next to the buttons you can enter a page number to jump to a specific page.

In the top center of the PDF panel the zoom level of the document can be adjusted.

The button on the top right in the PDF panel opens a small menu which provides
functionality to go to the first or last page.
You can also use the Home and End keys instead.
The menu also contains an option to enable the hand tool to navigate through the document via clicking
and dragging the pages.
When moving through the document annotations will not show immediately. Once the movement stops for a short period of time the annotations for the previous, current and next page will be loaded. The loading process might take a few seconds.
Creating Span Annotations
To create a span annotation first select the desired layer for it.
This can be done in the Layer box on the right sidebar.
If another annotation is already selected press the Clear button on the right
sidebar.
Once you have chosen a layer, select the desired text to create a span annotation. This can be done by clicking at the beginning of the text span, dragging until the end and then releasing the mouse button. In the upper right corner you can see a moving circle which indicates that the creation of the annotation is in process.
The creation might take a few seconds.
Once finished the new span annotation will be rendered if it was created
successfully.
If it was not possible to create the annotation an error message is shown.
After the span annotation is created it will be automatically selected in the
Layer box.

Creating Relation Annotations
To create a relation annotation click on the knob of a span annotation and drag and drop on another span annotation knob. In order to create a relation annotation between two spans an according layer must exist.

After releasing the mouse button the creation process starts which is indicated
by a moving circle in the upper right corner.
This might take a few seconds.
Once finished the new relation annotation will be rendered if it was created
successfully.
If it was not possible to create the annotation an error message is shown.
After the relation annotation is created it will be automatically selected in
the Layer box.

Currently long distance relation annotations are not creatable as annotations are rendered dynamically when moving through the pages.
Selecting Span and Relation Annotations
Span annotations can be selected by clicking on their span annotation knob.
To select relation annotations click on the relation arc.
Modifying Span and Relation Annotations
To modify an existing span or relation annotation you first need to select it.
Once an annotation is selected it will be shown in the Layer box.
You can now edit the selected annotation.
Deleting Span and Relation Annotations
First select the annotation that will be deleted.
The selected annotation will be shown in the Layer box.
To delete the annotation click on the Delete button on the right sidebar.
🧪 Cross-layer relations
Experimental feature. To use this functionality, you need to enable it first by adding ui.cross-layer-relations-enabled=true to the settings.properties file (see the Admin Guide). While this feature introduces a new level of flexibility, it can also interact with existing features in unexpected and untested ways.
|
By default, relations can only be created between two endpoints on the same layer. Also, it is only possible to create a single relation layer for any given span layer.
Enable this experimental option feature the creation of relation layers that can go between different span layers. This is done by adding a new option Any span to the Attach to layer setting in the relation layer details.
With this experimental feature, it becomes possible to define multiple annotation layer per span layer. If this is the case, the annotation editor will offer a selection list when a new relation is created between two spans to which multiple relation layers could apply.
🧪 Editable segmentation
Experimental feature. To use this functionality, you need to enable it first by adding ui.sentence-layer-editable=true to the settings.properties file (see the Admin Guide).
|
Often, after importing a text into INCEpTION, one discovers that a segment boundary (e.g. a sentence boundary) was not properly recognized or there was a segmentation mistake in the original data. Normally, such mistakes cannot be corrected. Enabling the experimental editable sentence layer feature can help in such cases.
Please note this feature is new and has not been tested a lot in practice yet. There may be unexpected side effects when manually editing sentences. For example, normally it is expected that:
-
the entire text is covered by token and sentence annotations;
-
no tokens exist outside sentence boundaries;
-
sentences start at a token start boundary and end at a token end boundary.
However, when you enable this feature, you will eventually be able to delete sentences (which leaves tokens lying around outside sentence boundaries) or create other odd situations which exporters, curation, recommenders, editors and other functionalities may not yet be able to deal with. So be careful, ready to face unexpected situations and make regular backups of course.
Once the feature has been enabled, new projects get a Sentence layer. It is also possible to add a sentence layer to existing project from the dropdown menu of the create layer button where other built-in layers can also be added to a project that does not yet contain them. By default, the layer is not enabled and read-only which means that you can neither see the sentence annotations in the annotation editor nor create or delete sentence annotations. To make the sentences visible and editable for the annotators, check the enabled checkbox and un-check the read-only checkbox and save the layer settings.
While the sentence layer is editable (i.e. enabled and not read-only), the annotation page and the curation page default to a line-oriented editor instead of the usual sentence-oriented editor. In the line-oriented editor, the sentences can be safely shown and edited because the editor does not rely on sentence boundaries to control the rendering process. It is then possible to curate the sentence boundaries.
| If you start curating a document while the sentence layer is editable but then switch it back not being editable, then it could happen that different annotators have different segmentations and/or that the curation document does not contain all sentence boundaries. This means that some sentences may be invisible because the the sentence-oriented visualization does not display them! |
Appendices
Appendix A: Frequently Asked Questions (FAQs)
What tokenization does INCEpTION use?
INCEpTION uses the Java BreakIterator internally. Note that the linked file is part of a specific version of OpenJDK 11 and may change in other Java versions or for other Java vendors.
If you need to provide your own tokenization, then the best choice would be to use a format that supports it, e.g. XMI, WebAnno TSV or CoNLL formats.
How can I annotate discontinuous spans?
The is no immediate support for discontinuous spans in INCEpTION.
However, you can emulate them using either a relations or link features.
You can define a relation layer on top of your span layer. When you have multiple spans that should be considered as one, you can use a relation to connect them.
Or you can add a Link: XXX feature to your span layer which either points to the same layer or which points to a new layer you might call e.g. Extension.
So when you have a discontinuous span, you could annotate the first span with your normal span layer and then add one or more links to the other spans.
What is the relation between WebAnno and INCEpTION?
INCEpTION is the successor of WebAnno and evolved from the WebAnno code base. Both INCEpTION and WebAnno are currently developed/maintained by the same team at the UKP Lab at the Technical University of Darmstadt.
INCEpTION has all the flexibility and many more exciting features including a completely new human-in-the-loop annotation assistance support, the ability to search texts and annotations, support for RDF/SPARQL knowledge bases for entity linking, and much more. And best: it can import your WebAnno annotation projects (Projects of type automation or correction are not supported).
Appendix B: Editors
This section provides information about the different annotation editors that INCEpTION provides.
| Editor | Feature flag | Spans | Relations/Links |
|---|---|---|---|
|
yes |
yes |
|
|
yes |
yes |
|
|
yes |
yes |
|
|
yes |
no |
|
|
yes |
no |
|
|
yes |
yes |
|
|
yes |
yes |
|
|
yes |
yes |
Brat (sentence-oriented)
A sentence-oriented presentation of the text using inter-linear annotations. This editor is useful for texts that have been externally segmented into sentences. It supports rendering span annotations, relations and link features. The editor uses a heavily improved version of the rendering engine of brat.
Brat (line-oriented)
A line-oriented presentation of the text using inter-linear annotations. This editor is useful for texts formatted using line breaks. It supports rendering span annotations, relations and link features. The editor uses a heavily improved version of the rendering engine of brat.
Brat (wrapping @ 120 chars)
A line-oriented presentation of the text using inter-linear annotations that also wraps lines longer than 120 characters. This editor is useful for texts using consecutive line breaks mainly to indicate paragraph boundaries but that do not use line breaks within paragraphs. It supports rendering span annotations, relations and link features. The editor uses a heavily improved version of the rendering engine of brat.
🧪 HTML (Apache Annotator)
Experimental feature. To use this functionality, you need to enable it first by adding ui.html-apacheannotator.enabled to the settings.properties file.
|
This editor renders documents imported using a XML/HTML-based format such as 🧪 MHTML (Web archive) or 🧪 HTML. It is build on top of Apache Annotator. It supports rendering span annotations but not relations or link features.
🪦 HTML (AnnotatorJS)
Legacy feature. To use this functionality, you need to enable it first by adding ui.html-annotatorjs.enabled to the settings.properties file.
|
This editor renders documents imported using a XML/HTML-based format such as 🧪 MHTML (Web archive) or 🧪 HTML. It is build on top of AnnotatorJS. It supports rendering span annotations but not relations or link features.
🧪 HTML (RecogitoJS)
Experimental feature. To use this functionality, you need to enable it first by adding ui.html-recogitojs.enabled to the settings.properties file.
|
This editor renders documents imported using a XML/HTML-based format such as 🧪 MHTML (Web archive) or 🧪 HTML. It is build on top of RecogitoJS. It supports rendering span annotations, relations and link features.
🪦 PDF (old)
Legacy feature. To use this functionality, you need to enable it first by adding ui.pdf-legacy.enabled to the settings.properties file.
|
This editor allows annotating PDF documents. It is based on PDF.js (version 1.x) and on the legacy INCEpTION PDF format support. The editor supports rendering span annotations, relations and link features. It is only kept for compatibility to allow users to view old annotation projects. The editor uses an improved version of the rendering engine of PDFAnno.
🧪 Editor plugins
| Experimental feature. The available plugins as well as their compatibility with a given version of INCEpTION may change without further notice. |
In addition to these different editors, INCEpTION has the ability to load editor plugins. Several of these can be found on your website. You can use these as inspirations to write your own.
Appendix C: Formats
This section provides information about the different formats that INCEpTION can import and export. While many formats can be imported and exported, some formats can only be imported and others can only be exported. Also, not all formats support custom annotation layers. Each format description includes a small table explaining whether the format can be imported, exported and whether custom layers are supported. The first column includes a format ID in addition to the format name. This ID can be used e.g. in conjunction with the remote API when to select the format when importing or exporting annotations and documents.
For your convenience, the following table provides an overview over all the available formats.
The remote API format ID column shows which format ID must be used when importing or exporting
data in a particular format. The feature flag column shows which flags you can put into the
settings.properties file to enable or disable a format. Most formats are enabled by default.
| Format | Remote API format ID | Feature flag |
|---|---|---|
|
|
|
|
|
|
|
|
|
|
|
|
|
|
|
|
|
|
|
|
|
|
|
|
|
|
|
|
|
|
|
|
|
|
|
|
|
|
|
|
|
|
|
|
|
|
|
|
|
|
|
|
|
|
|
|
|
|
|
|
|
|
|
|
|
|
|
|
|
|
|
|
|
|
|
|
|
|
|
|
|
|
|
|
|
|
|
|
|
|
|
|
|
|
|
|
|
|
|
|
|
🧪 BioC
Experimental feature. To use this functionality, you need to enable it first by adding format.bioc.enabled=true to the settings.properties file (see the Admin Guide).
|
This is a new and still experimental BioC format.
| This format dynamically maps information from the imported files to the layers and features configured in the project. For this process to work, the layers and features need to be set up before importing BioC files. |
-
Sentence information is supported
-
If sentences are present in a BioC document, they are imported. Otherwise, INCEpTION will automatically try to determine sentence boundaries.
-
On export, the BioC files are always created with sentence information.
-
Passages are imported as a
Divannotations and the passagetypeinfon is set as thetypefeature on theseDivannotations -
When reading span or relation annotations, the
typeinfon is used to look up a suitable annotation layer. If a layer exists where either the full technical name of the layer or the simple technical name (the part after the last dot) match the type, then an attempt will be made to match the annotation to that layer. If the annotation has other infons that match features on that layer, they will also be matched. If no layer matches but the defaultSpanlayer is present, annotations will be matched to that. Similarly, if only a single infon is present in an annotation and no other feature matches, then the infon value may be matched to a potentially existingvaluefeature. -
When exporting annotations, the
typeinfon will always be set to the full layer name and features will be serialized to infons matching their names. -
If a document has not been imported from a BioC file containing passages and does not contain
Divannotations from any other source either, then on export a single passage containing the entire document is created. -
Multi-value features are supported. They are serialized as a sequence of infons using the same key (but different values). They can also be deserialized from those infons. When there are multiple infons with the same key during deserialization but the target feature is not multi-valued, then only the first infon is considered and the others are ignored.
-
Cross-passage relations are not supported.
-
Sentence-level infons are not supported.
-
Passage-level infons are not supported.
-
Document-level infons are not supported.
-
The writer writes one BioC file per CAS (i.e. writing multiple documents to a single collection file is not supported).
| Format | Import | Export | Supported layers |
|---|---|---|---|
BioC (experimental) ( |
yes |
yes |
see description |
🧪 brat basic
Experimental feature. To use this functionality, you need to enable it first by adding format.brat-basic.enabled=true to the settings.properties file (see the Admin Guide).
|
This format is the native format of the brat rapid annotation tool. Its official documentation can be found here.
The brat basic format is mainly directed towards users who have existing texts annotated in the brat format and want to import these into INCEpTION. In the brat format, a document always consists of two files: an .ann file containing the annotations and a .txt file containing the text. However, INCEpTION requires every document to consist only of a single file. In order to import a document in brat basic format, it is therefore currently necessary to create one ZIP file per each pair of .ann and .txt file and then uploading this ZIP file into INCEpTION.
Before importing, ensure that your project contains the pre-defined layers Span and Relation. All annotations imported from the brat data will be mapped to these two layers. Also add any attributes that you want to import as features to the Span layer.
| Format | Import | Export | Supported layers |
|---|---|---|---|
brat (experimental) ( |
yes |
no |
Span (built-in), |
🧪 brat custom
Experimental feature. To use this functionality, you need to enable it first by adding format.brat-custom.enabled=true to the settings.properties file (see the Admin Guide).
|
This format is the native format of the brat rapid annotation tool. Its official documentation can be found here.
The brat custom format is mainly directed towards users who have existing tooling compatible with the brat format and want to use that tooling with texts annotated in INCEpTION. The brat format is less expressive than the INCEpTION data model, so the export process may not be loss-less. In contrast to the brat basic format, this format will export annotations on custom layers.
When writing, the format uses the short type names (i.e. the part of the technical name after the last dot (.)) of layers as labels for the brat span and relation annotations. This means it is important that you do not have multiple types with the same short names.
When reading, the format will try to match the labels of brat span and relation annotations to the short type names as well and will try to map attributes to the corresponding features of these types.
| INCEpTION supports attributes (features) on relations, but the original brat does not. For this reason, the files produced by this format may not import into or display properly in the original brat tool. |
| Format | Import | Export | Supported layers |
|---|---|---|---|
brat (experimental) ( |
false |
yes |
All span and relation layers (built-in and custom) |
CoNLL 2000
The CoNLL 2000 format represents POS and Chunk tags. Fields in a line are separated by spaces. Sentences are separated by a blank new line.
| Format | Import | Export | Supported layers |
|---|---|---|---|
CoNLL 2000 ( |
yes |
yes |
Part-of-speech tagging (built-in), |
| Column | Type | Description |
|---|---|---|
FORM |
Token |
token |
POSTAG |
POS |
part-of-speech tag |
CHUNK |
Chunk |
chunk (IOB1 encoded) |
He PRP B-NP
reckons VBZ B-VP
the DT B-NP
current JJ I-NP
account NN I-NP
deficit NN I-NP
will MD B-VP
narrow VB I-VP
to TO B-PP
only RB B-NP
# # I-NP
1.8 CD I-NP
billion CD I-NP
in IN B-PP
September NNP B-NP
. . O
CoNLL 2002
The CoNLL 2002 format encodes named entity spans. Fields are separated by a single space. Sentences are separated by a blank new line.
| Format | Import | Export | Supported layers |
|---|---|---|---|
CoNLL 2002 ( |
yes |
yes |
Named entity tagging (built-in) |
| Column | Type/Feature | Description |
|---|---|---|
FORM |
Token |
Word form or punctuation symbol. |
NER |
NamedEntity |
named entity (IOB2 encoded) |
Wolff B-PER
, O
currently O
a O
journalist O
in O
Argentina B-LOC
, O
played O
with O
Del B-PER
Bosque I-PER
in O
the O
final O
years O
of O
the O
seventies O
in O
Real B-ORG
Madrid I-ORG
. O
CoNLL 2003
The CoNLL 2003 format encodes named entity spans and chunk spans. Fields are separated by a single
space. Sentences are separated by a blank new line. Named entities and chunks are encoded in the
IOB1 format. I.e. a B prefix is only used if the category of the following span differs from the
category of the current span.
| Format | Import | Export | Supported layers |
|---|---|---|---|
CoNLL 2003 ( |
yes |
yes |
Chunking (built-in) |
| Column | Type/Feature | Description |
|---|---|---|
FORM |
Token |
Word form or punctuation symbol. |
CHUNK |
Chunk |
chunk (IOB1 encoded) |
NER |
Named entity |
named entity (IOB1 encoded) |
U.N. NNP I-NP I-ORG
official NN I-NP O
Ekeus NNP I-NP I-PER
heads VBZ I-VP O
for IN I-PP O
Baghdad NNP I-NP I-LOC
. . O O
CoNLL 2006
The CoNLL 2006 (aka CoNLL-X) format targets dependency parsing. Columns are tab-separated. Sentences are separated by a blank new line.
| Format | Import | Export | Supported layers |
|---|---|---|---|
CoNLL 2006 ( |
yes |
yes |
Part-of-speech tagging (built-in), |
| Column | Type/Feature | Description |
|---|---|---|
ID |
ignored |
Token counter, starting at 1 for each new sentence. |
FORM |
Token |
Word form or punctuation symbol. |
LEMMA |
Lemma |
Lemma of the word form. |
CPOSTAG |
POS coarseValue |
|
POSTAG |
POS PosValue |
Fine-grained part-of-speech tag, where the tagset depends on the language, or identical to the coarse-grained part-of-speech tag if not available. |
FEATS |
MorphologicalFeatures |
Unordered set of syntactic and/or morphological features (depending on the particular language), separated by a vertical bar ( |
HEAD |
Dependency |
Head of the current token, which is either a value of ID or zero ('0'). Note that depending on the original treebank annotation, there may be multiple tokens with an ID of zero. |
DEPREL |
Dependency |
Dependency relation to the HEAD. The set of dependency relations depends on the particular language. Note that depending on the original treebank annotation, the dependency relation may be meaningful or simply 'ROOT'. |
PHEAD |
ignored |
Projective head of current token, which is either a value of ID or zero ('0'), or an underscore if not available. Note that depending on the original treebank annotation, there may be multiple tokens an with ID of zero. The dependency structure resulting from the PHEAD column is guaranteed to be projective (but is not available for all languages), whereas the structures resulting from the HEAD column will be non-projective for some sentences of some languages (but is always available). |
PDEPREL |
ignored |
Dependency relation to the PHEAD, or an underscore if not available. The set of dependency relations depends on the particular language. Note that depending on the original treebank annotation, the dependency relation may be meaningful or simply 'ROOT'. |
1 Heutzutage heutzutage ADV _ _ ADV _ _CoNLL 2009
The CoNLL 2009 format targets semantic role labeling. Columns are tab-separated. Sentences are separated by a blank new line.
| Format | Import | Export | Supported layers |
|---|---|---|---|
CoNLL 2009 ( |
yes |
yes |
Part-of-speech tagging (built-in), |
| Column | Type/Feature | Description |
|---|---|---|
ID |
ignored |
Token counter, starting at 1 for each new sentence. |
FORM |
Token |
Word form or punctuation symbol. |
LEMMA |
Lemma |
Lemma of the word form. |
PLEMMA |
ignored |
Automatically predicted lemma of FORM. |
POS |
POS PosValue |
Fine-grained part-of-speech tag, where the tagset depends on the language. |
PPOS |
ignored |
Automatically predicted major POS by a language-specific tagger. |
FEATS |
MorphologicalFeatures |
Unordered set of syntactic and/or morphological features (depending on the particular language), separated by a vertical bar ( |
PFEAT |
ignored) |
Automatically predicted morphological features (if applicable). |
HEAD |
Dependency |
Head of the current token, which is either a value of ID or zero (`0). Note that depending on the original treebank annotation, there may be multiple tokens with an ID of zero. |
PHEAD |
ignored |
Automatically predicted syntactic head. |
DEPREL |
Dependency |
Dependency relation to the HEAD. The set of dependency relations depends on the particular language. Note that depending on the original treebank annotation, the dependency relation may be meaningful or simply |
PDEPREL |
ignored |
Automatically predicted dependency relation to PHEAD. |
FILLPRED |
ignored |
Contains |
PRED |
SemPred |
(sense) identifier of a semantic 'predicate' coming from a current token. |
APREDs |
SemArg |
Columns with argument labels for each semantic predicate (in the ID order). |
1	The	the	the	DT	DT	_	_	4	4	NMOD	NMOD	_	_	_	_
2	most	most	most	RBS	RBS	_	_	3	3	AMOD	AMOD	_	_	_	_
3	troublesome	troublesome	troublesome	JJ	JJ	_	_	4	4	NMOD	NMOD	_	_	_	_
4	report	report	report	NN	NN	_	_	5	5	SBJ	SBJ	_	_	_	_
5	may	may	may	MD	MD	_	_	0	0	ROOT	ROOT	_	_	_	_
6	be	be	be	VB	VB	_	_	5	5	VC	VC	_	_	_	_
7	the	the	the	DT	DT	_	_	11	11	NMOD	NMOD	_	_	_	_
8	August	august	august	NNP	NNP	_	_	11	11	NMOD	NMOD	_	_	_	AM-TMP
9	merchandise	merchandise	merchandise	NN	NN	_	_	10	10	NMOD	NMOD	_	_	A1	_
10	trade	trade	trade	NN	NN	_	_	11	11	NMOD	NMOD	Y	trade.01	_	A1
11	deficit	deficit	deficit	NN	NN	_	_	6	6	PRD	PRD	Y	deficit.01	_	A2
12	due	due	due	JJ	JJ	_	_	13	11	AMOD	APPO	_	_	_	_
13	out	out	out	IN	IN	_	_	11	12	APPO	AMOD	_	_	_	_
14	tomorrow	tomorrow	tomorrow	NN	NN	_	_	13	12	TMP	TMP	_	_	_	_
15	.	.	.	.	.	_	_	5	5	P	P	_	_	_	_
CoNLL 2012
The CoNLL 2012 format targets semantic role labeling and coreference. Columns are whitespace-separated (tabs or spaces). Sentences are separated by a blank new line.
Note that this format cannot deal with the following situations:
* An annotation has no label (e.g. a SemPred annotation has no category) - in such a case null is
written into the corresponding column. However, the reader will actually read this value as the
label.
* If a SemPred annotation is at the same position as a SemArg annotation linked to it, then only
the (V*) representing the SemPred annotation will be written.
* SemPred annotations spanning more than one token are not supported
* If there are multiple SemPred annotations on the same token, then only one of them is written.
This is because the category of the SemPred annotation goes to the Predicate Frameset ID
and that can only hold one value which.
| Format | Import | Export | Supported layers |
|---|---|---|---|
CoNLL 2012 ( |
yes |
yes |
Part-of-speech tagging (built-in), |
| Column | Type/Feature | Description |
|---|---|---|
Document ID |
ignored |
This is a variation on the document filename.</li> |
Part number |
ignored |
Some files are divided into multiple parts numbered as 000, 001, 002, … etc. |
Word number |
ignored |
|
Word itself |
document text |
This is the token as segmented/tokenized in the Treebank. Initially the |
Part-of-Speech |
POS |
|
Parse bit |
ignored |
This is the bracketed structure broken before the first open parenthesis in the parse, and the word/part-of-speech leaf replaced with a |
Predicate lemma |
Lemma |
The predicate lemma is mentioned for the rows for which we have semantic role information. All other rows are marked with a |
Predicate Frameset ID |
SemPred |
This is the PropBank frameset ID of the predicate in Column 7. |
Word sense |
ignored |
This is the word sense of the word in Column 3. |
Speaker/Author |
ignored |
This is the speaker or author name where available. Mostly in Broadcast Conversation and Web Log data. |
Named Entities |
NamedEntity |
These columns identifies the spans representing various named entities. |
Predicate Arguments |
SemPred |
There is one column each of predicate argument structure information for the predicate mentioned in Column 7. |
Coreference |
CoreferenceChain |
Coreference chain information encoded in a parenthesis structure. |
en-orig.conll	0	0	John	NNP	(TOP(S(NP*)	john	-	-	-	(PERSON)	(A0)	(1)
en-orig.conll	0	1	went	VBD	(VP*	go	go.02	-	-	*	(V*)	-
en-orig.conll	0	2	to	TO	(PP*	to	-	-	-	*	*	-
en-orig.conll	0	3	the	DT	(NP*	the	-	-	-	*	*	(2
en-orig.conll	0	4	market	NN	*)))	market	-	-	-	*	(A1)	2)
en-orig.conll	0	5	.	.	*))	.	-	-	-	*	*	-
CoreNLP CoNLL-like format
The CoreNLP CoNLL format is used by the Stanford CoreNLP package. Columns are tab-separated. Sentences are separated by a blank new line.
| Format | Import | Export | Supported layers |
|---|---|---|---|
CoreNLP CoNLL-like format ( |
yes |
yes |
Part-of-speech tagging (built-in), |
| Column | Type/Feature | Description |
|---|---|---|
ID |
ignored |
Token counter, starting at 1 for each new sentence. |
FORM |
Token |
Word form or punctuation symbol. |
LEMMA |
Lemma |
Lemma of the word form. |
POSTAG |
POS PosValue |
Fine-grained part-of-speech tag, where the tagset depends on the language, or identical to the coarse-grained part-of-speech tag if not available. |
NER |
NamedEntity |
Named Entity tag, or underscore if not available. If a named entity covers multiple tokens, all of the tokens simply carry the same label without (no sequence encoding). |
HEAD |
Dependency |
Head of the current token, which is either a value of ID or zero ('0'). Note that depending on the original treebank annotation, there may be multiple tokens with an ID of zero. |
DEPREL |
Dependency |
Dependency relation to the HEAD. The set of dependency relations depends on the particular language. Note that depending on the original treebank annotation, the dependency relation may be meaningful or simply 'ROOT'. |
1	Selectum	Selectum	NNP	O	_	_
2	,	,	,	O	_	_
3	Société	Société	NNP	O	_	_
4	d'Investissement	d'Investissement	NNP	O	_	_
5	à	à	NNP	O	_	_
6	Capital	Capital	NNP	O	_	_
7	Variable	Variable	NNP	O	_	_
8	.	.	.	O	_	_
CoNLL-U
The CoNLL-U format format targets dependency parsing. Columns are tab-separated. Sentences are separated by a blank new line.
| Format | Import | Export | Supported layers |
|---|---|---|---|
CoNLL-U ( |
yes |
yes |
Part-of-speech tagging (built-in), |
| Column | Type/Feature | Description |
|---|---|---|
ID |
ignored |
Word index, integer starting at 1 for each new sentence; may be a range for tokens with multiple words. |
FORM |
Token |
Word form or punctuation symbol. |
LEMMA |
Lemma |
Lemma or stem of word form. |
CPOSTAG |
POS coarseValue |
Part-of-speech tag from the universal POS tag set. |
POSTAG |
POS PosValue |
Language-specific part-of-speech tag; underscore if not available. |
FEATS |
MorphologicalFeatures |
List of morphological features from the universal feature inventory or from a defined language-specific extension; underscore if not available. |
HEAD |
Dependency |
Head of the current token, which is either a value of ID or zero (0). |
DEPREL |
Dependency |
Universal Stanford dependency relation to the HEAD (root iff HEAD = 0) or a defined language-specific subtype of one. |
DEPS |
Dependency |
List of secondary dependencies (head-deprel pairs). |
MISC |
unused |
Any other annotation. |
1	They	they	PRON	PRN	Case=Nom|Number=Plur	2	nsubj	4:nsubj	_
2	buy	buy	VERB	VB	Number=Plur|Person=3|Tense=Pres	0	root	_	_
3	and	and	CONJ	CC	_	2	cc	_	_
4	sell	sell	VERB	VB	Number=Plur|Person=3|Tense=Pres	2	conj	0:root	_
5	books	book	NOUN	NNS	Number=Plur	2	dobj	4:dobj	SpaceAfter=No
6	.	.	PUNCT	.	_	2	punct	_	_
🪦 HTML (old)
Legacy feature. To use this functionality, you need to enable it first by adding format.html-legacy.enabled=true to the settings.properties file.
|
Support for this feature will be removed in a future version. The replacement is 🧪 HTML.
Legacy support for HTML documents which imports a small subset of HTML elements as annotations.
Supported elements are h1-h6 and p.
| Format | Import | Export | Supported layers |
|---|---|---|---|
HTML ( |
yes |
no |
None |
🧪 HTML
Experimental feature. To use this functionality, you need to enable it first by adding format.html.enabled to the settings.properties file.
|
Generic support for HTML documents. This format imports the entire HTML document structure and is able to retain it until export. None of the HTML elements are converted to editable annotations though. In combination with a HTML-based editor, this format allows annotating in HTML documents while retaining most of the HTML layout. Note that some HTML elements and attributes are filtered out during rendering. These include e.g. JavaScript-related elements and attributes as well as links which could easily interfere with the functionality of the annotation editor.
| Format | Import | Export | Supported layers |
|---|---|---|---|
HTML ( |
yes |
no |
None |
🧪 MHTML (Web archive)
Experimental feature. To use this functionality, you need to enable it first by adding format.mhtml.enabled=true to the settings.properties file. In order to load images from MHTML files, it is currently also necessary to disable image blocking in the safety net using ui.external.block-img=false and set ui.external.allow-img-source=LOCAL - this will allow loading images
embedded into documents, but not to load images from remote servers.
|
MHTML is a format supported by many browsers which stores the website currently shown in the browser along with most resources required to display the page - including but not limited to images.
E.g. in Chrome, you may save a web page in this format using Save as… and then selecting the format Web page, Single File.
INCEpTION will load the web page saved in this format, but it will not look like the original. You will notice that most of the styling will be gone. This usually leads to a lot of boiler plate being visible in particular at the start and end of the document, e.g. page navigation sections, sidebars, etc. which have been inlined into the document structure because they are missing their usual styles. However, other essential styling like paragraph, headings, figures, tables, etc. should mostly be preserved.
A special feature of the MHTML format is that it also allows images that were part of the original page to be displayed in INCEpTION. Note that when saving a page, it is possible that the browser does not capture all the images into the MHTML file. INCEpTION will only be able to display those images that are actually included.
| Format | Import | Export | Supported layers |
|---|---|---|---|
MHTML ( |
yes |
no |
None |
🧪 HTML (ZIP)
Experimental feature. To use this functionality, you need to enable it first by adding format.html-zip.enabled to the settings.properties file.
|
Generic support for HTML documents. This format imports expects a HTML index.html file at the root of a ZIP file.
Additionally, the ZIP file may include images or other media which can be referenced from the index.html file e.g.
via the <img src="…"/> element.
| Format | Import | Export | Supported layers |
|---|---|---|---|
HTML ( |
yes |
no |
None |
IMS CWB (aka VRT)
The "verticalized XML" format used by the IMS Open Corpus Workbench,
a linguistic search engine. It uses a tab-separated format with limited markup (e.g. for sentences,
documents, but not recursive structures like parse-trees). In principle, it is a generic format -
i.e. there can be arbitrary columns, pseudo-XML elements and attributes. However, support is limited
to a specific set of columns that must appear exactly in a specific order: token text,
part-of-speech tag, lemma. Also only specific pseudo-XML elements and attributes are supported:
text (including an id attribute), s.
| Format | Import | Export | Supported layers |
|---|---|---|---|
IMS CWB VRT ( |
yes |
no |
Part-of-speech tagging (built-in), |
<text id="http://www.epguides.de/nikita.htm">
<s>
Nikita	NE	Nikita
(	$(	(
La	FM	La
Femme	NN	Femme
Nikita	NE	Nikita
)	$(	)
Dieser	PDS	dies
Episodenführer	NN	Episodenführer
wurde	VAFIN	werden
von	APPR	von
September	NN	September
1998	CARD	1998
bis	APPR	bis
Mai	NN	Mai
1999	CARD	1999
von	APPR	von
Konstantin	NE	Konstantin
C.W.	NE	C.W.
Volkmann	NE	Volkmann
geschrieben	VVPP	schreiben
und	KON	und
im	APPRART	im
Mai	NN	Mai
2000	CARD	2000
von	APPR	von
Stefan	NE	Stefan
Börzel	NN	Börzel
übernommen	VVPP	übernehmen
.	$.	.
</s>
</text>
NLP Interchange Format
The NLP Interchange Format (NIF) provides a way of representing NLP information using semantic web technology, specifically RDF and OWL. A few additions of the format were defined in the apparently in-official NIF 2.1 specification.
| Format | Import | Export | Supported layers |
|---|---|---|---|
NIF ( |
yes |
yes |
Part-of-speech tagging (built-in), |
@prefix rdfs:  <http://www.w3.org/2000/01/rdf-schema#> .
@prefix nif:   <http://persistence.uni-leipzig.org/nlp2rdf/ontologies/nif-core#> .
@prefix itsrdf: <http://www.w3.org/2005/11/its/rdf#> .
@prefix xsd:   <http://www.w3.org/2001/XMLSchema#> .
@prefix rdf:   <http://www.w3.org/1999/02/22-rdf-syntax-ns#> .

<http://example.org/document0#char=0,86>
        a               nif:RFC5147String , nif:String , nif:Context ;
        nif:beginIndex  "0"^^xsd:nonNegativeInteger ;
        nif:endIndex    "86"^^xsd:nonNegativeInteger ;
        nif:isString    "Japan (Japanese: 日本 Nippon or Nihon) is a stratovolcanic archipelago of 6,852 islands."^^xsd:string ;
        nif:topic       <http://example.org/document0#annotation0> .

<http://example.org/document0#char=0,5>
        a                     nif:RFC5147String , nif:String ;
        nif:anchorOf          "Japan"^^xsd:string ;
        nif:beginIndex        "0"^^xsd:nonNegativeInteger ;
        nif:endIndex          "5"^^xsd:nonNegativeInteger ;
        nif:referenceContext  <http://example.org/document0#char=0,86> ;
        itsrdf:taClassRef     <http://example.org/Country> , <http://example.org/StratovolcanicArchipelago> ;
        itsrdf:taIdentRef     <http://example.org/Japan> .

<http://example.org/document0#char=42,68>
        a                     nif:RFC5147String , nif:String ;
        nif:anchorOf          "stratovolcanic archipelago"^^xsd:string ;
        nif:beginIndex        "42"^^xsd:nonNegativeInteger ;
        nif:endIndex          "68"^^xsd:nonNegativeInteger ;
        nif:referenceContext  <http://example.org/document0#char=0,86> ;
        itsrdf:taClassRef     <http://example.org/Archipelago> , rdfs:Class ;
        itsrdf:taIdentRef     <http://example.org/StratovolcanicArchipelago> .

<http://example.org/document0#annotation0>
        a                  nif:Annotation ;
        itsrdf:taIdentRef  <http://example.org/Geography> .
PDF Format
This allows the import of PDF files. A PDF file can be viewed and annotated in its original form. It is also possible to switch to another editor like the "brat" editor to annotate directly on the text extracted from the PDF. The annotations made on PDF files can be exported again in other formats (e.g. UIMA CAS XMI or UIMA CAS JSON), but not as PDF files.
When importing PDF files, {produce-name} will automatically detect token and sentence boundaries. It is presently not possible override these boundaries externally.
| When importing a PDF file, you may get a message that the file cannot be imported because it is empty. You may be confused because you can see contents in the PDF if you open the file in your PDF viewer of choice. It may be that your PDF contains only an image of the text, but not actual text data. For INCEpTION to be able to work with a PDF, it must be searchable - i.e. the text must not only be included as an image but as actual Unicode character information. You may try using an OCR tool to process your PDF into a searchable PDF before importing it. |
| There is a feature of PDF files called "annotations" which you may create in tools like Acrobat Reader. These means annotations like notes, comments or highlights that are embedded in the PDF file itself. You may be able to see those in the annotation editor, but do not confuse them with INCEpTION annotations. There is currently no way for INCEpTION to interact with these "PDF annotations". |
| Format | Import | Export | Supported layers |
|---|---|---|---|
PDF ( |
yes |
no |
None |
🪦 PDF Format (old)
Legacy feature. To use this functionality, you need to enable it first by adding ui.pdf-legacy.enabled=true to the settings.properties file.
|
Support for this feature will be removed in a future version. The replacement is PDF Format.
This allows the import of PDF files. A PDF file can be viewed and annotated in its original form. It is also possible to switch to another editor like the "brat" editor to annotate directly on the text extracted from the PDF. The annotations made on PDF files can be exported again in other formats (e.g. UIMA CAS XMI or UIMA CAS JSON), but not as PDF files.
This legacy PDF format support should no longer be used. It has known issues, in particular that the creation of annotations in certain parts of a document may fail, that annotations disappear from the PDF view after created (but still be visible in other editors), etc.
Unfortunately, there is no way to automatically migrate already annotated PDF files to the new PDF editor which does not suffer from these problems. When importing new PDF documents, please ensure to use the PDF and not the PDF (legacy) format.
| Format | Import | Export | Supported layers |
|---|---|---|---|
PDF ( |
yes |
no |
None |
Perseus Ancient Greek and Latin Dependency Treebank 2.1 XML
An XML format used by the Perseus Ancient Greek and Latin Dependency Treebank.
| Format | Import | Export | Supported layers |
|---|---|---|---|
Perseus Ancient Greek and Latin Dependency Treebank 2.1 XML ( |
yes |
no |
Part-of-speech tagging (built-in), |
<treebank version="2.1" xml:lang="grc" cts="urn:cts:greekLit:tlg0013.tlg002.perseus-grc1.tb">
  <body>
    <sentence id="2" document_id="urn:cts:greekLit:tlg0013.tlg002.perseus-grc1" subdoc="1-495">
      <word id="1" form="σέβας" lemma="σέβας" postag="n-s---nn-" relation="PNOM" sg="nmn dpd" gloss="object.of.wonder" head="13"/>
      <word id="2" form="τό" lemma="ὁ" postag="p-s---nn-" relation="SBJ" sg="sbs nmn dpd" gloss="this" head="13"/>
      <word id="3" form="γε" lemma="γε" postag="d--------" relation="AuxY" sg="prt" gloss="indeed" head="13"/>
      <word id="4" form="πᾶσιν" lemma="πᾶς" postag="a-p---md-" relation="ATR" sg="prp" gloss="all" head="9"/>
      <word id="5" form="ἰδέσθαι" lemma="εἶδον" postag="v--anm---" relation="ATR" sg="dpd vrb as_nmn not_ind" gloss="see" head="1"/>
      <word id="6" form="ἀθανάτοις" lemma="ἀθάνατος" postag="a-p---md-" relation="ATR" sg="prp" gloss="immortal" head="8"/>
      <word id="7" form="τε" lemma="τε" postag="c--------" relation="AuxY" sg="" gloss="and" head="9"/>
      <word id="8" form="θεοῖς" lemma="θεός" postag="n-p---md-" relation="ADV_CO" sg="dtv dpd prp int adv" gloss="god" head="9"/>
      <word id="9" form="ἠδὲ" lemma="ἠδέ" postag="c--------" relation="COORD" sg="" gloss="and" head="13"/>
      <word id="10" form="θνητοῖς" lemma="θνητός" postag="a-p---md-" relation="ATR" sg="prp" gloss="mortal" head="11"/>
      <word id="11" form="ἀνθρώποις" lemma="ἄνθρωπος" postag="n-p---md-" relation="ADV_CO" sg="dtv dpd prp int adv" gloss="man" head="9"/>
      <word id="12" form="·" lemma="·" postag="u--------" relation="AuxK" sg="" head="0"/>
      <word id="13" insertion_id="0003e" artificial="elliptic" relation="PRED" lemma="εἰμί" postag="v3spia---" form="ἐστι" sg="ind stt" gloss="be" head="0"/>
    </sentence>
</treebank>
WebLicht TCF
The TCF (Text Corpus Format) was created in the context of the CLARIN project. It is mainly used to exchange data between the different web-services that are part of the WebLicht platform.
| Format | Import | Export | Supported layers |
|---|---|---|---|
TCF ( |
yes |
no |
Part-of-speech tagging (built-in), |
<?xml version="1.0" encoding="UTF-8"?>
<?xml-model href="https://raw.githubusercontent.com/weblicht/tcf-spec/master/src/main/rnc-schema/d-spin_0_4.rnc" type="application/relax-ng-compact-syntax"?>
<D-Spin xmlns="http://www.dspin.de/data" version="0.4">
<md:MetaData xmlns:xsi="http://www.w3.org/2001/XMLSchema-instance" xmlns:cmd="http://www.clarin.eu/cmd/" xmlns:md="http://www.dspin.de/data/metadata" xsi:schemaLocation="http://www.clarin.eu/cmd/ http://catalog.clarin.eu/ds/ComponentRegistry/rest/registry/profiles/clarin.eu:cr1:p_1320657629623/xsd"></md:MetaData>
<tc:TextCorpus xmlns:tc="http://www.dspin.de/data/textcorpus" lang="de">
    <tc:text>Sie sind gegen den Euro , gegen Ausländer und Abtreibungen : Bei der Parlamentswahl in Finnland haben die " Wahren Finnen " riesige Gewinne erzielt .</tc:text>
    <tc:tokens charOffsets="true">
      <tc:token end="3" start="0" ID="t_1">Sie</tc:token>
      <tc:token end="8" start="4" ID="t_2">sind</tc:token>
      <tc:token end="14" start="9" ID="t_3">gegen</tc:token>
      <tc:token end="18" start="15" ID="t_4">den</tc:token>
      <tc:token end="23" start="19" ID="t_5">Euro</tc:token>
      <tc:token end="25" start="24" ID="t_6">,</tc:token>
      <tc:token end="31" start="26" ID="t_7">gegen</tc:token>
      <tc:token end="41" start="32" ID="t_8">Ausländer</tc:token>
      <tc:token end="45" start="42" ID="t_9">und</tc:token>
      <tc:token end="58" start="46" ID="t_10">Abtreibungen</tc:token>
      <tc:token end="60" start="59" ID="t_11">:</tc:token>
      <tc:token end="64" start="61" ID="t_12">Bei</tc:token>
      <tc:token end="68" start="65" ID="t_13">der</tc:token>
      <tc:token end="83" start="69" ID="t_14">Parlamentswahl</tc:token>
      <tc:token end="86" start="84" ID="t_15">in</tc:token>
      <tc:token end="95" start="87" ID="t_16">Finnland</tc:token>
      <tc:token end="101" start="96" ID="t_17">haben</tc:token>
      <tc:token end="105" start="102" ID="t_18">die</tc:token>
      <tc:token end="107" start="106" ID="t_19">"</tc:token>
      <tc:token end="114" start="108" ID="t_20">Wahren</tc:token>
      <tc:token end="121" start="115" ID="t_21">Finnen</tc:token>
      <tc:token end="123" start="122" ID="t_22">"</tc:token>
      <tc:token end="131" start="124" ID="t_23">riesige</tc:token>
      <tc:token end="139" start="132" ID="t_24">Gewinne</tc:token>
      <tc:token end="147" start="140" ID="t_25">erzielt</tc:token>
      <tc:token end="149" start="148" ID="t_26">.</tc:token>
    </tc:tokens>
    <tc:sentences>
      <tc:sentence tokenIDs="t_1 t_2 t_3 t_4 t_5 t_6 t_7 t_8 t_9 t_10 t_11 t_12 t_13 t_14 t_15 t_16 t_17 t_18 t_19 t_20 t_21 t_22 t_23 t_24 t_25 t_26"></tc:sentence>
    </tc:sentences>
    <tc:lemmas>
      <tc:lemma ID="l_0" tokenIDs="t_1">Sie|sie|sie</tc:lemma>
      <tc:lemma ID="l_1" tokenIDs="t_2">sein</tc:lemma>
      <tc:lemma ID="l_2" tokenIDs="t_3">gegen</tc:lemma>
      <tc:lemma ID="l_3" tokenIDs="t_4">d</tc:lemma>
      <tc:lemma ID="l_4" tokenIDs="t_5">Euro</tc:lemma>
      <tc:lemma ID="l_5" tokenIDs="t_6">,</tc:lemma>
      <tc:lemma ID="l_6" tokenIDs="t_7">gegen</tc:lemma>
      <tc:lemma ID="l_7" tokenIDs="t_8">Ausländer</tc:lemma>
      <tc:lemma ID="l_8" tokenIDs="t_9">und</tc:lemma>
      <tc:lemma ID="l_9" tokenIDs="t_10">Abtreibung</tc:lemma>
      <tc:lemma ID="l_10" tokenIDs="t_11">:</tc:lemma>
      <tc:lemma ID="l_11" tokenIDs="t_12">bei</tc:lemma>
      <tc:lemma ID="l_12" tokenIDs="t_13">d</tc:lemma>
      <tc:lemma ID="l_13" tokenIDs="t_14">Parlamentswahl</tc:lemma>
      <tc:lemma ID="l_14" tokenIDs="t_15">in</tc:lemma>
      <tc:lemma ID="l_15" tokenIDs="t_16">Finnland</tc:lemma>
      <tc:lemma ID="l_16" tokenIDs="t_17">haben</tc:lemma>
      <tc:lemma ID="l_17" tokenIDs="t_18">d</tc:lemma>
      <tc:lemma ID="l_18" tokenIDs="t_19">"</tc:lemma>
      <tc:lemma ID="l_19" tokenIDs="t_20">wahr</tc:lemma>
      <tc:lemma ID="l_20" tokenIDs="t_21">Finne</tc:lemma>
      <tc:lemma ID="l_21" tokenIDs="t_22">"</tc:lemma>
      <tc:lemma ID="l_22" tokenIDs="t_23">riesig</tc:lemma>
      <tc:lemma ID="l_23" tokenIDs="t_24">Gewinn</tc:lemma>
      <tc:lemma ID="l_24" tokenIDs="t_25">erzielen</tc:lemma>
      <tc:lemma ID="l_25" tokenIDs="t_26">.</tc:lemma>
    </tc:lemmas>
    <tc:POStags tagset="STTS">
      <tc:tag tokenIDs="t_1">PPER</tc:tag>
      <tc:tag tokenIDs="t_2">VAFIN</tc:tag>
      <tc:tag tokenIDs="t_3">APPR</tc:tag>
      <tc:tag tokenIDs="t_4">ART</tc:tag>
      <tc:tag tokenIDs="t_5">NN</tc:tag>
      <tc:tag tokenIDs="t_6">$,</tc:tag>
      <tc:tag tokenIDs="t_7">APPR</tc:tag>
      <tc:tag tokenIDs="t_8">NN</tc:tag>
      <tc:tag tokenIDs="t_9">KON</tc:tag>
      <tc:tag tokenIDs="t_10">NN</tc:tag>
      <tc:tag tokenIDs="t_11">$.</tc:tag>
      <tc:tag tokenIDs="t_12">APPR</tc:tag>
      <tc:tag tokenIDs="t_13">ART</tc:tag>
      <tc:tag tokenIDs="t_14">NN</tc:tag>
      <tc:tag tokenIDs="t_15">APPR</tc:tag>
      <tc:tag tokenIDs="t_16">NE</tc:tag>
      <tc:tag tokenIDs="t_17">VAFIN</tc:tag>
      <tc:tag tokenIDs="t_18">ART</tc:tag>
      <tc:tag tokenIDs="t_19">$(</tc:tag>
      <tc:tag tokenIDs="t_20">ADJA</tc:tag>
      <tc:tag tokenIDs="t_21">NN</tc:tag>
      <tc:tag tokenIDs="t_22">$(</tc:tag>
      <tc:tag tokenIDs="t_23">ADJA</tc:tag>
      <tc:tag tokenIDs="t_24">NN</tc:tag>
      <tc:tag tokenIDs="t_25">VVPP</tc:tag>
      <tc:tag tokenIDs="t_26">$.</tc:tag>
    </tc:POStags>
    <tc:references reltagset="TueBaDz">
      <tc:entity>
        <tc:reference ID="rc_0" type="pro.per3" rel="cataphoric" target="rc_1" tokenIDs="t_1"></tc:reference>
        <tc:reference ID="rc_1" type="nam" tokenIDs="t_18 t_19 t_20 t_21 t_22"></tc:reference>
      </tc:entity>
    </tc:references>
  </tc:TextCorpus>
</D-Spin>
🧪 TEI P5 XML
Experimental feature. To use this functionality, you need to enable it first by adding format.tei.enabled=true to the settings.properties file (see the Admin Guide).
|
The TEI P5 XML format is a widely used standard format. It is a very complex format and furthermore is often extended for specific corpora.
When importing TEI files using this format, the XML structure of the document is retained. This allows INCEpTION to render the document layout in HTML-based editors that support layout. However, TEI elements are only used for layout purposes. They do not become editable annotations in INCEpTION.
To export an annotated TEI document, use e.g. UIMA CAS JSON or UIMA CAS JSON. The resulting exported files then contain the annotations as well as the entire TEI XML structure also in the form of annotations. They can be loaded and processed in Java using the Apache UIMA Java SDK (both flavors) or in Python using DKPro Cassis (only the XML 1.0 flavor).
It is not possible to export an annotated TEI document as TEI XML including the annotations.
| Format | Import | Export | Supported layers |
|---|---|---|---|
TEI P5 ( |
yes |
no |
None |
🪦 TEI P5 XML (old)
The TEI P5 XML format is a widely used standard format. It is a very complex format and furthermore is often extended for specific corpora.
INCEpTION supports importing annotations from various common element types, but by far not all. For more details about the supported element types, see the DKPro Core TEI support documentation.
When importing TEI files using this format, the XML structure of the document is not retained. When exporting an annotated document in this format, the XML structure is generated from scratch.
| Format | Import | Export | Supported layers |
|---|---|---|---|
TEI P5 ( |
yes |
yes |
Part-of-speech tagging (built-in), |
Plain Text
Basic UTF-8 plain text. Automatic sentence and token detection will be performed.
| Format | Import | Export | Supported layers |
|---|---|---|---|
Plain text ( |
yes |
yes |
None |
Plain Text (one sentence per line)
Basic UTF-8 plain text where each line is interpreted as one sentence.
| Format | Import | Export | Supported layers |
|---|---|---|---|
Plain text ( |
yes |
no |
None |
Plain Text (pretokenized)
Basic UTF-8 plain text. Tokens are taken to be separated by spaces. Each line is interpreted as a sentence.
| Format | Import | Export | Supported layers |
|---|---|---|---|
Plain text ( |
yes |
no |
None |
🧪 UIMA Binary CAS
This format is currently disabled by default. It can be enabled using the property
format.uima-binary-cas.enabled in the settings.properties file.
|
A binary format used by the Apache UIMA Java SDK.
| Format | Import | Export | Supported layers |
|---|---|---|---|
UIMA Binary CAS ( |
yes |
yes |
All built-in and custom layers |
UIMA Inline XML
Tries its best to export the annotations into an inline XML representation. Overlapping annotations are not supported in this format and are silently discarded during export.
| Format | Import | Export | Supported layers |
|---|---|---|---|
UIMA Inline XML ( |
no |
yes |
Any non-overlapping span layers |
UIMA CAS JSON
This is a new and still experimental UIMA CAS JSON format which is able to capture not only the annotations but also the type system. As such, it is self-contained like the 🧪 UIMA Binary CAS format while at the same time being more readable than the UIMA CAS XMI format.
Support for this format is available in the following implementations:
-
Apache UIMA Java SDK JSON CAS Support (Java). This is the implementation we use here.
-
DKPro Cassis (Python)
The current draft specification of the format is available here.
| Format | Import | Export | Supported layers |
|---|---|---|---|
UIMA CAS JSON 0.4.0 ( |
yes |
yes |
All built-in and custom layers |
🪦 UIMA CAS JSON
Legacy feature. To use this functionality, you need to enable it first by adding format.json-cas-legacy.enabled=true to the settings.properties file.
|
Support for this feature will be removed in a future version. The replacement is UIMA CAS JSON.
This is an old and deprecated UIMA CAS JSON format which can be exported but not imported. It should no longer be used. Instead, one should turn to UIMA CAS JSON.
The format does support custom layers.
For more details on this format, please refer to the UIMA Reference Guide.
By default, the format writes all values to the JSON output, even if the values are the default values
in JSON (e.g. 0 for numbers or false for booleans). You can configure this behavior by setting
format.json-cas-legacy.omit-default-values to true or false (default) respectively.
| Format | Import | Export | Supported layers |
|---|---|---|---|
UIMA CAS JSON (legacy) ( |
no |
yes |
All built-in and custom layers |
🧪 UIMA CAS RDF
Experimental feature. To use this functionality, you need to enable it first by adding format.rdf-cas.enabled=true to the settings.properties file (see the Admin Guide).
|
This format provides a representation of the annotated document in RDF using the design model of the UIMA CAS. This format is not an official Apache UIMA file format but rather a facility provided by INCEpTION for the benefit of users who want to interact with thier annotated data using Semantic Web technology.
| Format | Import | Export | Supported layers |
|---|---|---|---|
UIMA CAS RDF ( |
yes |
yes |
All built-in and custom layers |
<doc:fi-orig.conll#6>
        a                    cas:Sofa , rdfcas:View ;
        cas:Sofa-mimeType    "text" ;
        cas:Sofa-sofaID      "_InitialView" ;
        cas:Sofa-sofaNum     "1"^^xsd:int ;
        cas:Sofa-sofaString  "... here be document text ..." .

<doc:fi-orig.conll#1182>
        a                         rdfcas:FeatureStructure , segmentation:Token ;
        rdfcas:indexedIn          <doc:fi-orig.conll#6> ;
        segmentation:Token-lemma  <doc:fi-orig.conll#1362> ;
        segmentation:Token-morph  <doc:fi-orig.conll#213> ;
        segmentation:Token-pos    <doc:fi-orig.conll#1780> ;
        cas:AnnotationBase-sofa   <doc:fi-orig.conll#6> ;
        tcas:Annotation-begin     "173"^^xsd:int ;
        tcas:Annotation-end       "183"^^xsd:int .

<doc:fi-orig.conll#470>
        a                        syntax-dependency:Dependency , rdfcas:FeatureStructure ;
        rdfcas:indexedIn         <doc:fi-orig.conll#6> ;
        syntax-dependency:Dependency-DependencyType
                "obj" ;
        syntax-dependency:Dependency-Dependent
                <doc:fi-orig.conll#1182> ;
        syntax-dependency:Dependency-Governor
                <doc:fi-orig.conll#123> ;
        syntax-dependency:Dependency-flavor
                "basic" ;
        cas:AnnotationBase-sofa  <doc:fi-orig.conll#6> ;
        tcas:Annotation-begin    "173"^^xsd:int ;
        tcas:Annotation-end      "183"^^xsd:int .
UIMA CAS XMI
The probably most commonly used formats supported by the Apache UIMA framework is UIMA CAS XMI. It is able to capture all the information contained in the CAS. This is the de-facto standard for exchanging data in the UIMA world. Most UIMA-related tools support it.
The XMI format does not include type system information. When exporting files in the XMI format, a ZIP file is created for each document which contains the XMI file itself as well as an XML file containing the type system. In order to import such files again, the ZIPs would need to be extracted and only the XMI files contained within should be imported.
XML 1.0 and XML 1.1 do not allow all Unicode characters. In particular, certain control characters are not permitted.
INCEpTION by default will replace illegal characters with a space character on export. This behavior can be
disabled using the boolean properties format.uima-xmi.sanitize-illegal-characters and
format.uima-xmi-xml1_1.sanitize-illegal-characters. When disabled, an error is produced when trying to export texts
containing illegal characters.
There are two flavors of CAS XMI, namely XML 1.0 and XML 1.1. XML 1.0 is more widely supported in the world of XML parsers, so you may expect better interoperability with other programming languages (e.g. Python) with the XML 1.0 flavor. XML 1.1 has a support for a wider range of characters, despite dating back to 2006, it is still not supported by all XML parsers.
The format can be processed in Java using the Apache UIMA Java SDK (both flavors) or in Python using DKPro Cassis (only the XML 1.0 flavor).
| Format | Import | Export | Supported layers |
|---|---|---|---|
UIMA CAS XMI (XML 1.0) ( |
yes |
yes |
All built-in and custom layers |
UIMA CAS XMI (XML 1.1) ( |
yes |
yes |
All built-in and custom layers |
🪦 WebAnno TSV 1
TAllows importing files produced using WebAnno version 1 and earlier.
| Format | Import | Export | Supported layers |
|---|---|---|---|
WebAnno TSV 1 ( |
yes |
no |
Any layer/feature supported by WebAnno 1 |
🪦 WebAnno TSV 2
Allows importing files produced using WebAnno version 2.
| Format | Import | Export | Supported layers |
|---|---|---|---|
WebAnno TSV 2 ( |
yes |
no |
Any layer/feature supported by WebAnno 2 |
🪦 WebAnno TSV 3.x
| Legacy feature. This format does not support all of the layer and feature configurations of INCEpTION. For example, multi-value features are not supported. Using this format when exporting documents or projects with layer configurations not supported by this file format may generate errors or may simply omit unsupported information from the export. Please consider switching your post-processing workflows to the UIMA CAS JSON format. |
The file format used by WebAnno version 3.
| Format | Import | Export | Supported layers |
|---|---|---|---|
WebAnno TSV 3 ( |
yes |
yes |
Any layer/feature supported by WebAnno 3. For export, see warning above. |
🧪 XML (generic)
Experimental feature. To use this functionality, you need to enable it first by adding format.generic-xml.enabled to the settings.properties file.
|
Generic support for XML documents. This format imports the entire XML document structure and is able to retain it until export. None of the XML elements are converted to editable annotations though. In combination with a HTML-based editor, this format allows annotating in styled XML documents. Note that some XML elements and attributes are filtered out during rendering. These include e.g. elements which in a HTML file would be JavaScript-related elements and attributes as well as links which could easily interfere with the functionality of the annotation editor.
Note that when exporting a document in this format, you only recover the originally imported XML document - no annotations will be included. If you want to export the annotated data, you should use e.g. UIMA CAS JSON.
| Format | Import | Export | Supported layers |
|---|---|---|---|
XML (generic) ( |
yes |
yes |
None |
🧪 Custom XML formats
Experimental feature. To use this functionality, you need to enable it first by adding format.custom-xml.enabled to the settings.properties file.
|
Custom XML document support allows defining own XML annotation formats that can be displayed as formatted documents in HTML-based editors (e.g. the Apache Annotator editor or the RecogitoJS editor).
The custom XML document support has the goal to provide means of suitably formatting and rendering XML documents in the browser. It does not aim at being able to extract potential annotations from the XML document and making them accessible and editable as annotations within INCEpTION. It only offers support for importing custom XML documents, but not for exporting them. To export the annotated document, another format such as UIMA CAS JSON has to be used.
Custom XML formats are based on the 🧪 XML (generic) format support. They are defined by creating a sub-folder xml-formats in the application home direcotry. Within that folder, another folder is created for each custom XML format. The name of the folder is used as part of the format identifier. Within this per-format folder, a file called plugin.json need to be created with the following content:
plugin.json for custom XML format{
"name": "TTML format (external)",
"stylesheets": [
"styles.css"
],
"blockElements": [
"div", "p"
],
"splitSentencesInBlockElements": true
}The plugin.json file should define one or more CSS stylesheets that define how elements of the custom XML format should be rendered on screen.
styles.css for custom XML format@namespace tt url('http://www.w3.org/ns/ttml');
tt|p {
display: block;
border-color: gray;
border-style: solid;
border-width: 1px;
border-radius: 0.5em;
margin-top: 0.25em;
margin-bottom: 0.25em;
}
tt|p::before {
border-radius: 0.5em 0em 0em 0.5em;
display: inline-block;
padding-left: 0.5em;
padding-right: 0.5em;
margin-right: 0.5em;
background-color: lightgray;
min-width: 10em;
content: attr(agent) '\a0';
}Additionally, a policy.yaml file should be present in the format folder. It defines how the elements of the XML should be handled when rendering the documents for display in the browser.
policy.yaml for custom XML formatname: TTML Content Policies
version: 1.0
policies:
- elements: [
"{http://www.w3.org/ns/ttml}tt",
"{http://www.w3.org/ns/ttml}body",
"{http://www.w3.org/ns/ttml}div",
"{http://www.w3.org/ns/ttml}p" ]
action: "PASS"
- attributes: ["{http://www.w3.org/ns/ttml#metadata}agent"]
action: "PASS_NO_NS"An example XML file that could be imported with such a format would look like this:
dialog.xml file<tt xmlns="http://www.w3.org/ns/ttml" xmlns:ttm="http://www.w3.org/ns/ttml#metadata" xml:lang="en">
<head>
<metadata>
<ttm:agent xml:id="speaker1">Speaker 1</ttm:agent>
<ttm:agent xml:id="speaker2">Speaker 2</ttm:agent>
</metadata>
</head>
<body>
<div>
<p begin="00:00:01.000" end="00:00:05.000" ttm:agent="speaker1">
Hello, this is the first speaker.
</p>
<p begin="00:00:06.000" end="00:00:10.000" ttm:agent="speaker2">
And this is the second speaker.
</p>
</div>
</body>
</tt>
When exporting a project that contains documents using a custom XML format and importing
it into another INCEpTION instance in which the format has not been declared, the custom
XML documents will not be usable. You will also have to copy the custom format declaration over
to the new instance. If you use custom XML formats, make sure you keep backups of them
along with the projects that use them. Also try to use names for your formats that are unlikely to
clash with others. E.g. tei may not be the best name for a custom TEI format support -
project-theater-2000-tei may be a better name.¸
|
| Format | Import | Export | Supported layers |
|---|---|---|---|
XML (custom) ( |
yes |
no |
None |
Appendix D: WebAnno TSV 3.3 File format
In this section, we will discuss the WebAnno TSV (Tab Separated Value) file format version 3.3. The format is similar to the CoNNL file formats with specialized additions to the header and column representations. The file format inhabits a header and a body section. The header section present information about the different types of annotation layers and features used in the file. While importing the WebAnno TSV file, the specified headers should be first created in to the running WebAnno project. Otherwise, the importing of the file will not be possible.
The body section of the TSV file presents the document and all the associated annotations including sentence and token annotations.
Encoding and Offsets
TSV files are always encoded in UTF-8. However, the offsets used in the TSV file are based on UTF-16. This is important when using TSV files with texts containing e.g. Emojis or some modern non-latin Asian, Middle-eastern and African scripts.
WebAnno is implemented in Java. The Java platform internally uses a UTF-16 representation for text. For this reason, the offsets used in the TSV format currently represent offsets of the 16bit units in UTF-16 strings. This is important if your text contains Unicode characters that cannot be represented in 16bit and which thus require two 16bit units. For example a token represented by the Unicode character 😊 (U+1F60A) requires two 16bit units. Hence, the offset count increased by 2 for this character. So Unicode characters starting at U+10000 increase the offset count by 2.
#Text=I like it 😊 .
1-1	0-1	I	_
1-2	2-6	like	_
1-3	7-9	it	_
1-4	10-12	😊	*
1-5 13-14 . _| Since the character offsets are based on UTF-16 and the TSV file itself is encoded in UTF-8, first the text contained in the file needs to be transcoded from UTF-8 into UTF-16 before the offsets can be applied. The offsets cannot be used for random access to characters directly in the TSV file. |
File Header
WebAnno TSV 3.3 file header consists of two main parts:
-
the format indicator
-
the column declarations
After the header, there must be two empty lines before the body part containing the annotations may start.
#FORMAT=WebAnno TSV 3.3Layers are marked by the # character followed by T_SP= for span types (including slot features), T_CH= for chain layers, and T_RL= for relation layers. Every layer is written in new line, followed by the features in the layer.
If all layer type exists, first, all the span layers will be written, then the chain layer, and finally the relation layers.
Features are separated by the | character and only the short name of the feature is provided.
#T_SP=webanno.custom.Pred|bestSense|lemmaMapped|senseId|senseMappedHere the layer name is webanno.custom.Pred and the features are named bestSense, lemmaMapped, senseId, senseMapped.
Slot features start with a prefix ROLE_ followed by the name of the role and the link. The role feature name and the link feature name are separated by the _ character.
The target of the slot feature always follows the role/link name
#T_SP=webanno.custom.SemPred|ROLE_webanno.custom.SemPred:RoleSet_webanno.custom.SemPredRoleSetLink|uima.tcas.Annotation|aFrameHere the name of the role is webanno.custom.SemPred:RoleSet and the name of the role link is webanno.custom.SemPredRoleSetLink and the target type is uima.tcas.Annotation.
Chain layers will have always two features, referenceType and referenceRelation.
#T_CH=de.tudarmstadt.ukp.dkpro.core.api.coref.type.CoreferenceLink|referenceType|referenceRelationRelation layers will come at last in the list and the very last entry in the features will be the type of the base (governor or dependent) annotations with a prefix BT_.
#T_RL=de.tudarmstadt.ukp.dkpro.core.api.syntax.type.dependency.Dependency|DependencyType|BT_de.tudarmstadt.ukp.dkpro.core.api.lexmorph.type.pos.POSHere, the relation type de.tudarmstadt.ukp.dkpro.core.api.syntax.type.dependency.Dependency has a feature DependencyType and the relation is between a base type of de.tudarmstadt.ukp.dkpro.core.api.lexmorph.type.pos.POS.
File Body / Annotations
In this section we discuss the different representations of texts and annotation in WebAnno TSV3format
Reserved Characters
Reserved characters have a special meaning in the TSV format and must be are escaped with the backslash (\) character if they appear in text or feature values. Reserved characters are the following:
\,[,],|,_,->,;,\t,\n,*
The way that TSV is presently defined/implemented, it kind of considers → as a single
"character"… and it is also escaped as a single unit, i.e. → becomes ->. It is something to
be addressed in a future iteration of the format.
|
Sentence Representation
Sentence annotations are presented following the text marker #Text=, before the token
annotations. All text given here is inside the sentence boundaries.
#Text=Bell , based in Los Angeles , makes and distributes electronic , computer and building products .The text of an imported document is reconstructed from the sentence annotations. Additionally, the offset information of the sentence tokens are taken into account to determine whether padding needs to be added between sentences. The TSV format can presently not record text that occurs in between two sentences.
If a sentence spans multiple lines, the text is split at the line feed characters (ASCII 12) and
multiple #Text= lines are generated. Note that carriage return characters (ASCII 13) are kept
as escaped characters (\r).
#Text=Bell , based in Los Angeles , makes and distributes
#Text=electronic , computer and building products .
Optionally, an alphanumeric sentence identifier can be added in the sentence header section.
#Sentence.id=s1
#Text=Bell , based in Los Angeles , makes and distributes electronic , computer and building products .
Token and Sub-token Annotations
Tokens represent a span of text within a sentence. Tokens cannot overlap, although then can be directly adjacent (i.e. without any whitespace between them). The start offset of the first character of the first token corresponds to the start of offset of the sentence.
Token annotation starts with a sentence-token number marker followed by the begin-end offsets
and the token itself, separated by a TAB characters.
1-2 4-8 HaagHere 1 indicates the sentence number, 2 indicates the token number (here, the second token
in the first sentence) and 4 is the begin offset of the token and 8 is the end offset of the
token while Haag is the token.
The begin offset of the first token in a sentence must coincide with the offset at which the first
#Text line starts in the original document text.
#Text=Hello
1-1	0-6	Hello
#Text= Hello
1-1	1-7	Hello
Sub-token representations are affixed with a . and a number starts from 1 to N.
1-3	9-14	plays
1-3.1	9-13	play
1-3.2	13-14	s
Here, the sub-token play is indicated by sentence-token number 1-3.1 and the sub-token s is
indicated by 1-3.2.
While tokens may not overlap, sub-tokens may overlap.
1-3	9-14	plays
1-3.1	9-12	pla
1-3.2	11-14	ays
Span Annotations
For every features of a span Annotation, annotation value will be presented in the same row as the token/sub-token annotation, separated by a TAB character. If there is no annotation for the given span layer, a _ character is placed in the column. If the feature has no/null annotation or if the span layer do not have a feature at all, a * character represents the annotation.
#T_SP=de.tudarmstadt.ukp.dkpro.core.api.lexmorph.type.pos.POS|PosValue
#T_SP=webanno.custom.Sentiment|Category|Opinion1-9 36-43 unhappy JJ abstract negativeHere, the first annotation at column 4, JJ is avalue for a feature PosValue of the layer de.tudarmstadt.ukp.dkpro.core.api.lexmorph.type.pos.POS. For the two features of the layer webanno.custom.Sentiment (Category and Opinion), the values abstract and negative are
presented at column 5 and 6 resp.
When serializing a span annotation starts or ends in a space between tokens, then the
annotation is truncated to start at the next token after the space or to end at the last token
before the space. For example, if you consider the text [one two] and there is an some span annotation
on [one ] (note the trailing space), the extent of this span annotation will be serialized as only
covering [one]. It is not possible in this format to have annotations starting or ending in
the space between tokens because the inter-token space is not rendered as a row and therefore is not
addressable in the format.
|
Disambiguation IDs
Within a single line, an annotation can be uniquely identified by its type and stacking index. However, across lines, annotation cannot be uniquely identified easily. Also, if the exact type of the referenced annotation is not known, an annotation cannot be uniquely identified. For this reason, disambiguation IDs are introduced in potentially problematic cases:
-
stacked annotations - if multiple annotations of the same type appear in the same line
-
multi-unit annotations - if an annotations spans multiple tokens or sub-tokens
-
un-typed slots - if a slot feature has the type
uima.tcas.Annotationand may thus refer to any kind of target annotation.
The disambiguation ID is attached as a suffix [N] to the annotation value. Stacked annotations are separated by | character.
#T_SP=de.tudarmstadt.ukp.dkpro.core.api.lexmorph.type.pos.POS|PosValue
#T_SP=de.tudarmstadt.ukp.dkpro.core.api.ner.type.NamedEntity|value1-1 0-3 Ms. NNP PER[1]|PERpart[2]
1-2 4-8 Haag NNP PER[1]Here, PER[1] indicates that token 1-1 and 1-2 have the same annotation (multi-token annotations) while PERpart[2] is the second (stacked) annotation on token 1-1 separated by | character.
| On chain layers, the number in brackets is not a disambiguation ID but rather a chain ID! |
Slot features
Slot features and the target annotations are separated by TAB character (first the feature column then the target column follows). In the target column, the sentence-token id is recorded where the feature is drawn.
Unlike other span layer features (which are separated by | character), multiple annotations for a slot feature are separated by the ; character.
#T_SP=webanno.custom.Frame|FE|ROLE_webanno.custom.Frame:Roles_webanno.custom.FrameRolesLink|webanno.custom.Lu
#T_SP=webanno.custom.Lu|luvalue2-1 27-30 Bob _ _ _ bob
2-2 31-40 auctioned transaction seller;goods;buyer 2-1;2-3[4];2-6
2-3 41-44 the _ _ _ clock[4]
2-4 45-50 clock _ _ _ clock[4]
2-5 52-54 to _ _ _ _
2-6 55-59 John _ _ _ john
2-7 59-60 . _ _ _ _Here, for example, at token 2-2, we have three slot annotations for feature Roles that are seller, goods, and buyer. The targets are on token 2-1, 2-3[4], and 2-6 respectively which are on annotations of the layer webanno.custom.Lu which are bob, clock and john.
Chain Annotations
In the Chain annotation, two columns (TAB separated) are used to represent the referenceType and the referenceRelation. A chain ID is attached to the referenceType to distinguish to which of the chains the annotation belongs. The referenceRelation of the chain is represented by the relation value followed by → and followed by the CH-LINK number where CH is the chain number and LINK is the link number (the order the chain).
#T_CH=de.tudarmstadt.ukp.dkpro.core.api.coref.type.CoreferenceLink|referenceType|referenceRelation1-1 0-2 He pr[1] coref->1-1
1-2 3-7 shot _ _
1-3 8-15 himself pr[1] coref->1-2
1-4 16-20 with _ _
1-5 21-24 his pr[1] *->1-3
1-6 25-33 revolver _ _
1-7 33-34 . _ _In this example, token 1-3 is marked as pr[1] which indicates that the referenceType is pr and it is part of the chain with the ID 1. The relation label is coref and with the CH-LINK number 1-2 which means that it belongs to chain 1 and this is the second link in the chain.
Relation Annotations
Relation annotations comes to the last columns of the TSV file format. Just like the span annotations, every feature of the relation layers are represented in a separate TAB. Besides, one extra column (after all feature values) is used to write the token id from which token/sub-token this arc of a relation annotation is drawn.
#T_SP=de.tudarmstadt.ukp.dkpro.core.api.lexmorph.type.pos.POS|PosValue
#T_RL=de.tudarmstadt.ukp.dkpro.core.api.syntax.type.dependency.Dependency|DependencyType|BT_de.tudarmstadt.ukp.dkpro.core.api.lexmorph.type.pos.POS1-1 0-3 Ms. NNP SUBJ 1-3
1-2 4-8 Haag NNP SBJ 1-3
1-3 9-14 plays VBD P|ROOT 1-5|1-3
1-4 15-22 Elianti NNP OBJ 1-3
1-5 23-24 . . _ _In this example (say token 1-1), column 4 (NNP) is a value for the feature PosValue of the de.tudarmstadt.ukp.dkpro.core.api.lexmorph.type.pos.POS layer. Column 5 (SUBJ) records the value for the feature DependencyType of the de.tudarmstadt.ukp.dkpro.core.api.syntax.type.dependency.Dependency relation layer, where as column 6 (1-3) shows from which governor (VBD) the dependency arc is drawn.
For relations, a single disambiguation ID is not sufficient. If a relation is ambiguous, then
the source ID of the relation is followed by the source and target disambiguation ID separated
by an underscore (_). If only one of the relation endpoints is ambiguous, then the other one
appears with the ID 0. E.g. in the example below, the annotation on token 1-5 is ambiguous,
but the annotation on token 1-1 is not.
#FORMAT=WebAnno TSV 3.3
#T_SP=de.tudarmstadt.ukp.dkpro.core.api.ner.type.NamedEntity|value
#T_RL=webanno.custom.Relation|value|BT_de.tudarmstadt.ukp.dkpro.core.api.ner.type.NamedEntity


#Text=This is a test .
1-1	0-4	This	*	_	_
1-2	5-7	is	_	_	_
1-3	8-9	a	_	_	_
1-4	10-14	test	_	_	_
1-5 15-16 . *[1]|*[2] * 1-1[0_1]Appendix E: Troubleshooting
We are collecting error reports to improve the tool. For this, the error must be reproducible: If you find a way how to produce the error, please open an issue and describe it.
Session timeout
If the tool is kept open in the browser, but not used for a long period of time, you will have to log in again. For this, press the reload button of your browser.
Application is hanging
If the tool does not react for more than 1 minute, please also reload and re-login.
We are collecting error reports to improve the tool. For this, the error must be reproducible: If you find a way how to produce the error, please open an issue and describe it.
Forgot admin password
If you locked yourself out of INCEpTION, you can reset/recreated the default admin account. In order to do so, first stop INCEpTION if it is still running. Then specify the system property restoreDefaultAdminAccount when you start INCEpTION (note that the value of the property does not matter and can be omitted!). For example, if you are using the standalone version of INCEpTION, you can start it as
$ java -DrestoreDefaultAdminAccount -jar inception-app-webapp-34.2-standalone.jar
Mind that if you are using a non-default inception.home, you also have to specify this system property.
|
When INCEpTION has started, try opening it in your browser. The login page will show, but it will not allow you to log in. Instead a message will be shown stating that the default admin account has been reset or recreated. In order to resume normal operations, stop INCEpTION again and restart it without the restoreDefaultAdminAccount system property.


